Ingredients
Method
Step 1: Prepare Your Chicken Base
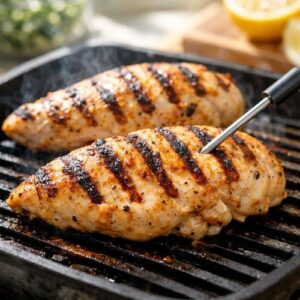
- If you're starting from scratch, grill two boneless, skinless chicken breasts (about 7 ounces each) until the internal temperature reaches 165°F on a meat thermometer—typically 6-7 minutes per side over medium-high heat. Always verify doneness with a thermometer rather than guessing; undercooked chicken poses food safety risks. If you have leftover grilled chicken from dinner the night before, this recipe becomes even faster. Chop your cooked chicken into small, uniform pieces (roughly ¼-inch pieces work best for wrap filling). Smaller pieces distribute more evenly through the tortilla and prevent large chunks from puncturing the wrapper during cooking. Once chopped, place your chicken in a medium bowl and add garlic powder, smoked paprika, black pepper, and salt. Toss thoroughly until every piece is lightly coated with seasonings. If you have a young child helping at this stage, let them shake the spices and toss with a large spoon—they're doing real cooking work here.
Step 2: Gather Your Filling Components
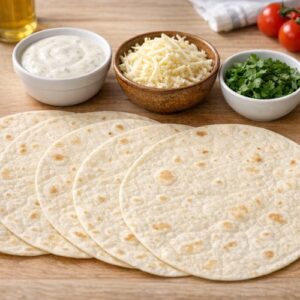
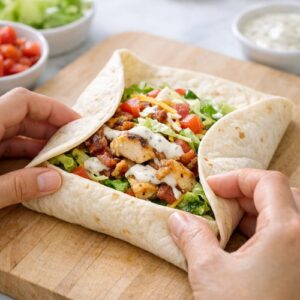
- Set up a small assembly station with your ranch dressing, shredded mozzarella, and cilantro (if using) in separate small bowls. Lay all four tortillas flat on a clean cutting board or large plate. If your tortillas seem dry or brittle, lightly steam them wrapped in a damp paper towel in the microwave for 15 seconds—this makes them pliable and prevents cracking during wrapping. This is the perfect moment for kids ages 6-9 to participate. They can measure out portions using the small spoon or measuring spoon, placing exactly 1 tablespoon of ranch dressing on each tortilla, followed by 2 tablespoons of shredded cheese and about ½ cup of seasoned chicken. Let them position the ingredients in roughly the center-lower third of each tortilla, leaving space at the sides for wrapping.
Step 3: The Wrap Assembly
- Take the first tortilla with its ingredients and fold the left and right edges inward about 2 inches, then firmly fold the bottom edge up and over the filling. Roll tightly away from you, using your hands to press and secure as you go. The key is tension—wrapping loosely means your filling will tumble out during cooking. This is actually much easier than it sounds, and watching someone successfully execute that first wrap is genuinely satisfying. Repeat with remaining tortillas. Place each wrapped tortilla seam-side down as you finish—this seals the package and prevents the ranch from leaking out during cooking. If you're cooking with kids, this assembly step is genuinely fun. There's something satisfying about rolling and tucking that appeals to young hands.
Step 4: Heat Your Cooking Surface
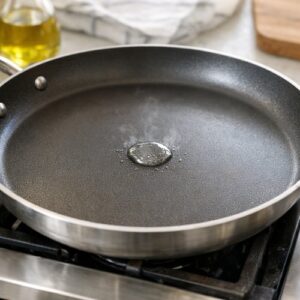
- Place a large skillet or griddle over medium heat. Let it warm for 2-3 minutes until a drop of water sizzles on contact but doesn't immediately evaporate (that's medium heat, not too hot). Add the extra-virgin olive oil and tilt the pan to coat evenly. If you're cooking with children, they should step back during this heating phase. Heat-related burns are entirely preventable when you maintain clear boundaries about who operates the stove. The right temperature matters here. Too-low heat results in pale, soggy wraps. Too-high heat burns the exterior before warming the interior. Medium heat gives you that perfect golden-brown crispy shell while keeping the filling warm without overheating.
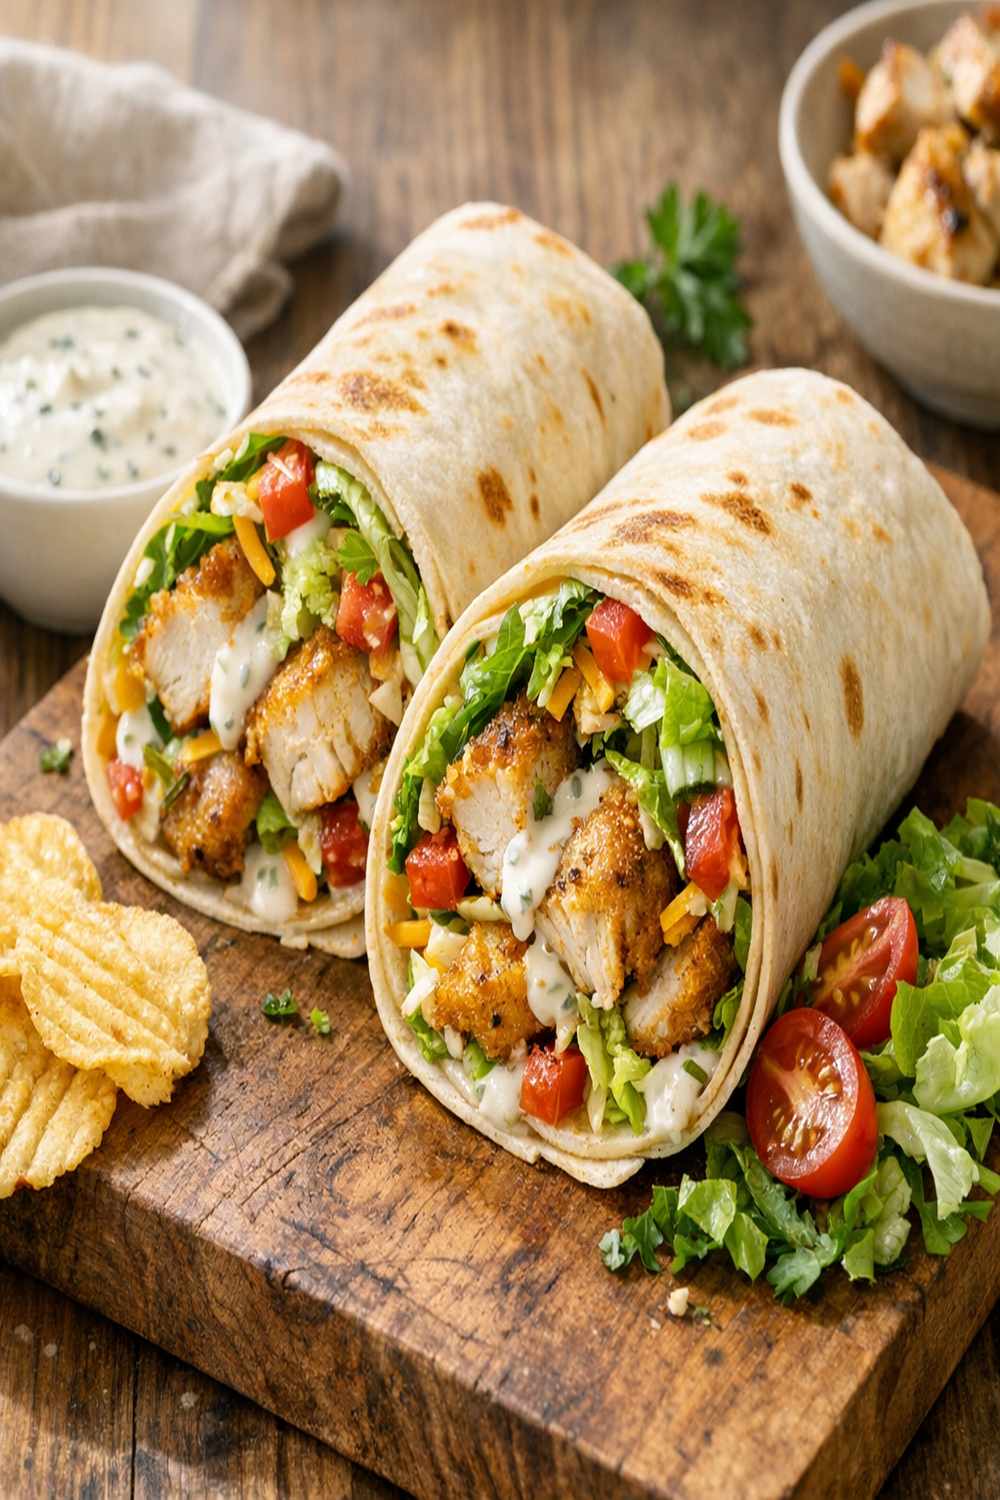
Step 5: Cook Your Wraps to Golden Perfection
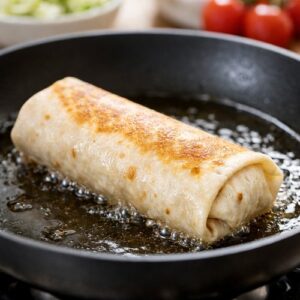
- Carefully place your first wrapped tortilla seam-side down into the hot oil. You should hear a gentle sizzle—not an aggressive roar. Let it cook undisturbed for 1-2 minutes until the bottom is golden brown and slightly crispy. Using tongs or a wide spatula, flip the wrap and cook the other side for another 1-2 minutes until matching color appears there too. The exterior should look like it's been lightly toasted with crispy edges. Don't crowd your pan. Cook 2 wraps at a time if using a standard 10-inch skillet. Overcrowding drops the temperature and causes steaming instead of searing. Remove each finished wrap to a clean cutting board. Repeat with remaining wraps. This entire cooking phase takes about 8 minutes total. The smell at this stage is absolutely irresistible—your family will start gathering in the kitchen without you calling them.
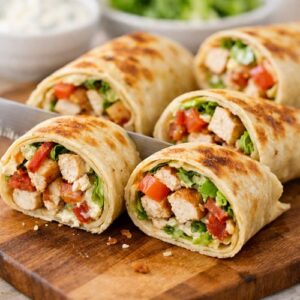
Step 6: Slice and Serve Immediately
- Once all wraps are cooked, let them cool for just 1-2 minutes (enough time to handle safely but not so long they start cooling), then use a sharp serrated knife to slice each wrap diagonally in half. The diagonal cut not only looks appealing but also creates a larger surface area that showcases the beautiful filling inside—presentation matters when you're trying to win over skeptical eaters. Serve immediately while the exterior is still crispy and the interior is warm.