Ingredients
Equipment
Method
Step 1: Gather Your Ingredients and Equipment
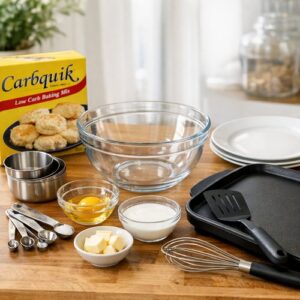
- Before you do anything else, assemble everything on your counter. This is called "mise en place" in professional cooking, and it transforms the experience from chaotic to smooth. Grab your large bowl, whisk or fork, measuring cups and spoons, small bowl for butter, griddle or skillet, spatula, and plate for finished pancakes. Measure out your water, Carbquik, and have your egg and butter nearby. This takes two minutes and eliminates mid-recipe scrambling when your hands are wet or floury.
Step 2: Combine Your Dry Ingredients
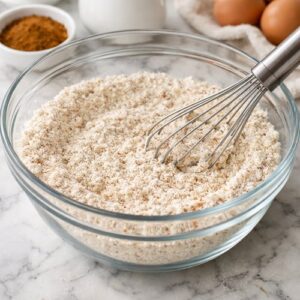
- Pour 2 cups of Carbquik into your large mixing bowl. Carbquik is a pre-mixed baking blend, so you don't need to sift it, but do give it a gentle shake in the measuring cup to settle it. If you're adding the optional ½ teaspoon cinnamon, add it now to the bowl with the Carbquik. Use your whisk or fork to stir them together for about 15-20 seconds until the cinnamon is evenly distributed. This prevents clumpy spots of cinnamon in your finished pancakes. You'll notice Carbquik has a slightly different texture than wheat flour—it's a bit more granular. This is completely normal and expected. Don't worry that it looks different; it's meant to.
Step 3: Melt and Cool Your Butter
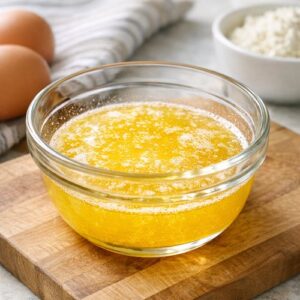
- While your dry ingredients wait, melt ¼ cup unsalted butter. You can do this in a small saucepan over medium-low heat (watching constantly to prevent browning) or in a microwave (30-second bursts, checking after each). Once completely melted, let it cool for about 2-3 minutes. Why? Hot butter will scramble your egg when you mix everything together. You want it warm, not hot. A simple test: dip your clean finger in the butter. It should feel pleasantly warm, not hot.
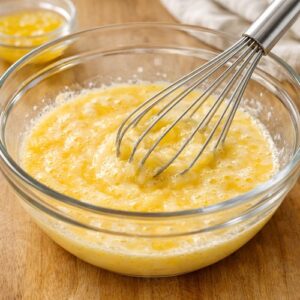
Step 4: Create Your Wet Ingredients Mixture
- In a separate small bowl or even a measuring cup, combine 1 cup room-temperature water, 1 large egg, the cooled melted butter, and ½ teaspoon vanilla extract. Before mixing, crack your egg and make sure there's no shell fragment (it happens). Using a fork or small whisk, beat these ingredients together for about 30 seconds until the egg is fully incorporated and the mixture looks relatively uniform. You don't need to whip it into a foam; you just need everything mixed smoothly together.
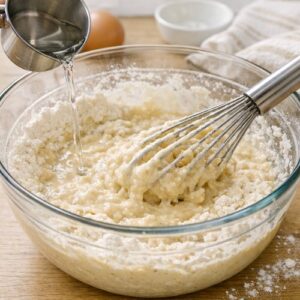
Step 5: Combine Wet and Dry Ingredients
- This is the critical moment. Pour your wet ingredients into your bowl of dry ingredients. Using your whisk or fork, gently stir until just combined. Here's what matters: you're looking for a batter that's completely mixed without any visible dry Carbquik bits, but you're not overmixing. Overmixing develops gluten in the Carbquik and makes pancakes tough. The batter should be slightly thicker than traditional pancake batter—almost like thick cake batter. If it seems too thick (barely pourable), add 1-2 tablespoons more water. If it's too thin (pours like cream), let it rest for 2 minutes as Carbquik continues absorbing liquid. Your batter might have tiny lumps, and that's completely fine. A few small lumps actually result in better texture than overworked batter.
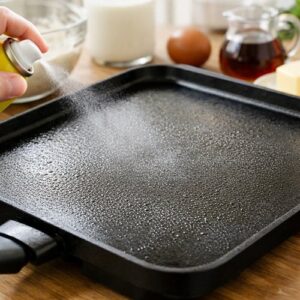
Step 6: Heat Your Griddle or Skillet
- Set your griddle or skillet on the stovetop and turn the heat to medium. Let it sit there for 2-3 minutes while you let your batter rest. This resting period (just 2-3 minutes) allows the Carbquik to fully absorb the liquid and creates fluffier pancakes. You'll know your cooking surface is ready when a single drop of water sizzles gently when dropped on it, then evaporates within 2-3 seconds. This indicates medium heat—hot enough to cook pancakes evenly without burning them. Now lightly grease your griddle. If you have cooking spray, a light coat works perfectly. If you prefer butter, use a paper towel to rub a small amount of butter across the surface. You don't need much—just enough that the surface isn't completely dry.
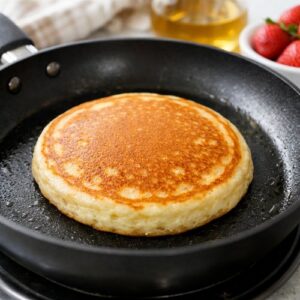
Step 7: Cook Your First Pancake (The Learning One)
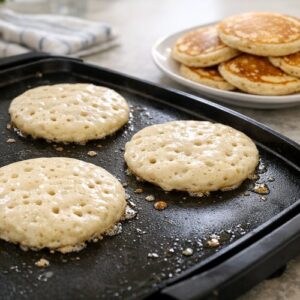
- Pour approximately ¼ cup batter onto your hot griddle, forming a circle about 4 inches wide. Don't make them huge; medium-sized pancakes cook more evenly. You should hear a gentle sizzle when the batter hits the surface. Cook without moving it for 2 minutes. During this time, you'll notice the edges start to look drier and less shiny, and you might see tiny bubbles forming on the surface. After 2 minutes, peek underneath using your spatula. The bottom should be golden brown, not pale. If it's still pale, give it another 30 seconds. If it's golden, flip it gently and cook the second side for 1.5 to 2 minutes until it's also golden brown. This first pancake teaches you the exact timing for your particular griddle and heat source. Write down the timing if you want to remember it next time.
Step 8: Cook Your Remaining Pancakes
- Once you know your timing from pancake one, you're in rhythm. Continue pouring ¼ cup portions of batter onto your prepared griddle, leaving space between them so they don't touch. You can usually fit 2-3 pancakes simultaneously depending on your griddle size. Cook each batch for 2 minutes on the first side, then 1.5-2 minutes on the second side until all are golden brown. If your griddle has cooler spots, rotate pancakes to hotter areas halfway through cooking the first side. As finished pancakes come off the griddle, transfer them to a plate. If you're serving everyone at once, you can keep finished pancakes warm in a 200°F oven while you finish cooking the rest. This batter makes approximately 8-10 medium pancakes, depending on your portion size.
Step 9: Serve and Enjoy
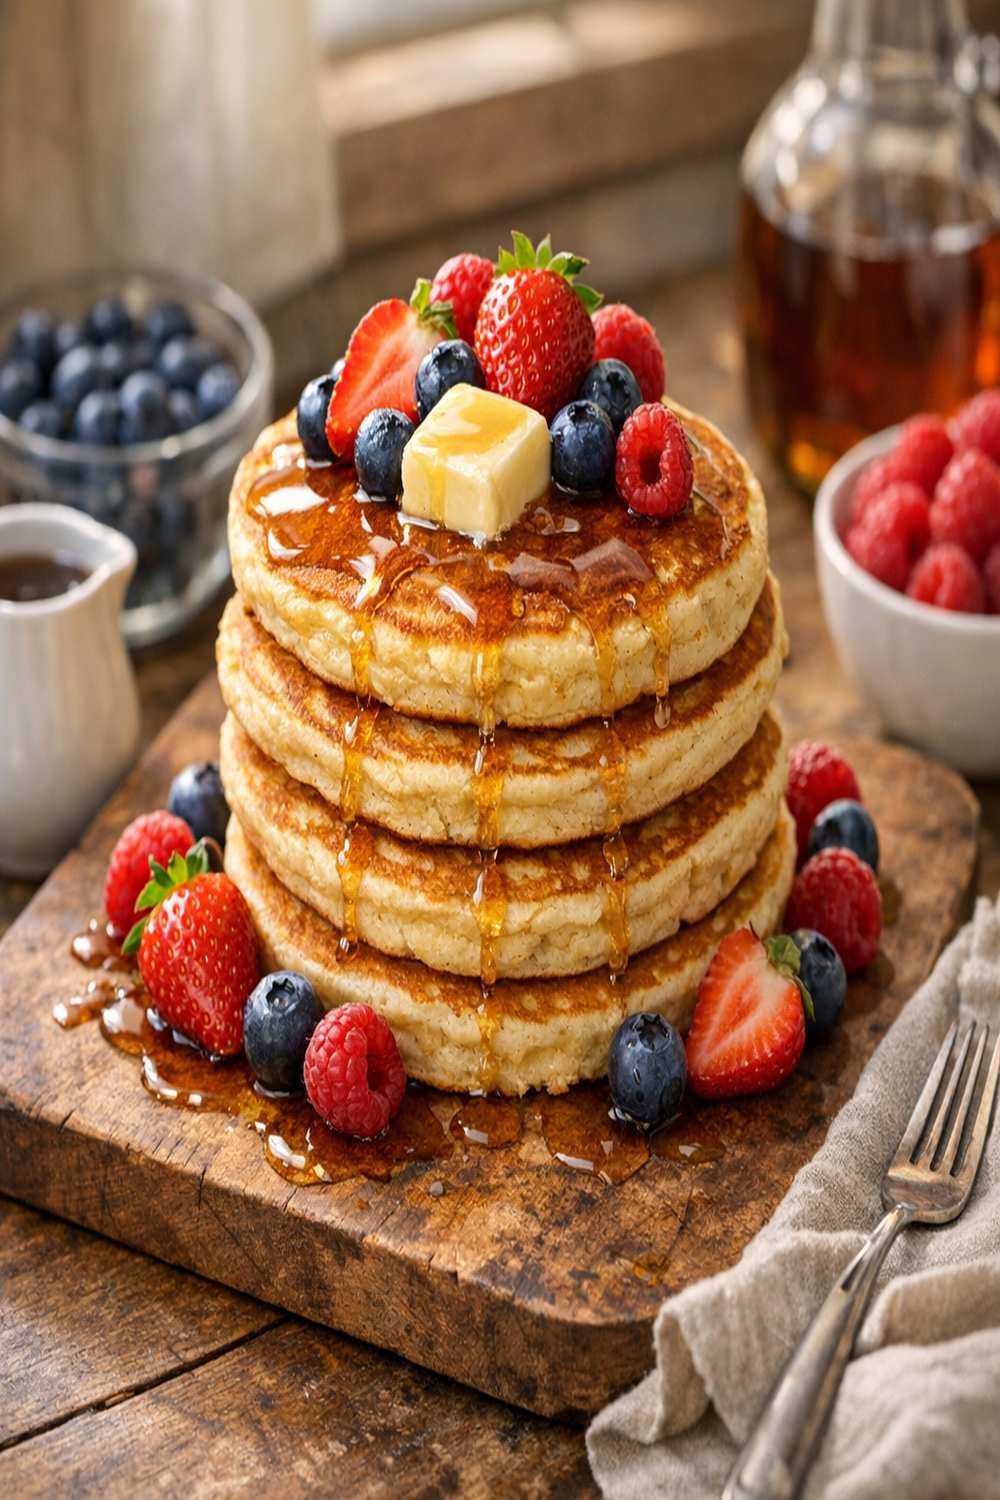
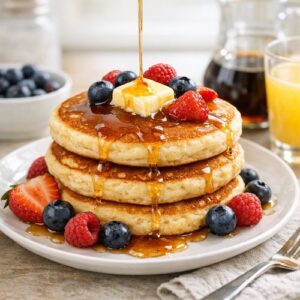
- Transfer your warm pancakes to serving plates and top with your favorite additions. Butter melts beautifully into warm pancakes, and sugar-free syrup works wonderfully if you want traditional topping. Fresh berries add brightness, whipped cream adds richness, and a sprinkle of cinnamon-sugar (if you're using small amounts) adds elegant finishing touches.
Notes
- 1 large egg (room temperature for better incorporation; use the largest size)
- 1 cup water (filtered or tap water works equally well; room temperature is ideal)
- ½ teaspoon vanilla extract (pure vanilla, not imitation, which can leave an aftertaste in low-carb recipes)
- ¼ cup unsalted butter (melted and cooled slightly; European-style butter creates slightly richer flavor)
- ½ teaspoon ground cinnamon (optional but recommended; adds warmth and subtle sweetness without sugar)
- 2 cups Carbquik baking mix (found in the low-carb or specialty baking aisle; look for the distinctive blue-and-white packaging)