Carbquik Pancake Recipe
This post contains affiliate links. As an Amazon Associate I earn from qualifying purchases.
If you’ve always wanted to make a satisfying, low-carb pancake breakfast but felt intimidated by specialty ingredients, this is your starting point. I’m Rachel Garland, and I’ve helped countless families in Fairfield discover that healthy breakfasts don’t require complicated techniques or hours in the kitchen. These fluffy, golden pancakes come together in under 30 minutes, taste indulgent, and fit perfectly into a lower-carbohydrate lifestyle. Whether you’re managing blood sugar, exploring carb-conscious eating, or simply want a filling breakfast that keeps you satisfied until lunch, this recipe delivers real food with real flavor—no sacrifice required.
I remember the first time I served these pancakes at a family breakfast. My sister arrived expecting the usual sugar-loaded stack, and when I explained these were low-carb, she was skeptical. One bite changed her mind completely. That moment reminded me why I became a dietitian: food connects people, and when that food nourishes your body while tasting genuinely delicious, magic happens at the table. You’ll experience that same satisfaction when you flip your first perfect pancake. Plus, if you’re planning a Christmas Morning with Mimosas, this recipe scales beautifully for crowds.
How to Make Carbquik Pancake Recipe for the First Time (You’ve Got This)
When I first experimented with low-carb baking ingredients, I was nervous. Would they taste like cardboard? Would the texture be rubbery? Would my family actually eat them? I started with this exact recipe on a quiet Tuesday morning, measuring each ingredient carefully, second-guessing myself at every step. The moment those pancakes hit the griddle and I smelled that familiar pancake aroma, my doubt disappeared. They cooked beautifully. They flipped without falling apart. Most importantly, nobody at my family dinner even realized these weren’t traditional pancakes until I told them—and by then, they were already reaching for seconds.
That experience taught me something crucial: the recipe works because the science is sound. Carbquik is specifically engineered to mimic the behavior of wheat flour in baking, which means your instincts about cooking time, temperature, and texture will serve you well. You’re not fighting against specialty ingredient quirks—you’re using a thoughtfully formulated product that respects the fundamentals of good pancake cooking.
What to Expect Before You Start
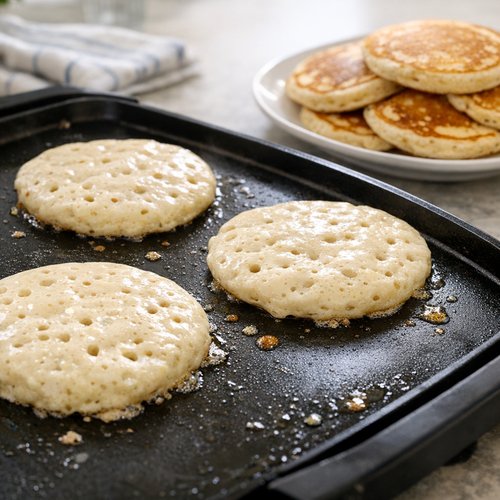
Let’s be realistic about what this experience will be like so you feel completely prepared. This recipe takes approximately 25-30 minutes total, including prep, cooking, and plating. The difficulty level is genuinely beginner-friendly—if you can whisk and watch a griddle, you can make these. You’ll need basic kitchen equipment (nothing fancy), and what success looks like is golden-brown pancakes that are fluffy inside with slightly crispy edges, ready to serve with your favorite toppings within half an hour of starting.
- Batter consistency matters more than exact measurements – Your first batch teaches you what the batter should look like. It’ll be slightly thicker than traditional pancake batter because Carbquik absorbs liquid differently. This is normal and exactly what you want.
- Heat control is your secret weapon, not something to fear – Medium heat on your griddle or skillet might feel vague, but you’ll know it’s right when a drop of water sizzles gently (not explosively). Beginners worry about burning them; in reality, most first attempts cook too slowly. Trust the medium heat setting.
- The first pancake is always the learning pancake – Professional chefs call this “the tester.” Your first pancake helps you calibrate temperature and cooking time. It probably won’t be perfect, and that’s completely expected. Pancake two and onward will be beautiful.
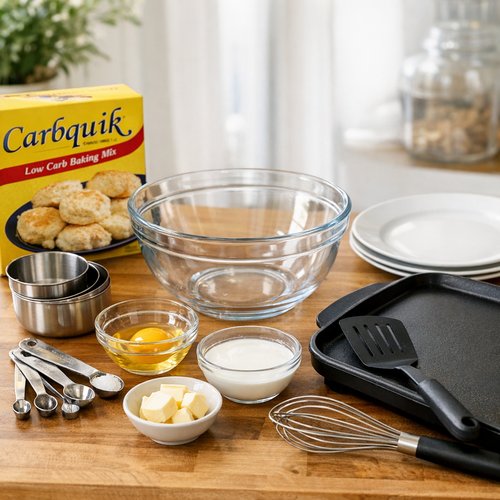
Equipment You’ll Need (And What You Can Skip)
Here’s what I’ve learned through years of cooking in a busy household: fancy equipment doesn’t make better pancakes—attention and technique do. You genuinely need only a few items, and most homes already have them. I’ll be honest about what’s essential and what’s just nice-to-have.
- Large mixing bowl – Any bowl deep enough to whisk ingredients without splashing. A stainless steel bowl works beautifully, but glass or ceramic work equally well. Budget alternative: any bowl you have on hand, even a small pot.
- Whisk or fork – A whisk creates smoother batter in about 30 seconds; a fork takes maybe a minute longer. Both work perfectly. The goal is combining ingredients thoroughly, not aerating.
- Griddle or skillet – Cast iron is beloved by pancake enthusiasts because it holds heat evenly, but a regular non-stick skillet or griddle works wonderfully. A 12-inch surface gives you room to cook 2-3 pancakes simultaneously.
- Spatula – Any heat-safe spatula works. Metal won’t hurt your non-stick surface if you’re gentle. Silicone spatulas are quieter and slightly more forgiving.
- Measuring cups and spoons – Standard kitchen measuring tools ensure consistent results. Optional but helpful: a kitchen scale for weighing Carbquik if you prefer precision.
- Small bowl for melted butter – Optional. You can melt butter in a small saucepan or microwave, then measure it. This step just keeps cleanup minimal.
The Ingredients – A Beginner’s Shopping Guide
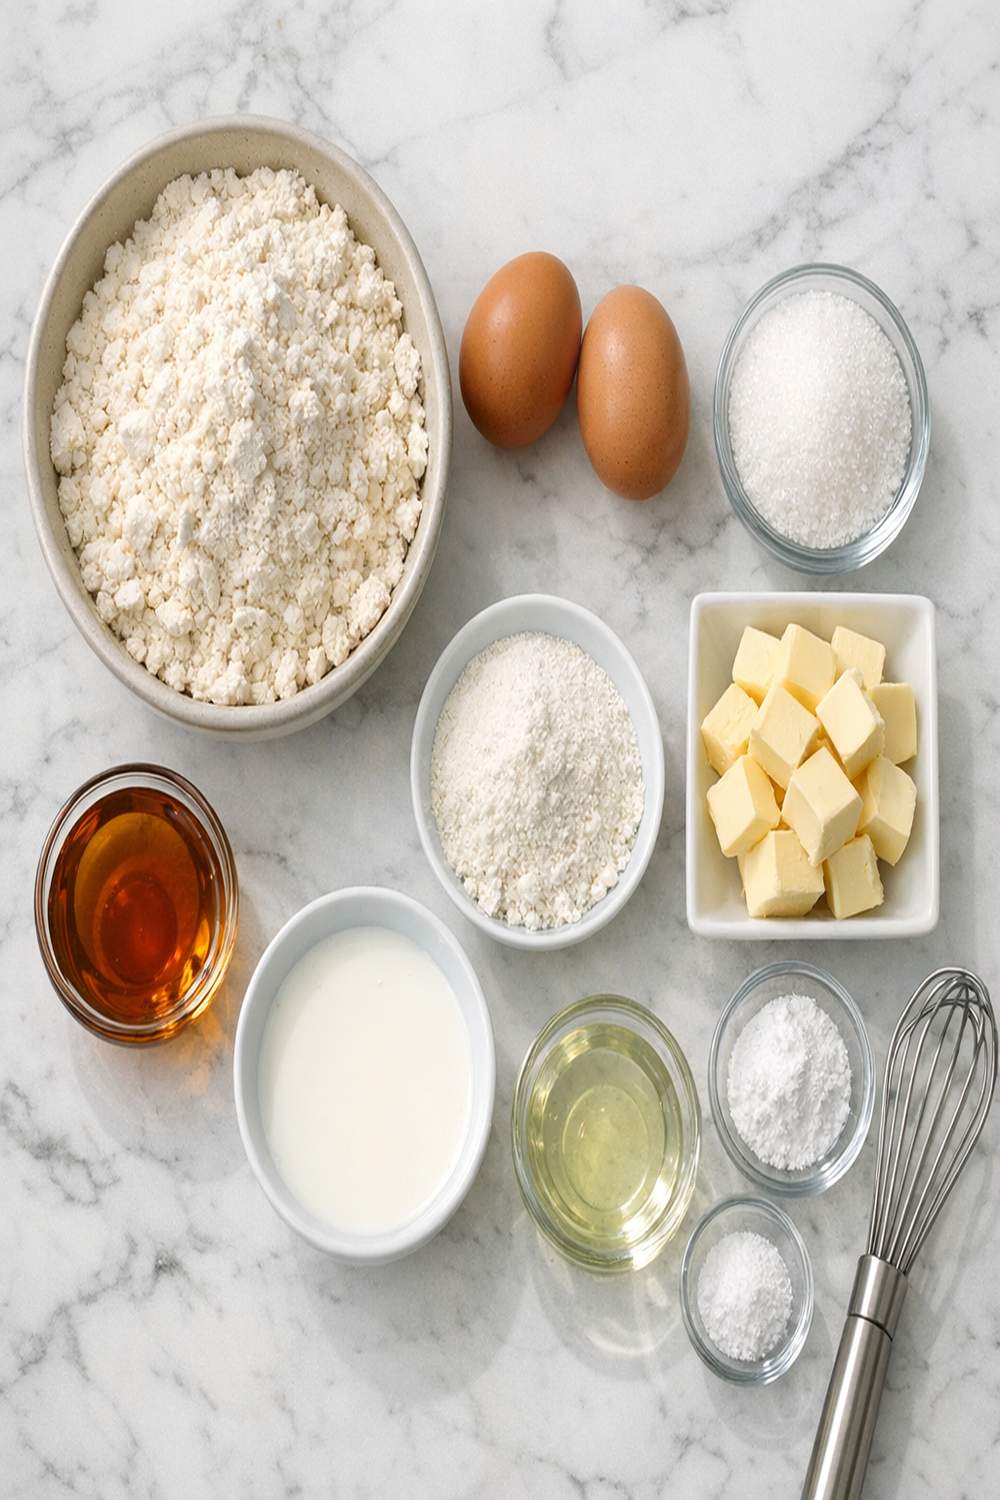
Finding these ingredients is straightforward, though Carbquik might be new to your pantry. I’ll guide you through each one, explain what to look for when purchasing, and suggest practical substitutions. All ingredients are available at major grocery stores in the baking or specialty diet section, though online ordering works beautifully if you prefer shopping from home.
- 1 large egg (room temperature for better incorporation; use the largest size)
- 1 cup water (filtered or tap water works equally well; room temperature is ideal)
- ½ teaspoon vanilla extract (pure vanilla, not imitation, which can leave an aftertaste in low-carb recipes)
- ¼ cup unsalted butter (melted and cooled slightly; European-style butter creates slightly richer flavor)
- ½ teaspoon ground cinnamon (optional but recommended; adds warmth and subtle sweetness without sugar)
- 2 cups Carbquik baking mix (found in the low-carb or specialty baking aisle; look for the distinctive blue-and-white packaging)
Where to Find Carbquik: Major grocery chains like Safeway, Whole Foods, and grocery delivery services all stock Carbquik in their specialty or low-carb sections. If your local store doesn’t carry it, online retailers ship it within 2-3 days. One box (usually 8-10 oz) makes multiple batches of pancakes, so one purchase lasts several weeks.
A Critical Ingredient Warning: Carbquik contains wheat gluten and may contain tree nuts depending on the facility. If you have celiac disease or gluten sensitivity, verify the package states “gluten-free” certification. Similarly, if tree nut allergies affect your household, check the allergen statement on the package before purchasing. For nut-free recipes, stick with the pure Carbquik product without added ingredients.
Butter Selection Tip: Unsalted butter gives you control over final saltiness. If you only have salted butter available, reduce any salt you might add to the batter. European-style butter (with 86% fat instead of 80%) creates a richer flavor, but standard butter is absolutely fine.
Step-by-Step: Your First Carbquik Pancake Recipe
I’m going to walk you through this with the assumption that you’ve never made low-carb pancakes before. I’ll explain every single action because even obvious steps feel less obvious when you’re learning something new. Trust yourself. You’re going to do this beautifully.
Step 1: Gather Your Ingredients and Equipment
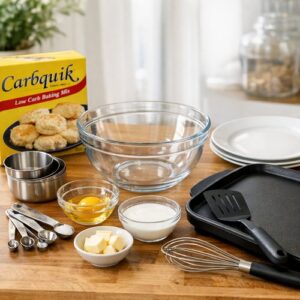
Before you do anything else, assemble everything on your counter. This is called “mise en place” in professional cooking, and it transforms the experience from chaotic to smooth. Grab your large bowl, whisk or fork, measuring cups and spoons, small bowl for butter, griddle or skillet, spatula, and plate for finished pancakes. Measure out your water, Carbquik, and have your egg and butter nearby. This takes two minutes and eliminates mid-recipe scrambling when your hands are wet or floury.
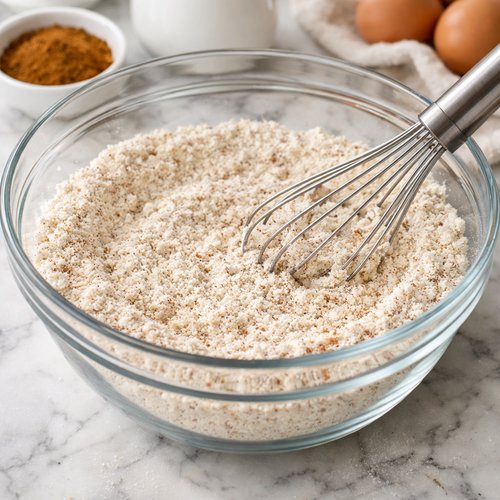
Step 2: Combine Your Dry Ingredients
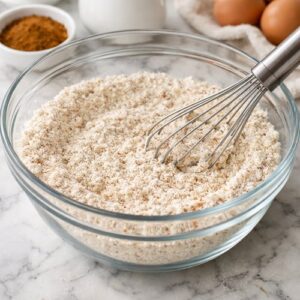
Pour 2 cups of Carbquik into your large mixing bowl. Carbquik is a pre-mixed baking blend, so you don’t need to sift it, but do give it a gentle shake in the measuring cup to settle it. If you’re adding the optional ½ teaspoon cinnamon, add it now to the bowl with the Carbquik. Use your whisk or fork to stir them together for about 15-20 seconds until the cinnamon is evenly distributed. This prevents clumpy spots of cinnamon in your finished pancakes.
You’ll notice Carbquik has a slightly different texture than wheat flour—it’s a bit more granular. This is completely normal and expected. Don’t worry that it looks different; it’s meant to.
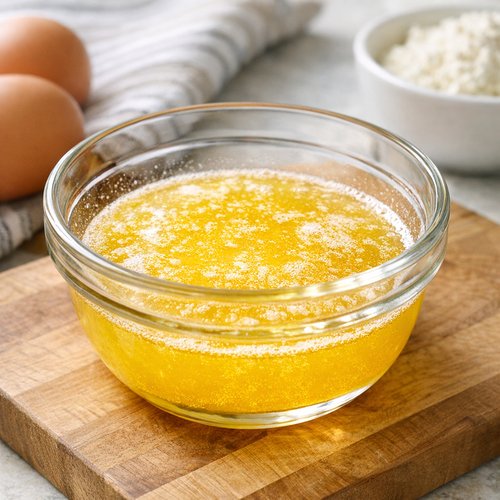
Step 3: Melt and Cool Your Butter
While your dry ingredients wait, melt ¼ cup unsalted butter. You can do this in a small saucepan over medium-low heat (watching constantly to prevent browning) or in a microwave (30-second bursts, checking after each). Once completely melted, let it cool for about 2-3 minutes. Why? Hot butter will scramble your egg when you mix everything together. You want it warm, not hot. A simple test: dip your clean finger in the butter. It should feel pleasantly warm, not hot.
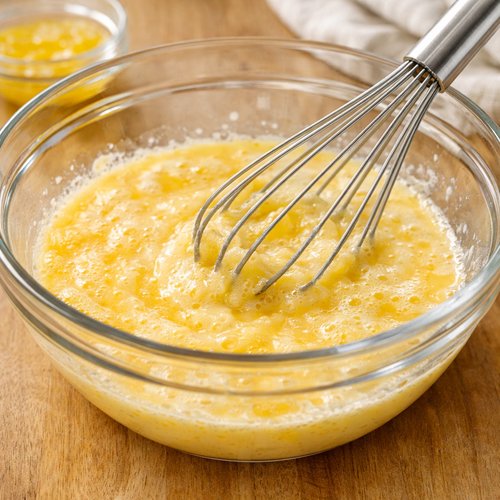
Step 4: Create Your Wet Ingredients Mixture
In a separate small bowl or even a measuring cup, combine 1 cup room-temperature water, 1 large egg, the cooled melted butter, and ½ teaspoon vanilla extract. Before mixing, crack your egg and make sure there’s no shell fragment (it happens). Using a fork or small whisk, beat these ingredients together for about 30 seconds until the egg is fully incorporated and the mixture looks relatively uniform. You don’t need to whip it into a foam; you just need everything mixed smoothly together.
Step 5: Combine Wet and Dry Ingredients
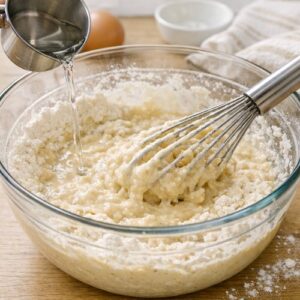
This is the critical moment. Pour your wet ingredients into your bowl of dry ingredients. Using your whisk or fork, gently stir until just combined. Here’s what matters: you’re looking for a batter that’s completely mixed without any visible dry Carbquik bits, but you’re not overmixing. Overmixing develops gluten in the Carbquik and makes pancakes tough. The batter should be slightly thicker than traditional pancake batter—almost like thick cake batter. If it seems too thick (barely pourable), add 1-2 tablespoons more water. If it’s too thin (pours like cream), let it rest for 2 minutes as Carbquik continues absorbing liquid.
Your batter might have tiny lumps, and that’s completely fine. A few small lumps actually result in better texture than overworked batter.

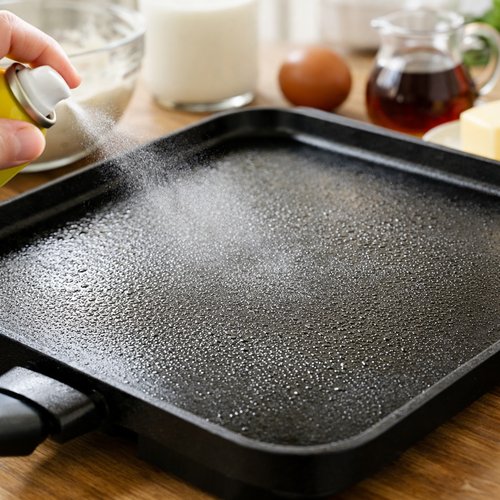
Step 6: Heat Your Griddle or Skillet
Set your griddle or skillet on the stovetop and turn the heat to medium. Let it sit there for 2-3 minutes while you let your batter rest. This resting period (just 2-3 minutes) allows the Carbquik to fully absorb the liquid and creates fluffier pancakes. You’ll know your cooking surface is ready when a single drop of water sizzles gently when dropped on it, then evaporates within 2-3 seconds. This indicates medium heat—hot enough to cook pancakes evenly without burning them.
Now lightly grease your griddle. If you have cooking spray, a light coat works perfectly. If you prefer butter, use a paper towel to rub a small amount of butter across the surface. You don’t need much—just enough that the surface isn’t completely dry.
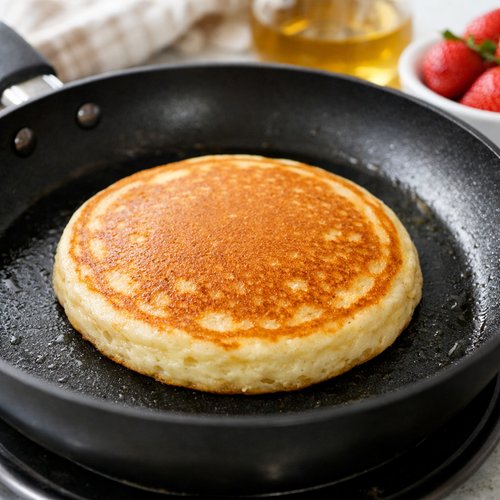
Step 7: Cook Your First Pancake (The Learning One)
Pour approximately ¼ cup batter onto your hot griddle, forming a circle about 4 inches wide. Don’t make them huge; medium-sized pancakes cook more evenly. You should hear a gentle sizzle when the batter hits the surface. Cook without moving it for 2 minutes. During this time, you’ll notice the edges start to look drier and less shiny, and you might see tiny bubbles forming on the surface.
After 2 minutes, peek underneath using your spatula. The bottom should be golden brown, not pale. If it’s still pale, give it another 30 seconds. If it’s golden, flip it gently and cook the second side for 1.5 to 2 minutes until it’s also golden brown. This first pancake teaches you the exact timing for your particular griddle and heat source. Write down the timing if you want to remember it next time.
Step 8: Cook Your Remaining Pancakes
Once you know your timing from pancake one, you’re in rhythm. Continue pouring ¼ cup portions of batter onto your prepared griddle, leaving space between them so they don’t touch. You can usually fit 2-3 pancakes simultaneously depending on your griddle size. Cook each batch for 2 minutes on the first side, then 1.5-2 minutes on the second side until all are golden brown. If your griddle has cooler spots, rotate pancakes to hotter areas halfway through cooking the first side.
As finished pancakes come off the griddle, transfer them to a plate. If you’re serving everyone at once, you can keep finished pancakes warm in a 200°F oven while you finish cooking the rest. This batter makes approximately 8-10 medium pancakes, depending on your portion size.
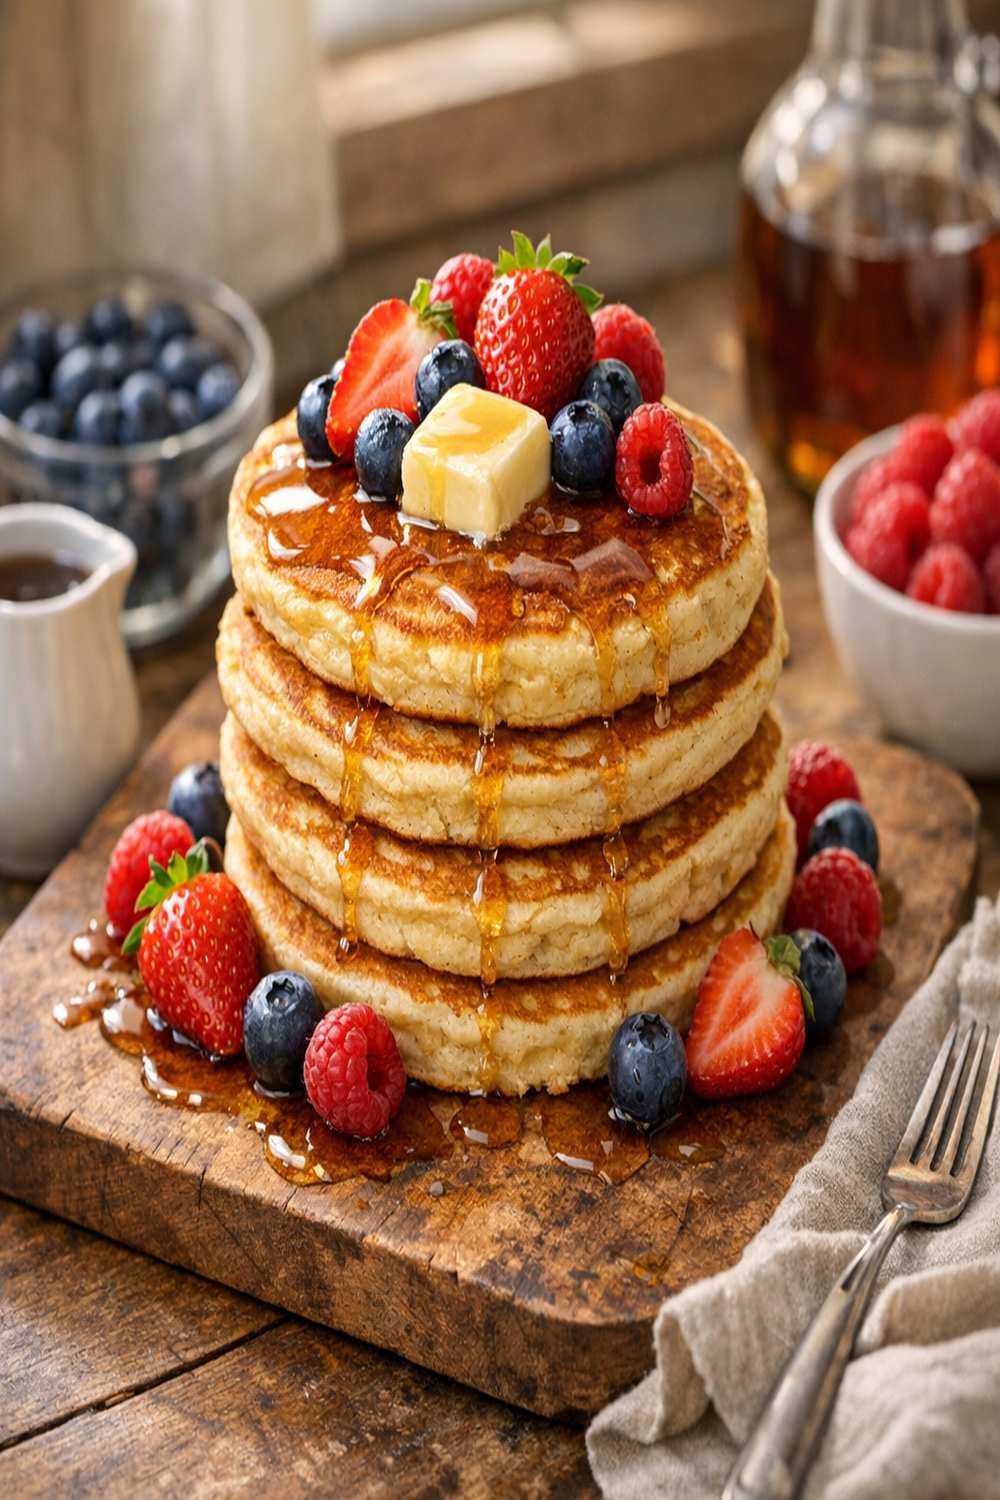
Step 9: Serve and Enjoy
Transfer your warm pancakes to serving plates and top with your favorite additions. Butter melts beautifully into warm pancakes, and sugar-free syrup works wonderfully if you want traditional topping. Fresh berries add brightness, whipped cream adds richness, and a sprinkle of cinnamon-sugar (if you’re using small amounts) adds elegant finishing touches.

How to Tell If You Did It Right
Success has specific markers, and you’ll recognize them immediately once you know what to look for. Here’s what perfect Carbquik pancakes look and feel like at each stage.
- The batter is properly mixed when it’s pourable but substantial – It should flow easily from a measuring cup but not be thin like cream. If you tilt your bowl, batter should move slowly, not quickly. The mixture should be completely lump-free with no visible dry Carbquik spots.
- The cooked pancake is done when it’s golden brown on both sides with a slightly springy texture – When you press the cooked surface gently with your spatula, it should spring back slightly rather than stay compressed. The edges should have a subtle crispy texture, while the interior is tender and fluffy.
- You’ll smell a wonderful, familiar pancake aroma as they cook – This is the scent of low-carb baking done right. The vanilla and cinnamon should be noticeable but subtle, not overpowering.
- The pancake flips cleanly when the edges look set and drier – If you struggle to flip and it tears, your heat might be too low or you didn’t cook side one long enough. If it burns immediately after flipping, your heat is too high.
What Went Wrong? Beginner Fixes
- Pancakes are gummy or dense inside – This usually means either your heat was too low (they didn’t cook through properly) or you overmixed the batter. Solution: increase heat to medium-high for the next batch, and mix only until ingredients are just combined. Overmixing is the most common cause, so err on the side of lumpy batter.
- Pancakes are dry or rubbery – Carbquik is thirsty for liquid, and if your batter was too thick, finished pancakes become dense. Solution: add 2-3 tablespoons more water next time. The batter should pour easily. Also, avoid cooking too long on either side; 2 minutes first side and 1.5-2 minutes second side is the sweet spot.
- Pancakes burn on the outside but are raw inside – Your heat is too high. Solution: reduce to medium and give them slightly more time. The bottom should be golden, not dark brown, when you flip.
- Pancakes spread too thin or look more like crepes – Your batter is too thin. Solution: let it rest 3-5 minutes (Carbquik keeps absorbing liquid) or add 2 more tablespoons of Carbquik to the next batch.
- First pancake sticks to the griddle despite greasing – You might need more grease, or the griddle temperature might be too low. Solution: use slightly more cooking spray or butter on the griddle, and increase heat to medium-high. The first pancake often sticks while the griddle finishes heating evenly.
Your Next Steps After Mastering This
Once you’ve made these pancakes twice, you’ve learned something valuable: you can work confidently with specialty baking ingredients. That skill opens doors. You now understand how to adjust batter consistency based on how it looks and feels, how to manage griddle temperature through visual cues, and how to troubleshoot baking when something doesn’t work perfectly on the first try. These aren’t low-carb skills—they’re fundamental cooking skills that apply everywhere.
Next, try variations on this recipe. Add unsweetened cocoa powder to the dry ingredients for chocolate pancakes, or use almond extract instead of vanilla for a subtle flavor shift. Make the batter ahead of time the night before and refrigerate it (it keeps for 24 hours beautifully). Once you’re comfortable with the basic recipe, explore making a batch for the freezer—these pancakes freeze wonderfully for up to 2 weeks and reheat in 90 seconds in a toaster oven.
Can I Store Carbquik Pancake Recipe?
In the refrigerator: Cooked pancakes last 3-4 days in an airtight container. Reheat them in a 350°F oven for 8-10 minutes until warmed through, or use a toaster oven.
In the freezer: Pancakes freeze beautifully for up to 2 months. Cool them completely first, then layer them between parchment paper in a freezer container. Reheat from frozen in a toaster oven at 350°F for 12-15 minutes, or use your toaster on a medium setting.
Batter storage: Uncooked batter keeps in the refrigerator for 24 hours maximum. Store it in a covered container. The batter will thicken as it sits (Carbquik continues absorbing liquid), so add 1-2 tablespoons of water before cooking if you’ve stored it overnight.
Carbquik storage: Keep your box of Carbquik in a cool, dry pantry. Once opened, transfer it to an airtight container to prevent it from absorbing ambient humidity. Properly stored, it lasts 6-12 months after opening.
Expert’s Nutritional Tip
Here’s something I notice working with families: people often worry that low-carb baking ingredients are “artificial” or “unhealthy.” Let me be transparent about Carbquik specifically. It’s primarily wheat protein and fiber—ingredients that appear in traditional baking, just in different proportions. The actual carbohydrate content matters for blood sugar management, which is why Carbquik substitutes for regular flour at a 1:1 ratio while reducing carbs by approximately 90%. One serving (typically one pancake) contains roughly 2 grams net carbohydrate versus 15-20 grams in traditional pancakes. That’s a meaningful difference for anyone managing glucose levels. From a nutritional standpoint, you’re getting protein-rich pancakes (about 6-8 grams of protein per serving) with substantial fiber support for digestive health. This isn’t “diet food”—it’s real food engineered for better macronutrient balance.
Nutrition Information
Based on USDA database standards for one serving (one medium pancake with toppings excluded), this recipe provides approximately:
- Calories: 90-110 per pancake
- Protein: 7-8 grams
- Total Fat: 5-6 grams
- Total Carbohydrates: 3-4 grams
- Net Carbohydrates: 2 grams (important for low-carb tracking)
- Dietary Fiber: 1-2 grams
These values vary slightly based on your exact measuring technique and specific Carbquik product used, but they’re consistent across batches. The protein-to-carb ratio is one of the strongest nutritional benefits—you’re getting substantial protein while keeping carbohydrates minimal, which means better satiety and more stable blood sugar through the morning.
What Can I Serve With Carbquik Pancake Recipe?
The beauty of these pancakes is their versatility. They’re a blank canvas that accepts virtually any topping while maintaining their nutritional benefits. Here are my go-to serving combinations that I use regularly at family meals.
- Butter and sugar-free maple syrup – The classic combination. Look for zero-sugar or keto-specific syrups at most grocery stores. They’ve improved dramatically in recent years and taste genuinely delicious.
- Whipped cream and fresh berries – Raspberries, strawberries, and blackberries all pair beautifully. A dollop of whipped cream adds richness without requiring syrup.
- Almond butter and banana slices – If you’re adding fruit, thin banana slices work wonderfully. A spread of natural almond butter adds protein and satisfying richness.
- Cream cheese and sugar-free jam – Spread a thin layer of cream cheese on a warm pancake, top with your favorite sugar-free jam, and roll it up for a breakfast that feels like dessert.
- Cinnamon and powdered sweetener – If you want minimal toppings, sprinkle a touch of cinnamon and sweetener (like erythritol) on warm pancakes for elegant simplicity.
- Greek yogurt and granola – Top your pancakes with a dollop of plain Greek yogurt and your favorite low-carb granola for a protein-packed breakfast with interesting texture.
If you’re planning a special breakfast occasion, these pancakes also pair beautifully with other recipes. For a holiday brunch spread, serve them alongside other morning dishes, or create an Ice Cream Taco dessert experience later in the day for a fun twist.
Make-Ahead Guide: Feeding Your Whole Family Efficiently
As a dietitian who’s spent years helping families prepare nutritious meals amid busy schedules, I’ve developed strategies for batch-cooking these pancakes. Here’s my professional approach:
Option 1: Cook Once, Eat Multiple Times – Make a full batch (8-10 pancakes) on Sunday morning. Cool them completely on a wire rack, then layer them between parchment paper in an airtight container. Each morning during the week, your family can toast one or two pancakes in a toaster oven (3-4 minutes at 350°F) while getting dressed. This works beautifully for families with staggered morning schedules.
Option 2: Prepare Batter Ahead – Mix your batter the night before and refrigerate it in a covered container. In the morning, it’s literally just cooking. Add 1-2 tablespoons water before cooking (the batter thickens overnight as Carbquik continues absorbing liquid), then proceed with cooking. This works for families that prefer fresh pancakes every morning but want prep work minimized.
Option 3: Freezer Pancakes for Busy Mornings – Cook a double batch on a Sunday, cool completely, and freeze individually in a freezer-safe bag. On hectic mornings, pop two frozen pancakes directly into your toaster oven at 350°F for 12-15 minutes. It’s genuinely faster than making them from scratch and requires zero morning effort.
Scaling for Crowds: This recipe doubles and triples beautifully. For a family of 6 eating 1.5 pancakes each (9 pancakes total), I multiply the recipe by 1.5 and prep batter accordingly. For special occasions or feeding guests, I triple the recipe. Note: larger batches of batter can sit up to 4 hours in the refrigerator, though adding water before cooking is still necessary if they’ve rested longer than an hour.
Seasonal Variations: Adapting This Recipe Throughout the Year
One of the joys of developing cooking skills is learning to adapt recipes seasonally. These pancakes are wonderfully flexible:
Spring and Summer: Add ½ teaspoon lemon zest to the batter and serve with fresh strawberries or raspberries. The brightness complements warm weather perfectly. Alternatively, add a tablespoon of unsweetened cocoa powder mixed into the dry ingredients for chocolate berry pancakes that feel indulgent yet light.
Fall and Early Winter: Increase the cinnamon to 1 full teaspoon and add ¼ teaspoon nutmeg and a pinch of cloves to the dry ingredients for authentic spice-forward flavor. Serve with sugar-free caramel sauce and candied pecans. This variation feels festive and warming.
Winter Holidays: Add ½ teaspoon peppermint extract and stir a tablespoon of unsweetened cocoa powder into the dry ingredients for peppermint chocolate pancakes. Serve with whipped cream for a breakfast that captures holiday flavors without excessive sugar.
Year-Round Option: Add 2 tablespoons unsweetened shredded coconut to the dry ingredients and use coconut extract instead of vanilla for tropical flavor. This works any time and feels special without requiring seasonal planning.
Carbquik Pancake Recipe
Ingredients
Equipment
Method
- Before you do anything else, assemble everything on your counter. This is called "mise en place" in professional cooking, and it transforms the experience from chaotic to smooth. Grab your large bowl, whisk or fork, measuring cups and spoons, small bowl for butter, griddle or skillet, spatula, and plate for finished pancakes. Measure out your water, Carbquik, and have your egg and butter nearby. This takes two minutes and eliminates mid-recipe scrambling when your hands are wet or floury.
- Pour 2 cups of Carbquik into your large mixing bowl. Carbquik is a pre-mixed baking blend, so you don't need to sift it, but do give it a gentle shake in the measuring cup to settle it. If you're adding the optional ½ teaspoon cinnamon, add it now to the bowl with the Carbquik. Use your whisk or fork to stir them together for about 15-20 seconds until the cinnamon is evenly distributed. This prevents clumpy spots of cinnamon in your finished pancakes. You'll notice Carbquik has a slightly different texture than wheat flour—it's a bit more granular. This is completely normal and expected. Don't worry that it looks different; it's meant to.
- While your dry ingredients wait, melt ¼ cup unsalted butter. You can do this in a small saucepan over medium-low heat (watching constantly to prevent browning) or in a microwave (30-second bursts, checking after each). Once completely melted, let it cool for about 2-3 minutes. Why? Hot butter will scramble your egg when you mix everything together. You want it warm, not hot. A simple test: dip your clean finger in the butter. It should feel pleasantly warm, not hot.

- In a separate small bowl or even a measuring cup, combine 1 cup room-temperature water, 1 large egg, the cooled melted butter, and ½ teaspoon vanilla extract. Before mixing, crack your egg and make sure there's no shell fragment (it happens). Using a fork or small whisk, beat these ingredients together for about 30 seconds until the egg is fully incorporated and the mixture looks relatively uniform. You don't need to whip it into a foam; you just need everything mixed smoothly together.

- This is the critical moment. Pour your wet ingredients into your bowl of dry ingredients. Using your whisk or fork, gently stir until just combined. Here's what matters: you're looking for a batter that's completely mixed without any visible dry Carbquik bits, but you're not overmixing. Overmixing develops gluten in the Carbquik and makes pancakes tough. The batter should be slightly thicker than traditional pancake batter—almost like thick cake batter. If it seems too thick (barely pourable), add 1-2 tablespoons more water. If it's too thin (pours like cream), let it rest for 2 minutes as Carbquik continues absorbing liquid. Your batter might have tiny lumps, and that's completely fine. A few small lumps actually result in better texture than overworked batter.
- Set your griddle or skillet on the stovetop and turn the heat to medium. Let it sit there for 2-3 minutes while you let your batter rest. This resting period (just 2-3 minutes) allows the Carbquik to fully absorb the liquid and creates fluffier pancakes. You'll know your cooking surface is ready when a single drop of water sizzles gently when dropped on it, then evaporates within 2-3 seconds. This indicates medium heat—hot enough to cook pancakes evenly without burning them. Now lightly grease your griddle. If you have cooking spray, a light coat works perfectly. If you prefer butter, use a paper towel to rub a small amount of butter across the surface. You don't need much—just enough that the surface isn't completely dry.

- Pour approximately ¼ cup batter onto your hot griddle, forming a circle about 4 inches wide. Don't make them huge; medium-sized pancakes cook more evenly. You should hear a gentle sizzle when the batter hits the surface. Cook without moving it for 2 minutes. During this time, you'll notice the edges start to look drier and less shiny, and you might see tiny bubbles forming on the surface. After 2 minutes, peek underneath using your spatula. The bottom should be golden brown, not pale. If it's still pale, give it another 30 seconds. If it's golden, flip it gently and cook the second side for 1.5 to 2 minutes until it's also golden brown. This first pancake teaches you the exact timing for your particular griddle and heat source. Write down the timing if you want to remember it next time.

- Once you know your timing from pancake one, you're in rhythm. Continue pouring ¼ cup portions of batter onto your prepared griddle, leaving space between them so they don't touch. You can usually fit 2-3 pancakes simultaneously depending on your griddle size. Cook each batch for 2 minutes on the first side, then 1.5-2 minutes on the second side until all are golden brown. If your griddle has cooler spots, rotate pancakes to hotter areas halfway through cooking the first side. As finished pancakes come off the griddle, transfer them to a plate. If you're serving everyone at once, you can keep finished pancakes warm in a 200°F oven while you finish cooking the rest. This batter makes approximately 8-10 medium pancakes, depending on your portion size.

- Transfer your warm pancakes to serving plates and top with your favorite additions. Butter melts beautifully into warm pancakes, and sugar-free syrup works wonderfully if you want traditional topping. Fresh berries add brightness, whipped cream adds richness, and a sprinkle of cinnamon-sugar (if you're using small amounts) adds elegant finishing touches.

Notes
FAQs
Can I use regular flour instead of Carbquik?
Technically yes, but the nutritional profile changes dramatically. Regular all-purpose flour contains roughly 12-15 grams net carbohydrates per ¼ cup, while Carbquik contains only 2 grams net carbohydrates per ¼ cup. That’s a 600% difference in carbohydrate content. If you’re making these pancakes specifically for low-carb benefits, Carbquik is non-negotiable. If you simply prefer the taste and want traditional pancakes, regular flour works (use the same amount, but the texture might be slightly different because Carbquik has wheat protein that regular flour lacks). My recommendation: get Carbquik. It’s worth the pantry space and creates pancakes specifically optimized for the low-carb benefits you’re pursuing.
What if I don’t have vanilla extract?
Vanilla extract is primarily for flavor, not structure. You can omit it entirely—the pancakes are still delicious. Alternatively, substitute with almond extract (use only ¼ teaspoon because it’s stronger), peppermint extract, or even a tiny bit of maple flavoring. Each creates a slightly different taste, but all work beautifully. If you have none of these available, your pancakes are perfectly fine without any extract.
Can I make these pancakes dairy-free?
The butter can be replaced with coconut oil or dairy-free butter at a 1:1 ratio. The egg cannot be easily replaced while maintaining the texture—it provides structure and moisture that work together. If you need to avoid eggs for allergies, you’d need to experiment with flax eggs (1 tablespoon ground flaxseed mixed with 3 tablespoons water equals one egg), but I haven’t tested this variation extensively and cannot guarantee results. Stick with eggs for best pancake texture, or consult a dairy-free cookbook for egg substitutes tested specifically in baked goods.
Why is my batter foamy or bubbly when I pour it?
You likely overmixed the batter. Carbquik contains ingredients that create slight foam when over-agitated. Solution: next time, mix only until you see no visible dry Carbquik bits, then stop immediately. If your current batter is foamy, skim off the foam with a spoon before pouring onto the griddle. The pancakes will still taste fine; you might just get slightly fluffier edges.
Can I make these pancakes without butter?
The butter provides moisture and richness, but if you absolutely cannot use it, substitute with the same amount of unsweetened applesauce, Greek yogurt thinned with water, or coconut oil. I’d start with coconut oil since it has the most similar properties to butter. You might need to add an extra tablespoon of liquid since applesauce-based pancakes tend to absorb liquid differently. This is definitely an experiment—your first batch might need adjustments, but it’s worth trying if dietary restrictions require it.
More Beginner-Friendly Recipes
- Black Bean and Rice Burrito Recipe – A protein-packed lunch that teaches you flavor balancing and ingredient layering
- Beef Pasta Crock Pot Recipe – Hands-off cooking that shows you how slow, gentle heat creates tender, flavorful results
You’re Ready for Panc
