Ingredients
Method
Step 1: Prepare Your Onions With Precision
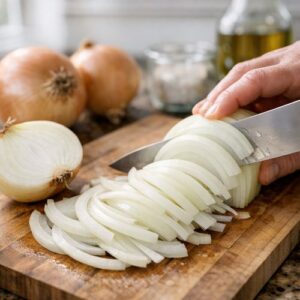
- Slice your four large onions into uniform ½-inch thick half-moons. This measurement is critical—thinner slices will fall apart into mush, while thicker chunks won't soften evenly. I use a sharp chef's knife or mandoline, cutting from root to tip to keep the layers somewhat connected. Place them in a bowl and set aside. This prep work takes about 5 minutes, but it's the foundation for everything that follows.
Step 2: Heat Your Pan and Build the Foundation
- Use a 12-inch cast iron skillet or heavy-bottomed stainless steel pan (not non-stick—you need the surface to develop fond). Pour in 2 tablespoons of extra virgin olive oil and heat over medium-high heat for about 60 seconds, until the oil shimmers slightly but doesn't smoke. The oil should be hot enough that a single onion slice sizzles immediately when it hits the pan, but not so hot that it browns in 10 seconds. This is where many home cooks fail: they start with medium heat thinking onions won't burn. Medium heat takes 25–30 minutes to caramelize onions properly. Medium-high heat does it in 12–15 minutes while developing deeper color and more complex flavor. The key is stirring frequently (every 90 seconds or so) to prevent burning while still allowing the onions to make contact with the hot pan surface.
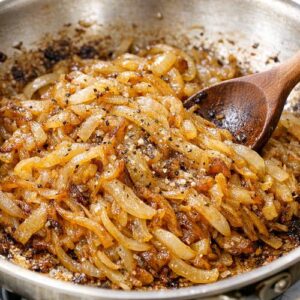
Step 3: Caramelize the Onions and Season Generously
- Add all the sliced onions to the hot oil immediately. Season with about ¾ teaspoon of kosher salt right away—this draws out moisture through osmosis, allowing water to evaporate faster so caramelization can occur. Stir well to coat every piece in oil. Now, here's the technique that separates adequate caramelization from exceptional caramelization: stir every 90 seconds for the first 8 minutes, then every 2–3 minutes for the remaining 5–7 minutes. You're watching for color progression. At 5 minutes, the onions will look slightly softened and translucent. At 10 minutes, the edges start browning to a light golden tone. At 12–15 minutes, you should see deep mahogany brown edges, the onions should have collapsed significantly (they'll look like they've reduced by about 60%), and the pan will smell sweet and toasty, almost caramel-like. If the onions look pale after 12 minutes, increase heat to medium-high. If dark brown bits are forming on the pan bottom before the onions are all golden, reduce heat slightly to medium. This active monitoring takes about 15 minutes total but creates the flavor foundation everything else builds on.
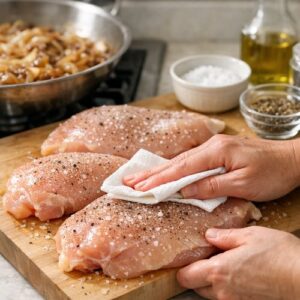
Step 4: Pat and Season the Chicken While Onions Cook
- As the onions cook (around the 8-minute mark), pat your chicken thighs dry with paper towels. Moisture is the enemy of browning—any surface water prevents the Maillard reaction (that browning process that creates flavor). Pat thoroughly, even if it seems excessive. Season both sides generously with kosher salt and about ¼ teaspoon black pepper. Do this just before you're ready to sear them (no more than 5 minutes prior) so the salt doesn't draw out moisture that sits on the surface.
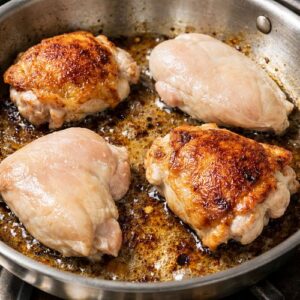
Step 5: Create Space and Sear the Chicken
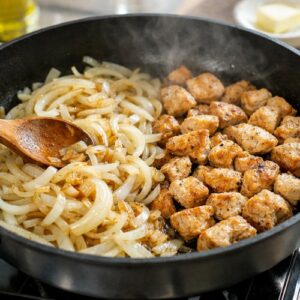
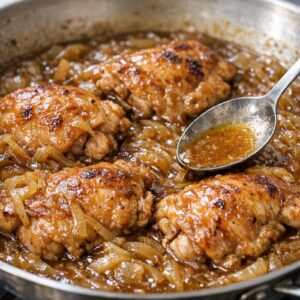
- Once your onions have reached that deep golden-brown stage, push them toward the edges of the pan, creating a clear center space. You want the onions mounded around the perimeter, leaving a hot spot in the middle for searing chicken. If necessary, add the remaining 1 tablespoon of olive oil to the center space (you may not need it if plenty of rendered fat is present, but you want enough so the chicken sizzles immediately when it hits the pan). Place the chicken pieces skin-side down (remember, we removed the skin for nutrition, but we're using bone-in pieces because the bones keep the meat incredibly moist) in the center space, making sure each piece makes direct contact with the hot pan. Do not move them for the first 4 minutes—resist the urge to flip or check them. This is called the "sear"—you're building a golden, flavorful crust. After 4 minutes, flip each piece. You'll see a deep golden-brown crust has formed on the side that was down. The other side will look pale, but that's fine—it just needs 3–4 minutes to brown as well. While the second side cooks, you can gently nestle some caramelized onions on top of the chicken if the pan was crowded.
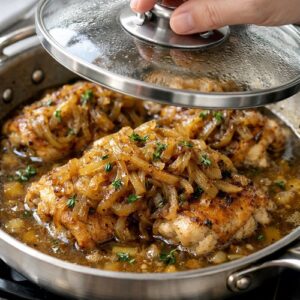
Step 6: Add Liquid and Transition to Braising
- After the second side of chicken has browned (total searing time is about 8 minutes), pour in ¼ cup of chicken broth or filtered water around the chicken pieces, not directly on top of them. You should hear a pleasant sizzle as the liquid hits the hot pan. Look at the pan bottom—you'll see brown, stuck-on bits. These are the fond, and they're pure flavor. The liquid will begin dissolving them immediately. Scatter any remaining caramelized onions over the top of the chicken. Add the thyme leaves if using. Turn the heat down to medium-low and cover the pan with a lid (even a large plate works in a pinch). The goal now is gentle simmering, not aggressive boiling—you want steam to cook the chicken through while keeping it tender.
Step 7: Braise Until Cooked Through
- Set a timer for 25 minutes. During this time, don't lift the lid more than once. The trapped steam does the heavy lifting. At 25 minutes, check the chicken's internal temperature using a meat thermometer inserted into the thickest part of a thigh (avoid touching bone). You're looking for 165°F exactly—this is the USDA food safety standard that kills harmful bacteria while keeping the meat from drying out. If you reach 165°F at 22 minutes, remove the lid and simmer uncovered for the last few minutes so the sauce concentrates slightly. If you're at 160°F at 25 minutes, replace the lid and cook another 2–3 minutes. The sauce at this point should coat the back of a spoon lightly. If it looks too thin and watery, remove the lid for the last 2 minutes to allow some evaporation. If it looks thick and reduced but you're not at 165°F yet, add another 2 tablespoons of broth to prevent scorching.
Step 8: Final Seasoning and Plating
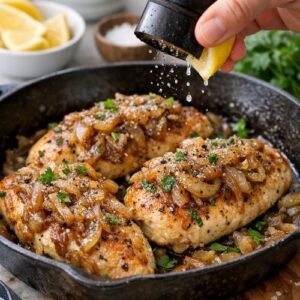
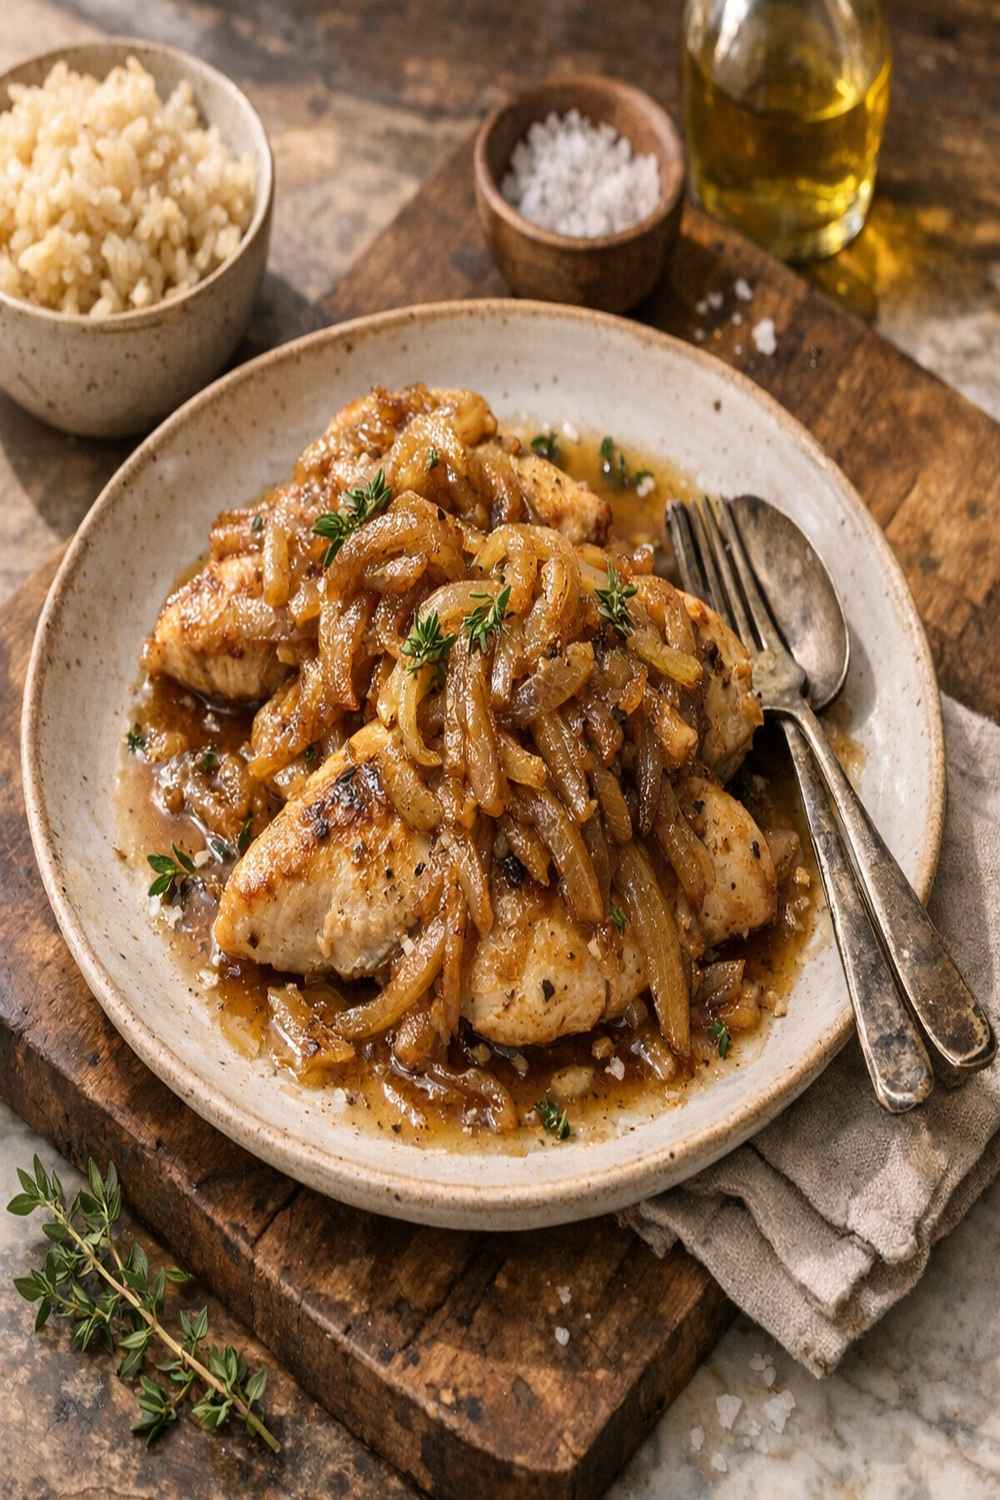
- Remove the pan from heat. Taste the sauce—it should taste distinctly onion-forward with savory depth from the chicken. If it tastes flat, add a pinch more salt. If it needs brightness, add about ¼ teaspoon black pepper or a small squeeze of fresh lemon juice. Divide the chicken among four plates or bowls, ensuring each person gets 2 thighs. Spoon the caramelized onions and all the sauce over the top.