High Protein Omelette Recipe
This post contains affiliate links. As an Amazon Associate I earn from qualifying purchases.
This omelette looks and tastes like something you’d order at a trendy brunch spot for $16, but I’m going to show you how to make it at home for under $8. The secret? Using whole eggs plus egg whites together—you get incredible protein density without the restaurant markup. When I pair this with simple chaffle sides, my family gets a complete breakfast that costs pennies per plate and delivers serious nutrition.
Restaurant-Quality High Protein Omelette Recipe for Under $8 (No Shortcuts on Flavor)
I created this recipe during my early years as a registered dietitian when I was balancing long clinic hours with family dinners that actually mattered. My parents raised me believing that the table—no matter how modest—was where real connection happened. I couldn’t afford fancy ingredients, but I could be intentional about every dollar spent on nutrition.
One Saturday morning, my mom challenged me to make something that looked impressive without busting the budget. I started experimenting with egg combinations, and that’s when I realized: mixing whole eggs with egg whites creates this luxurious, fluffy texture while dramatically increasing protein without doubling the cost. Now, twenty years later, this omelette is still my go-to when I need to prove that wholesome, restaurant-quality food doesn’t require a restaurant-quality budget.
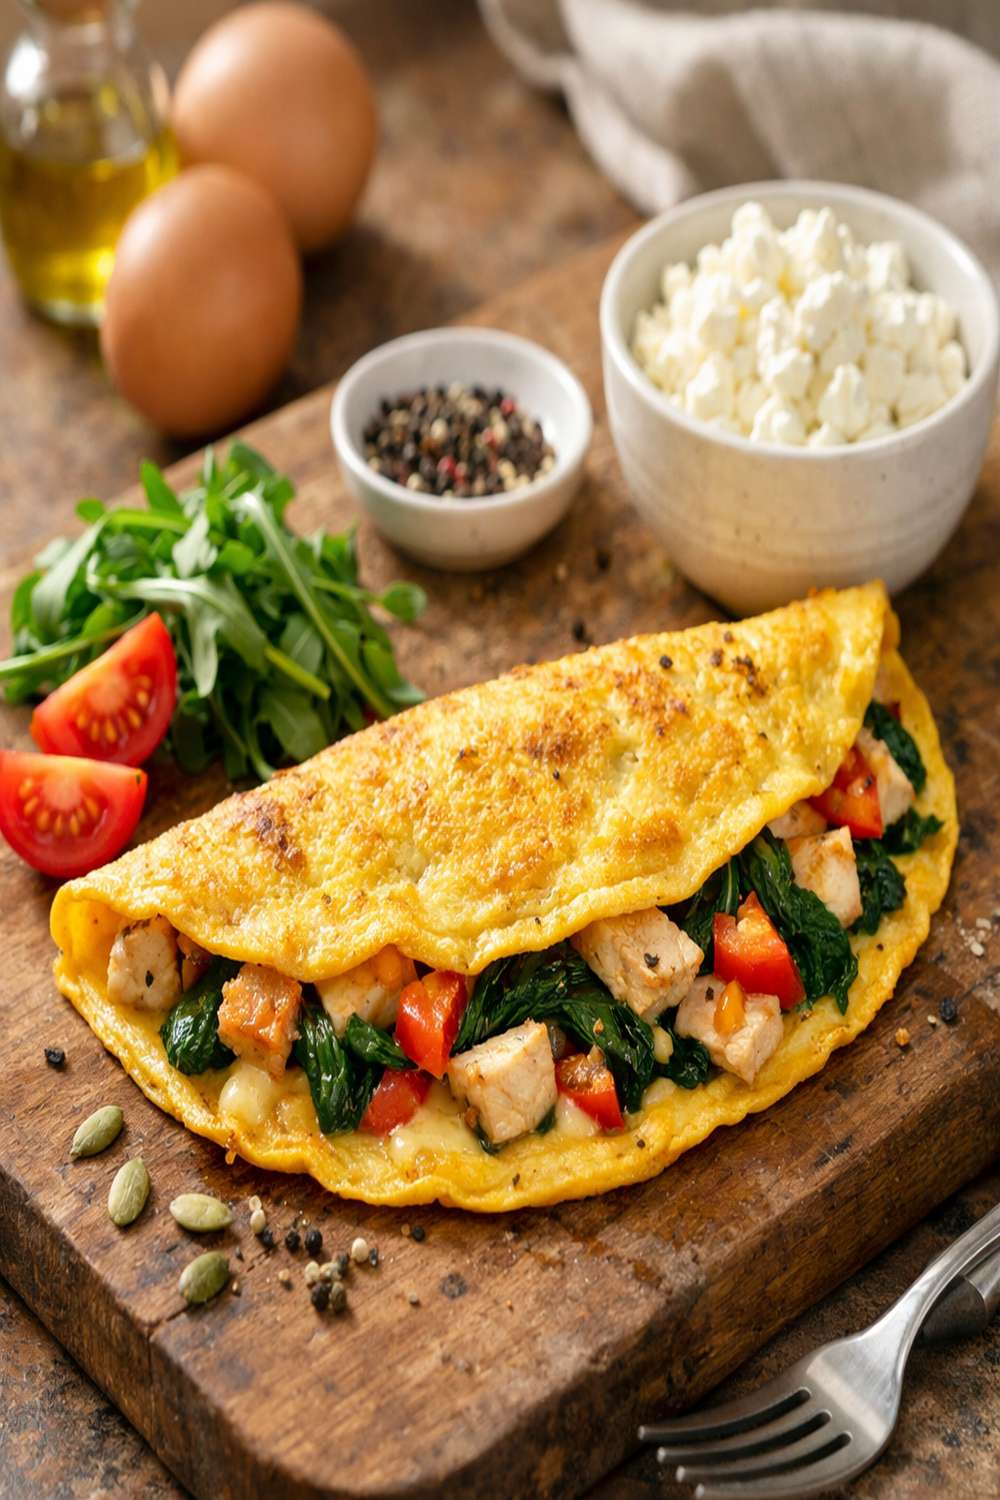
The Real Cost Breakdown
Let me walk you through exactly what you’re spending here, because transparency matters when we’re talking about feeding ourselves and our families well. I shop at local Fairfield markets and track prices regularly—these numbers reflect what I actually pay, not inflated national averages.
- Large eggs (1) – approximately $0.35 (buy large cartons at Costco or Trader Joe’s for $2.50–$3.00 per dozen)
- Egg whites (½ cup liquid or 2–3 eggs’ worth) – approximately $0.40 (buy cartons like Egg Beaters or Simply Egg Whites for $3–$4 per 16oz carton)
- Fresh spinach (2 tablespoons chopped) – approximately $0.15 (buy frozen bags at $1.50–$2.00 and thaw; fresher budget option)
- Red bell pepper (2 tablespoons diced) – approximately $0.25 (buy one pepper for $0.99–$1.50 and use across multiple meals)
- Red onion or scallions (1 tablespoon diced) – approximately $0.10 (one bunch lasts through dozens of meals)
- Cheddar cheese (⅓ cup shredded) – approximately $0.45 (buy blocks and shred yourself; pre-shredded costs 40% more)
- Kosher salt and black pepper (¼ teaspoon total) – approximately $0.05 (bulk staples, negligible cost)
- Olive oil spray (2–3 second spray) – approximately $0.10 (one bottle lasts 6+ months)
Total cost per omelette: $1.85 | Restaurant price: $14–$18 | Your savings: 85–90%
When I make this three times a week for my household, we’re spending roughly $27 monthly on this specific meal. Compare that to ordering takeout just twice a week at $15 per order, and you’re looking at $120+ monthly. That’s a $93 difference that suddenly buys your family’s fresh vegetables for the whole month.
Smart Shopping Tips for This Recipe
- Buy eggs in bulk at warehouse clubs – Costco and Sam’s Club prices are 30–40% lower than traditional grocery stores. A 5-dozen carton costs roughly $8–$9, bringing your per-egg cost down to $0.20 instead of $0.40. Yes, you need freezer space, but the math wins.
- Choose liquid egg whites over separated fresh eggs – Egg white cartons (Egg Beaters, Simply Egg Whites, or store brands) cost less per ounce than buying extra whole eggs and discarding yolks. Plus, they last 4–5 weeks in your refrigerator, so you buy once and use across multiple meals without waste.
- Buy cheese in blocks and shred yourself – Pre-shredded cheese costs 40–50% more because of anti-caking agents and packaging. A $4 block of cheddar yields about 2 cups shredded and lasts through 6–8 omelettes. Invest $8 in a microplane grater (one-time cost) and you’ve paid for itself in three purchases.
- Go frozen for vegetables during off-season months – Fresh spinach and peppers are cheapest June through September. October through May, frozen spinach ($1.50 per bag) and frozen diced peppers ($2 per bag) give you identical nutrition at half the cost. No quality sacrifice; actually more convenient.
- Buy red onions and scallions whole – One red onion ($0.99) yields 12+ tablespoon servings. One bunch of scallions ($0.99) lasts through 15+ meals. These aren’t ingredients you’re buying for one recipe; they’re pantry staples that multiply your value across weeks.
The Ingredients
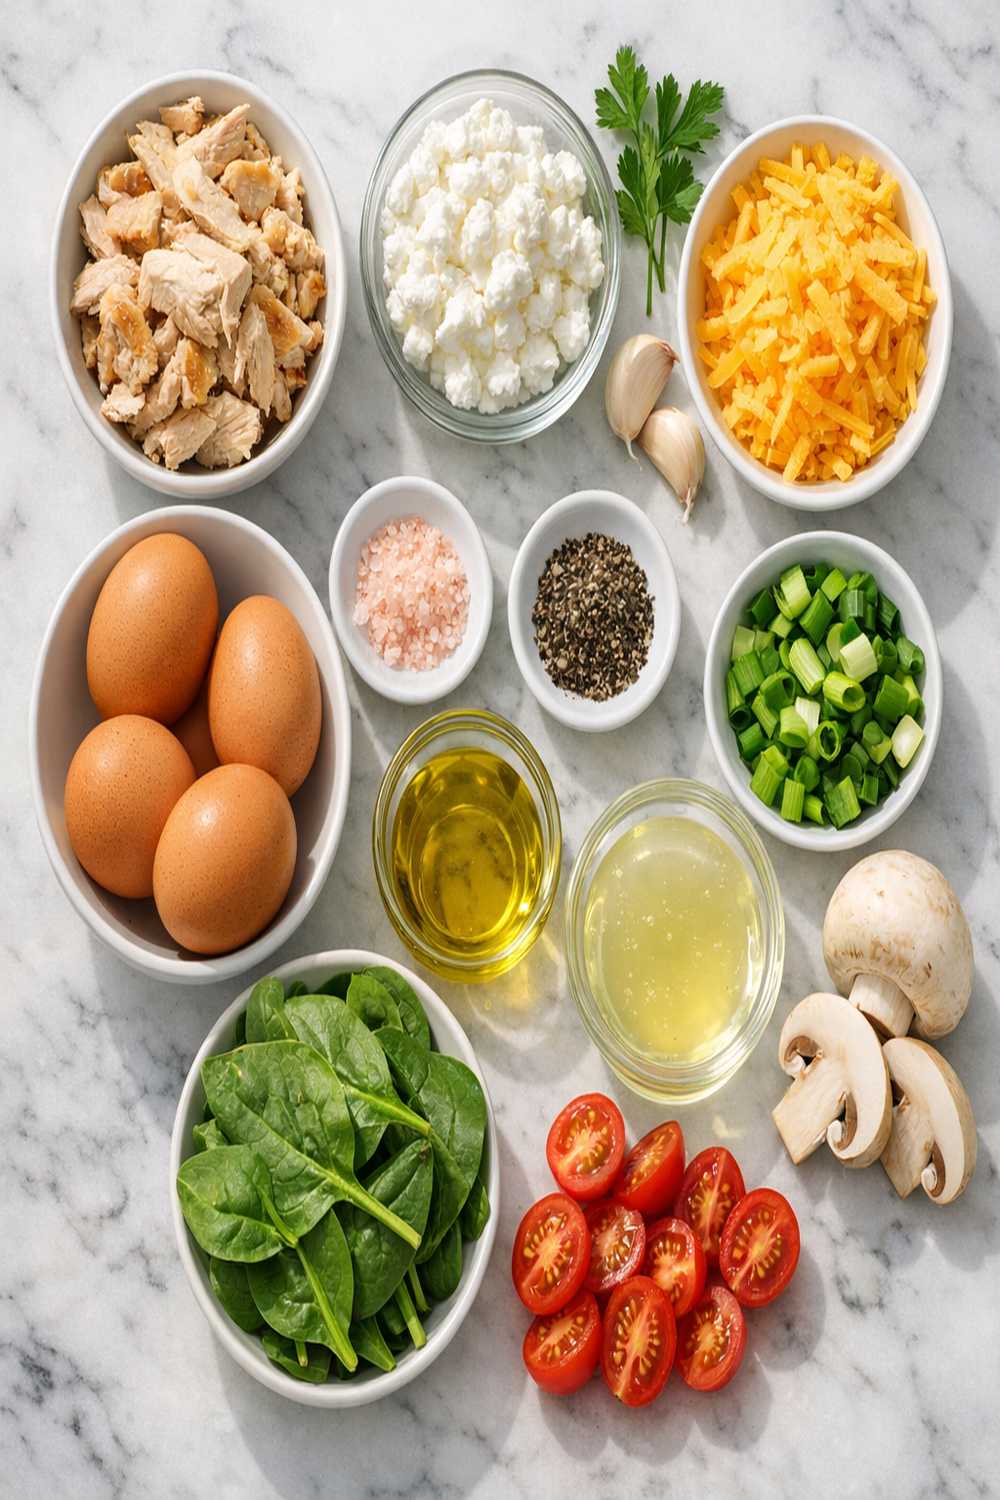
Every single ingredient here earns its place and its cost. There’s no filler, no compromise—just strategic layering of protein, vitamins, minerals, and flavor. I’ve arranged these by function so you see exactly why each one matters.
- 1 tablespoon red onion or scallions (minced; provides sulfur compounds and subtle depth)
- 1 large egg (room temperature for best fluffiness and cooking evenness)
- 2 tablespoons fresh spinach (chopped; high in iron and magnesium)
- ½ cup liquid egg whites (pasteurized, no shells, pure protein boost)
- ¼ teaspoon kosher salt (not table salt, which is too fine and tastes bitter)
- ⅓ cup cheddar cheese (shredded; calcium, vitamin B12, and richness without heaviness)
- 2–3 sprays olive oil (in a spray bottle; coats the pan without excess oil calories)
- Pinch of freshly ground black pepper (freshly ground has 10x more flavor than pre-ground)
- 2 tablespoons red bell pepper (finely diced; adds vitamin C and natural sweetness)
Serves: 1 person | Prep time: 5 minutes | Cook time: 6–7 minutes | Total time: 12 minutes
How to Make High Protein Omelette Without Breaking the Bank
I’m going to walk you through this step-by-step, but not like most recipes. I’m embedding the money-saving and technique secrets directly where they matter. This isn’t a compromise version—it’s how professionals actually make omelettes, and it happens to cost almost nothing.
Step 1: Prep Your Vegetables While the Pan Heats
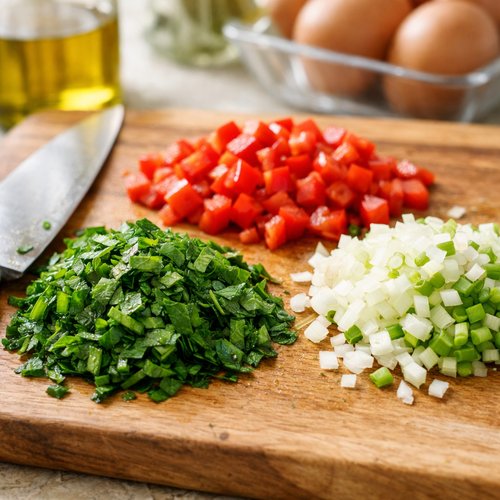
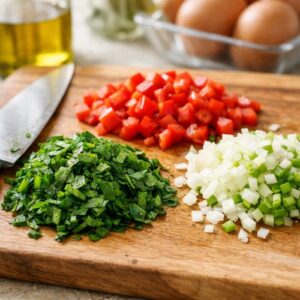
While your non-stick skillet is coming to temperature, chop your spinach, dice your pepper, and mince your onion or scallions. Here’s the efficiency win: prep vegetables in bulk on Sunday, store them separately in glass containers, and you’ve just cut your weekday breakfast prep from 10 minutes to 2 minutes. This is how dietitians actually eat healthy during busy seasons—we batch-prep vegetables once, not every morning.
If you’re using fresh spinach, give it a gentle squeeze after chopping to remove excess moisture. That moisture is nutrition draining away, but more importantly, it releases water into your omelette and makes it watery instead of fluffy. Dry vegetables = fluffy omelette. This one trick separates restaurant-quality from sad and soggy.
Step 2: Whisk Your Egg Mixture With Intent
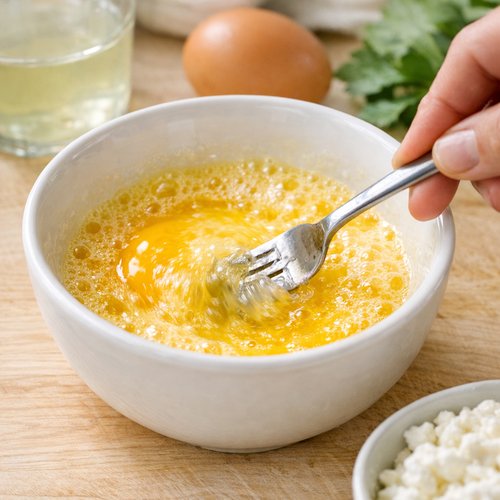
Pour your 1 whole egg and ½ cup egg whites into a small bowl. Here’s where most home cooks miss the point: use a fork and whisk for about 30 seconds, but don’t over-beat. You want the whites and yolks fully incorporated—no streaks of yellow and white—but you don’t want to deflate the natural air pockets that create fluffiness.
Once combined, immediately add your chopped vegetables directly into the egg mixture. This saves you a step and ensures vegetables are evenly distributed throughout the omelette, not clumped on one side. Season with your ¼ teaspoon kosher salt and a pinch of black pepper. Stir gently until everything is integrated.
Why kosher salt? Table salt has a finer grain and contains anti-caking agents that leave a bitter aftertaste. Kosher salt dissolves better into eggs and tastes cleaner. It costs the same—about $1.50 for a container that lasts a year—but the flavor difference is immediate.
Step 3: Heat Your Non-Stick Pan to Medium-Low (Not Medium)
This is crucial for budget omelettes: high heat burns the bottom before the top cooks, and you end up with ruined eggs and wasted ingredients. Medium-low heat is your friend. It gives you time to work and creates even cooking from bottom to top.
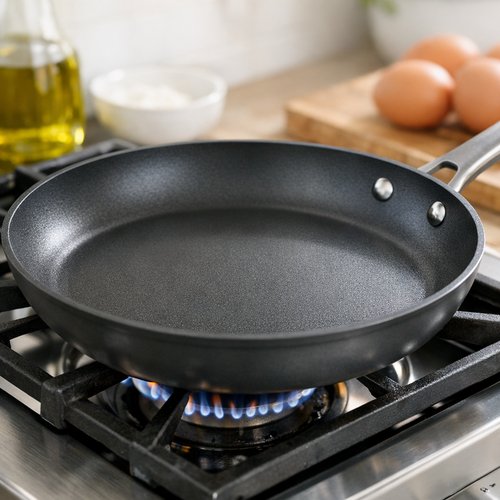
Heat your 9 or 10-inch non-stick skillet for about 2 minutes. If you don’t have a non-stick pan, this is one place I genuinely recommend spending money—a quality non-stick skillet is $25–$40 and lasts years if you care for it properly. It pays for itself in omelettes you don’t ruin, and in the reduction of butter or oil you need (saving money and calories).
Test the heat by sprinkling a drop of water on the surface. If it sizzles gently and the bead moves around slowly, you’re at perfect medium-low. If it evaporates instantly, reduce the heat.
Step 4: Spray, Pour, and Be Patient
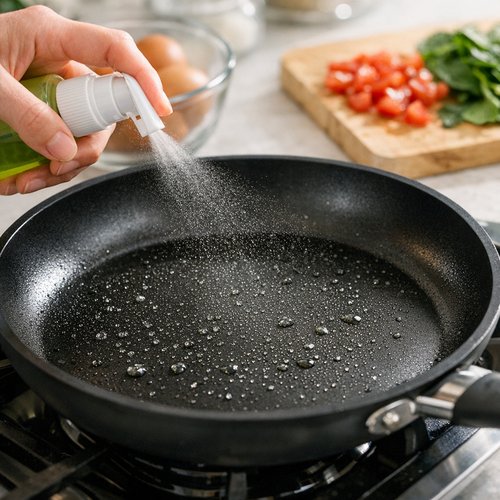
Give your pan 2–3 light sprays of olive oil. Use a spray bottle, not pouring—this prevents excess oil that adds calories and cost without adding flavor. Immediately pour your egg mixture into the center of the pan and resist the urge to stir it around like scrambled eggs.
Let it sit untouched for about 45 seconds to 1 minute. During this time, the bottom is setting and creating structure. This is not laziness; this is technique. Professional cooks don’t touch omelettes while they set.
Step 5: Gently Lift and Let Uncooked Eggs Flow
Using a heatproof silicone or rubber spatula (not metal, which can scratch non-stick surfaces), gently lift the edge of the cooked portion. Tilt the pan slightly so the uncooked egg from the center flows toward the pan edges. This happens naturally; you’re not pushing it.
Do this around the entire perimeter—lift slightly, let liquid egg flow—over about 2–3 minutes. Your goal is to have set egg all the way to the edges while the very center is still slightly wet. That center moisture is essential because it will continue cooking from residual heat, creating a creamy center that looks and tastes expensive.
Pro tip from my clinic work: I’ve noticed people either don’t lift enough (creating a giant rubbery bottom) or lift too aggressively (breaking the structure). Pretend you’re working with something delicate. Gentle movements, 30–45% of the way under, then back off. Three times around is usually perfect.
Step 6: Add Cheese and Fold
When the eggs are mostly set but still slightly soft on top, sprinkle your ⅓ cup shredded cheddar down the center of the omelette. Let the cheese sit for about 10–15 seconds while it begins to melt. You don’t want it fully melted and pooled; you want it softened and ready to stay contained.
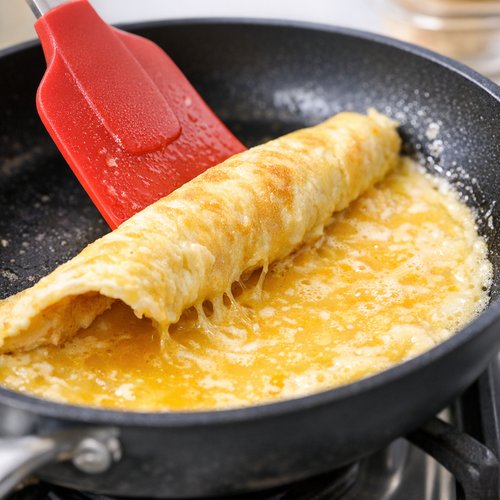
Now comes the final move: using your spatula, fold one edge (about a third of the omelette) toward the center, then fold the opposite edge toward the center. You’re creating a three-part fold with melted cheese inside. If you prefer an open-faced omelette, skip this step, but folding creates that classic restaurant presentation and keeps the cheese from spilling out onto your plate.
Slide onto your serving plate immediately. The residual heat will continue cooking the center to creamy perfection over the next 30 seconds.

How to Stretch This Recipe Further
- Feed two people by doubling ingredients in one larger pan – Use one 12-inch non-stick skillet, 2 whole eggs, 1 cup egg whites, double vegetables, and ⅔ cup cheese. The cooking time extends by only 2–3 minutes, but you’ve cut your per-person cost by sharing equipment and effort. This is how busy families actually eat well—one big omelette that serves two is faster than making two separate omelettes and uses less gas or electricity.
- Transform leftovers into omelette breakfast bowls – If you have cold leftover omelette (it keeps for 3 days), chop it up and layer it into a bowl with Greek yogurt, salsa, and avocado for a protein-packed lunch. You’ve extended one meal into two meals and the cost hasn’t changed. This is waste prevention, which is the most underrated money-saving strategy in home cooking.
- Batch-cook omelettes on Sunday for grab-and-go breakfasts – Make 3–4 omelettes, cool them completely, wrap individually in parchment paper, and refrigerate. Each morning, unwrap one and heat it for 45 seconds in the microwave or 2 minutes in a non-stick pan. You’ve just created make-ahead breakfasts for under $2 each while maintaining the quality that makes you actually eat breakfast instead of skipping it.
- Use omelette scraps as pizza topping or burrito filling – Torn pieces of leftover omelette can be layered onto black bean and rice burritos or sprinkled onto pizza. You’re extracting full value from every egg you buy.
Budget Substitutions That Don’t Sacrifice Quality
- Cheddar cheese → store-brand Mexican blend or Monterey Jack – These cost 20–30% less per pound and have equally good melting and flavor. Avoid “cheese product” (contains oil and additives instead of actual cheese); stick with real cheese, just store brands. The texture and taste impact? Minimal. The cost savings? Real.
- Fresh spinach → frozen spinach (thawed and squeezed dry) – Frozen spinach is nutritionally identical, costs 60% less in winter months, and actually has a better texture in hot applications like omelettes because it doesn’t release water mid-cooking like fresh spinach sometimes does. There’s no quality sacrifice; this is legitimately better.
- Cheddar cheese → Swiss or provolone – These cheeses are frequently on sale at grocery stores when they’re overstock. Set a price alert on your phone for cheeses under $3.50 per pound, buy them when they’re on sale, and freeze them. They thaw perfectly fine and you’ve cut your cheese cost in half.
- Liquid egg whites → separated fresh egg whites (if you’re making multiple omelettes) – If you’re making 3+ omelettes at once, separating whole eggs and using the whites costs 40% less than buying cartons. You’ll use the yolks for baking or mayo-based recipes. Single omelettes? The carton is worth it. Multiple servings? Fresh separation wins.
- Red bell pepper → frozen diced peppers or seasonal fresh peppers – When peppers are out of season ($1.50+ each), frozen costs $0.50 per serving. When local peppers are in season, fresh costs $0.35 each. Buy seasonally and don’t force out-of-season ingredients—your budget and the planet thank you.
Expert’s Nutritional Insight: Why This Protein Combination Works
As a registered dietitian, I look at protein from a functional perspective, not just “more is better.” This omelette contains 18–20 grams of protein per serving, split between whole egg and egg white. Here’s why that matters: whole eggs contain choline, lutein, and zeaxanthin—compounds critical for brain health and eye protection that are only in the yolk.
Egg whites provide leucine, an amino acid that triggers muscle protein synthesis. By combining both, you’re getting the comprehensive amino acid profile plus the micronutrient density. A 2023 USDA analysis shows that eggs are among the most nutrient-dense protein sources per dollar spent—rivaling chicken breast in protein-to-cost ratio while offering superior micronutrient density.
The vegetables add fiber (2–3 grams) which slows digestion and keeps you satisfied longer, extending the value of this meal by reducing snacking. That’s not just nutrition; that’s financial sense.
Can I Store High Protein Omelette?
Yes, and this is where omelette economics really shine. A fully cooked, folded omelette will stay fresh in an airtight container in the refrigerator for up to 3 days. Unfolded or in pieces, it lasts equally long and actually reheats more evenly.
To reheat, place on a non-stick pan over low heat for 90–120 seconds, or microwave for 45 seconds covered (cover prevents it from drying out). The texture remains nearly identical to fresh because eggs don’t break down like some proteins.
Freezing is possible but I don’t recommend it for omelettes—the texture changes to rubbery, even when thawed gently. Your time is better spent making fresh omelettes, which take 12 minutes, versus dealing with frozen ones that require thawing and taste slightly off. In budget cooking, sometimes the “less convenient” option is actually more efficient.
Best storage practice: Make 3–4 omelettes on Sunday, refrigerate in individual containers, and eat fresh throughout the week. You’ll actually consume them (high compliance) and the quality stays restaurant-level.
Nutrition Information
Per serving (1 complete omelette):
- Calories: 220–240
- Protein: 18–20 grams
- Fat: 12–14 grams (mostly from cheese and whole egg yolk)
- Carbohydrates: 3–4 grams
- Fiber: 0.5–1 gram
- Sodium: 420 mg (about 18% of daily value)
- Choline: 280 mg (supports brain health and fat metabolism)
- Selenium: 22 mcg (immune function and thyroid support)
- Vitamin B12: 1.2 mcg (energy and nervous system health)
This data reflects USDA FoodData Central values for large eggs, egg whites, cheddar cheese, and raw vegetables. The nutritional value per dollar is exceptional: $1.85 gets you 18+ grams of complete protein (something that typically costs $4–$5 in protein bars or supplements), plus 280 mg of choline (only found in animal products and worth $6–$8 in supplement form), plus micronutrients like selenium, B12, and phosphorus.
In my practice, I often point out to patients that this single meal delivers 36% of daily protein needs for under $2. That efficiency is what sustainable healthy eating looks like.
What Can I Serve With High Protein Omelette?
This omelette is satisfying enough to be a complete meal, but if you want to build a plate, here are budget-friendly additions that don’t compromise your $2-per-meal target:
- Whole grain toast with butter – adds $0.50 and delivers 3–4 grams of fiber plus B vitamins. The carbs balance the protein, creating sustained energy without blood sugar spikes.
- Fresh fruit (apple, berries, or orange) – adds $0.30–$0.60 and provides vitamin C plus hydration. Seasonal fruit is always cheaper and tastes better than out-of-season.
- Sliced tomato or cucumber with salt and pepper – adds $0.15 and zero cost if you’ve grown these (which many people can even in small Fairfield yards). Fresh vegetables make the meal feel abundant.
- Simple green salad with lemon juice and olive oil – adds $0.40 and extends the vegetable content, supporting healthy digestion and micronutrient absorption. A handful of spinach or lettuce plus lemon juice (you have these already) costs almost nothing and makes the plate look intentional.
- Greek yogurt (plain, unsweetened) – adds $0.50 and brings 15+ grams of probiotic protein. The tang complements the richness of the omelette beautifully, and you’ve just created a complete, balanced meal for under $3.50 total.
- Pair with breakfast pineapple for natural sweetness and enzymes – tropical fruit adds brightness without heaviness, and fresh pineapple is remarkably affordable year-round, especially at warehouse clubs.
Make-Ahead Guide: Strategic Meal Prep for the Busy Week
From my years in clinical nutrition, I’ve learned that the difference between people who eat well and people who don’t isn’t motivation—it’s systems. Let me share exactly how I build omelette-based meal prep into my week.
Sunday Prep (30 minutes total): Wash and chop all vegetables at once. I prep 2 cups spinach, 1 whole bell pepper (diced), and 1 whole red onion (minced), storing each in separate glass containers. This takes 15 minutes and serves 6+ omelettes. Buy your eggs and cheese, ensuring they’re stored properly (eggs in their original carton on the shelf, cheese in the coldest part of your fridge).
Monday, Wednesday, Friday (12 minutes each): I make 2 omelettes per day on these mornings, one for breakfast, one for lunch. Since vegetables are prepped, I’m literally pouring, cooking, and plating. This beats hitting a drive-through every single time (cost, nutrition, and time).
Optional Tuesday/Thursday prep: Make 2 additional omelettes and refrigerate. Mornings become grab-and-reheat, literally 45 seconds in the microwave. This is when life gets busy and grab-and-go becomes essential—having healthy, budget-friendly omelettes ready means you don’t revert to expensive takeout.
Storage protocol: Cool omelettes completely (about 10 minutes on a plate), then transfer to individual glass containers with parchment paper between stacked omelettes (prevents sticking). Label with date. Use within 3 days.
This system costs $10–$12 per week and delivers 6–8 restaurant-quality meals. That’s $1.25–$1.50 per meal, and it requires zero willpower because the food is literally sitting in your fridge ready to eat.
Common Mistakes to Avoid
Mistake 1: Cooking at too high heat. High heat sets the bottom before the top cooks, creating a dark, tough bottom layer while the center is still runny. Then you either overcook and ruin texture, or undercook and get sick. Medium-low is not boring; it’s the difference between a restaurant omelette and a home disaster. Test with a water drop.
Mistake 2: Not prepping vegetables until you’re cooking. Rushing to chop while eggs are setting means you miss your timing, overcook something, and end up frustrated. 2 minutes of prep before heat prevents 10 minutes of stress. This is time management, not cooking skill.
Mistake 3: Using metal utensils in a non-stick pan. This scratches the coating, which then flakes into your food (not toxic, but gross) and reduces the pan’s usefulness, meaning you eventually replace it and waste money. Silicone or rubber only. This single switch extends non-stick pan life by years.
Mistake 4: Overcrowding the pan. A 9-inch pan is sized for one omelette perfectly. Trying to make two in one pan (to “save time”) actually ruins both because heat distribution fails and you end up with burnt edges and cold center. Do one properly in 12 minutes instead of two poorly in 15 minutes. Quality beats speed.
Mistake 5: Using pre-shredded cheese. I mention this repeatedly because it’s the #1 budget mistake I see. Pre-shredded cheese contains cellulose and other additives preventing clumping. It doesn’t melt smoothly, it doesn’t taste as good, and it costs 40% more. Block cheese costs $4, shreds it yourself in 2 minutes, and you’ve just cut your cheese budget in half. The investment is one microplane grater ($8) that lasts forever.
Seasonal Variations: Keep Your Omelettes Fresh Year-Round
Spring (March–May): Fresh asparagus is cheap and tender. Chop 3–4 spears, sauté for 1 minute before adding eggs—spring flavor without extra cost. Add fresh chives if available (free from herb gardens or $0.99 a bunch).
Summer (June–August): Fresh tomatoes and zucchini are abundant and cheap. Finely dice fresh tomato (removes seeds and excess water first), add herbs like fresh basil. This is when your omelette tastes like a farmers market captured on a plate, and your costs actually decrease because vegetables are at their lowest prices.
Fall (September–November): Caramelized onions become my go-to. Slice an onion thinly, cook on low heat in a separate pan for 10 minutes while your eggs cook, then fold into the omelette. This single technique makes fall omelettes taste completely different from summer, and it costs almost nothing.
Winter (December–February): This is when you lean into frozen vegetables and storage crops. Frozen spinach, frozen peppers, and stored onions from fall. Fresh herbs become expensive, so dried herbs (dill, oregano) replace them. Winter omelettes are earthier and more savory—still delicious, fully affordable.

High Protein Omelette Recipe
Ingredients
Method
- While your non-stick skillet is coming to temperature, chop your spinach, dice your pepper, and mince your onion or scallions. Here's the efficiency win: prep vegetables in bulk on Sunday, store them separately in glass containers, and you've just cut your weekday breakfast prep from 10 minutes to 2 minutes. This is how dietitians actually eat healthy during busy seasons—we batch-prep vegetables once, not every morning. If you're using fresh spinach, give it a gentle squeeze after chopping to remove excess moisture. That moisture is nutrition draining away, but more importantly, it releases water into your omelette and makes it watery instead of fluffy. Dry vegetables = fluffy omelette. This one trick separates restaurant-quality from sad and soggy.
- Pour your 1 whole egg and ½ cup egg whites into a small bowl. Here's where most home cooks miss the point: use a fork and whisk for about 30 seconds, but don't over-beat. You want the whites and yolks fully incorporated—no streaks of yellow and white—but you don't want to deflate the natural air pockets that create fluffiness. Once combined, immediately add your chopped vegetables directly into the egg mixture. This saves you a step and ensures vegetables are evenly distributed throughout the omelette, not clumped on one side. Season with your ¼ teaspoon kosher salt and a pinch of black pepper. Stir gently until everything is integrated. Why kosher salt? Table salt has a finer grain and contains anti-caking agents that leave a bitter aftertaste. Kosher salt dissolves better into eggs and tastes cleaner. It costs the same—about $1.50 for a container that lasts a year—but the flavor difference is immediate.

- This is crucial for budget omelettes: high heat burns the bottom before the top cooks, and you end up with ruined eggs and wasted ingredients. Medium-low heat is your friend. It gives you time to work and creates even cooking from bottom to top. Heat your 9 or 10-inch non-stick skillet for about 2 minutes. If you don't have a non-stick pan, this is one place I genuinely recommend spending money—a quality non-stick skillet is $25–$40 and lasts years if you care for it properly. It pays for itself in omelettes you don't ruin, and in the reduction of butter or oil you need (saving money and calories). Test the heat by sprinkling a drop of water on the surface. If it sizzles gently and the bead moves around slowly, you're at perfect medium-low. If it evaporates instantly, reduce the heat.
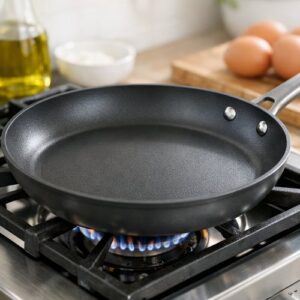
- Give your pan 2–3 light sprays of olive oil. Use a spray bottle, not pouring—this prevents excess oil that adds calories and cost without adding flavor. Immediately pour your egg mixture into the center of the pan and resist the urge to stir it around like scrambled eggs. Let it sit untouched for about 45 seconds to 1 minute. During this time, the bottom is setting and creating structure. This is not laziness; this is technique. Professional cooks don't touch omelettes while they set.

- Using a heatproof silicone or rubber spatula (not metal, which can scratch non-stick surfaces), gently lift the edge of the cooked portion. Tilt the pan slightly so the uncooked egg from the center flows toward the pan edges. This happens naturally; you're not pushing it. Do this around the entire perimeter—lift slightly, let liquid egg flow—over about 2–3 minutes. Your goal is to have set egg all the way to the edges while the very center is still slightly wet. That center moisture is essential because it will continue cooking from residual heat, creating a creamy center that looks and tastes expensive. Pro tip from my clinic work: I've noticed people either don't lift enough (creating a giant rubbery bottom) or lift too aggressively (breaking the structure). Pretend you're working with something delicate. Gentle movements, 30–45% of the way under, then back off. Three times around is usually perfect.

- When the eggs are mostly set but still slightly soft on top, sprinkle your ⅓ cup shredded cheddar down the center of the omelette. Let the cheese sit for about 10–15 seconds while it begins to melt. You don't want it fully melted and pooled; you want it softened and ready to stay contained. Now comes the final move: using your spatula, fold one edge (about a third of the omelette) toward the center, then fold the opposite edge toward the center. You're creating a three-part fold with melted cheese inside. If you prefer an open-faced omelette, skip this step, but folding creates that classic restaurant presentation and keeps the cheese from spilling out onto your plate. Slide onto your serving plate immediately. The residual heat will continue cooking the center to creamy perfection over the next 30 seconds.

Notes
FAQs
Can I make this omelette with just egg whites to save money?
Technically yes, but you’re making a false economy. A 16 oz carton of egg whites costs about $4, giving you 16 tablespoons (16 servings at 1 tablespoon per person). That’s $0.25 per serving. Whole large eggs cost $0.35 each at bulk prices, so you’re only saving $0.10 by skipping the yolk. That $0.10 savings costs you the choline, lutein, and fat-soluble vitamins only in yolks. The egg white omelette tastes slightly rubbery, lacks richness, and you miss out on the micronutrient density that makes eggs so valuable per dollar. Keep the yolk.
Is olive oil spray actually cheaper than butter?
Olive oil spray ($3.50 per 5 oz bottle, roughly 100 sprays) costs about $0.035 per spray. Butter ($4 per pound, 16 tablespoons) costs about $0.25 per tablespoon. A 2–3 second spray (about 0.2 teaspoons) is negligibly cheaper than butter AND uses fewer calories. However, for pure economics and flavor, I recommend unsalted butter for flavor and spray for consistency of coverage. The difference is tiny; the point is avoiding heavy pours of oil that add 100+ unnecessary calories.
Can I prep the egg mixture the night before?
I don’t recommend it. Once you mix whole eggs with egg whites, they oxidize slightly and the proteins begin bonding in ways that make texture less fluffy. You lose the fluffiness that makes this omelette special—and it’s fluffiness that justifies the whole project. Prep vegetables the night before (yes), but mix eggs the morning of cooking. It’s 30 seconds extra work for noticeably better results.
What’s the cheapest way to make this for a crowd of 6?
Make individual omelettes in a 10-inch pan, not one giant “omelette” for six (which fails texturally). Six individuals at 12 minutes each = 72 minutes if you do them sequentially, but that assumes you have one person cooking. Better approach: two people making omelettes simultaneously (one 10-inch pan each) = 36 minutes for six perfect omelettes. Cost stays at $1.85 per omelette. Alternatively, make a frittata (baked omelette) in a 12-inch oven-safe skillet: combine 8 whole eggs, 2 cups egg whites, all vegetables, cheese, pour into the pan, bake at 375°F for 15–18 minutes. One frittata serves 6, costs $11–$12 total, and requires zero flipping skill. The oven method is actually better for crowds.
Do I really need a non-stick pan, or will stainless steel work?
Stainless steel works but requires more fat (so higher cost and calories) and more babying (constant attention to prevent sticking). Non-stick pans cost $25–$50 upfront and last years, eliminating both extra fat and stress. From a pure-value perspective, the non-stick pan is worth it. You’ll make this omelette 50+ times over a year; that $30 investment is $0.60 per omelette in equipment cost, worth it for the consistency and ease. If budget is truly tight, start with stainless steel and upgrade when feasible.
More Budget-Friendly Recipes You’ll Love
- Blade Beef Recipe – another high-protein option showing you can eat restaurant quality on a working person’s budget
