Gluten Free Banana Bread Recipe
This post contains affiliate links. As an Amazon Associate I earn from qualifying purchases.
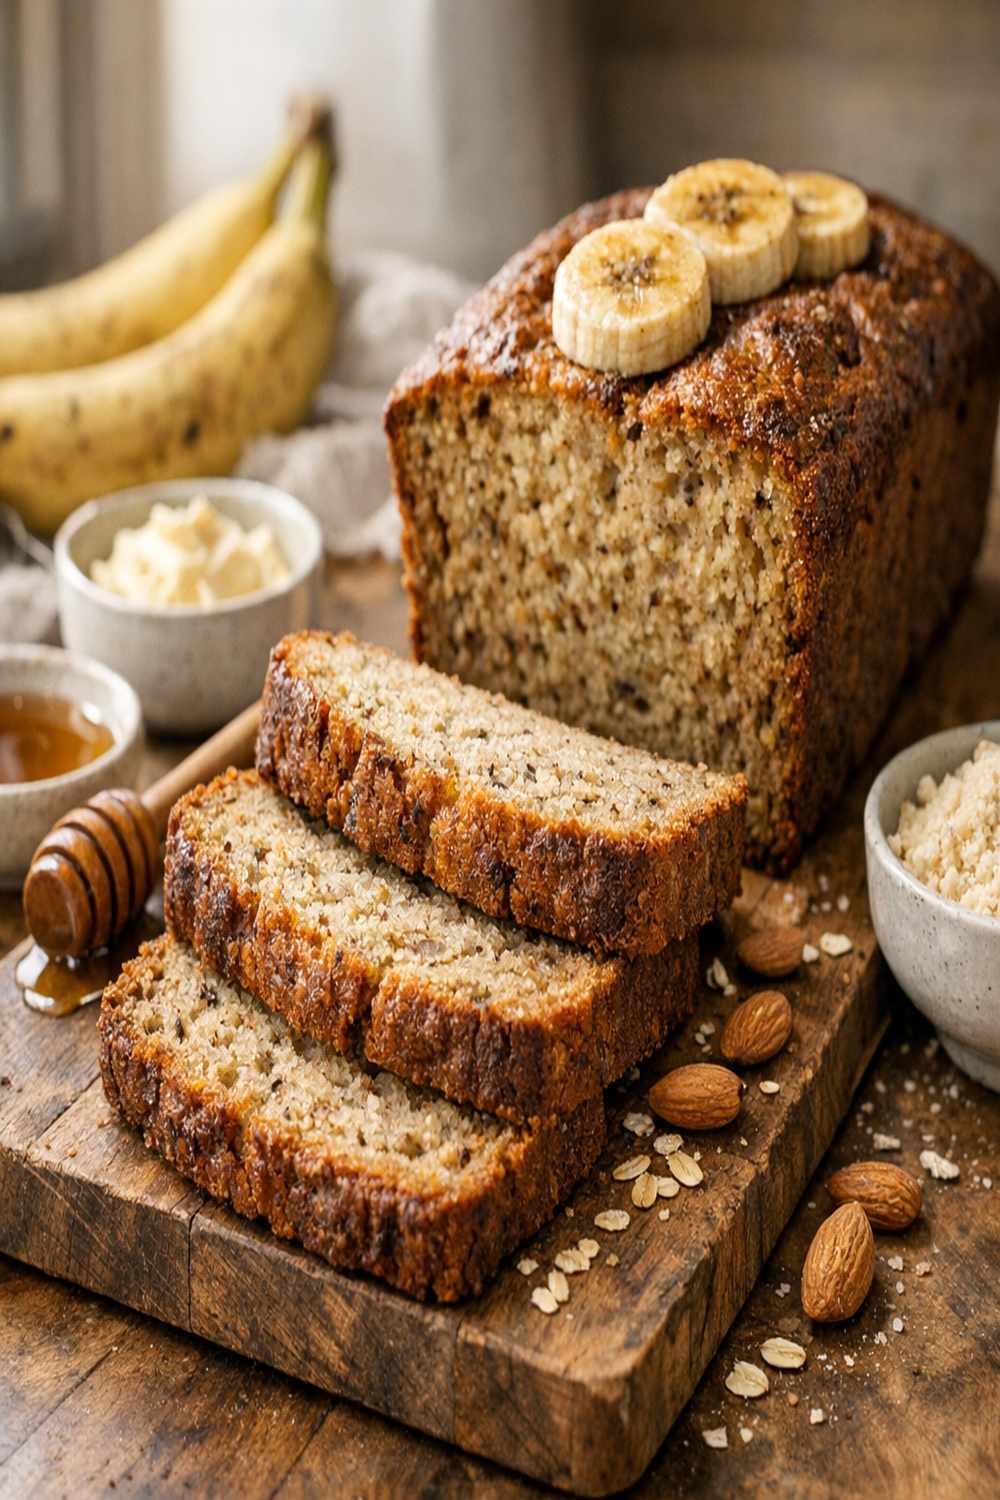
I still remember standing in my kitchen on a Saturday morning, the smell of ripe bananas filling the air while my nephew bounced excitedly around the counter. He’d recently been diagnosed with celiac disease, and I watched his face fall as his mom explained he couldn’t have the banana bread I’d made for years at family gatherings. That moment shifted something in me professionally and personally—I realized that removing gluten didn’t mean removing joy from the table. Within weeks, I’d perfected this gluten free banana bread recipe, and now it’s become the showstopper at every family dinner, potluck, and weekend brunch. Whether you’re cooking for someone with dietary restrictions or simply exploring wholesome ingredients, this loaf proves that inclusive cooking creates the most meaningful memories. If you’re looking to build a complete gluten free breakfast spread, you might also enjoy pairing this with Breakfast Wraps With Eggs Recipe for a full morning celebration.
Gluten Free Banana Bread Recipe: The Ultimate Comfort Loaf for Every Occasion
That first batch I made for my nephew disappeared in under an hour. His eyes lit up the moment he bit into that first slice—warm, tender, and absolutely indistinguishable from traditional banana bread. My sister texted me later: “He asked for seconds. Then thirds.” That’s when I knew I’d created something special. As a registered dietitian, I’ve tested countless gluten free flour blends, experimented with binding agents, and learned exactly which ingredient combinations create that perfect crumb structure. This isn’t just another gluten free recipe—it’s proof that thoughtful cooking meets delicious results.
When to Make Gluten Free Banana Bread Recipe
This loaf shines in so many moments throughout your year. I’ve learned that the best recipes aren’t just about technique—they’re about timing, occasion, and the people gathered around your table. Here are the moments when this banana bread becomes your hero:
- Weekend Brunch Gatherings – Slice this warm from the oven and serve alongside scrambled eggs for a gluten free spread that impresses without fussing
- After-School Snack Time – Portion into lunch boxes or set out for kids who need wholesome, filling fuel between activities
- Holiday Baking Season – Make multiple loaves to gift friends, neighbors, and colleagues who are managing gluten sensitivities
- Meal Prep Sundays – Bake ahead and freeze individual slices for grab-and-go breakfasts throughout the week
- Potluck and Dinner Party Contributions – Bring this as your dish and watch guests request the recipe—it feels homemade but intentional
- Comfort Food Moments – When you need something warm, familiar, and reassuring, this banana bread delivers emotional and physical nourishment
What Makes This Gluten Free Banana Bread Recipe Special
After years of working with clients managing celiac disease and gluten sensitivity, I’ve discovered that most gluten free baked goods fail for one reason: they prioritize texture over taste, or vice versa. This recipe bridges that gap entirely. The secret lies in understanding how xanthan gum mimics gluten’s binding properties while allowing the natural sweetness of ripe bananas to remain the true star.
I use very ripe bananas—the kind with brown spots that make some people hesitate—because their higher sugar content and softer texture create natural moisture and binding power. Combined with melted butter instead of oil, you get that rich, tender crumb that feels indulgent rather than restrictive. The eggs provide additional structure, while the gluten free flour blend (with xanthan gum integrated) delivers reliable lift without any grainy aftertaste.
What truly elevates this recipe is my professional approach to ingredient selection. I specify unsalted butter so you control the salt balance, pure vanilla extract (never imitation) for authentic flavor, and gluten free all-purpose flour with xanthan gum already integrated to prevent the common mistake of over-gumming your batter. This loaf doesn’t taste “gluten free”—it tastes like home.
Scaling for Your Crowd
One of my favorite aspects of recipe development is adapting dishes for different group sizes. This banana bread scales beautifully whether you’re baking for two or twenty. Here’s how I approach scaling based on your gathering size:
- For 2-4 People (One Standard Loaf) – Use the recipe exactly as written. One 4×8 loaf pan bakes in 50-60 minutes and yields approximately 10-12 slices, perfect for a small family or couple with leftovers for the week. Bake time remains consistent at 350°F.
- For 8-12 People (Two Loaves) – Double all ingredients and divide between two greased loaf pans. Arrange pans side by side on the center rack—they may need 5-10 minutes additional baking time (up to 65 minutes total) since they’re sharing oven space. Start checking at 55 minutes with a toothpick.
- For 16-20 People (Four Loaves) – Quadruple the recipe and bake in two batches, 30 minutes apart. This prevents oven crowding and ensures even baking. The first batch will finish at approximately 60 minutes; rotate the second batch in immediately. This timing works beautifully for potlucks and holiday events.
- For 24+ People (Large Event) – Multiply the base recipe by 6-8 and prepare in batches. I recommend baking across two oven racks, rotating halfway through, with batches staggered 20 minutes apart. This requires advance planning but delivers beautiful presentation options.
The Ingredients
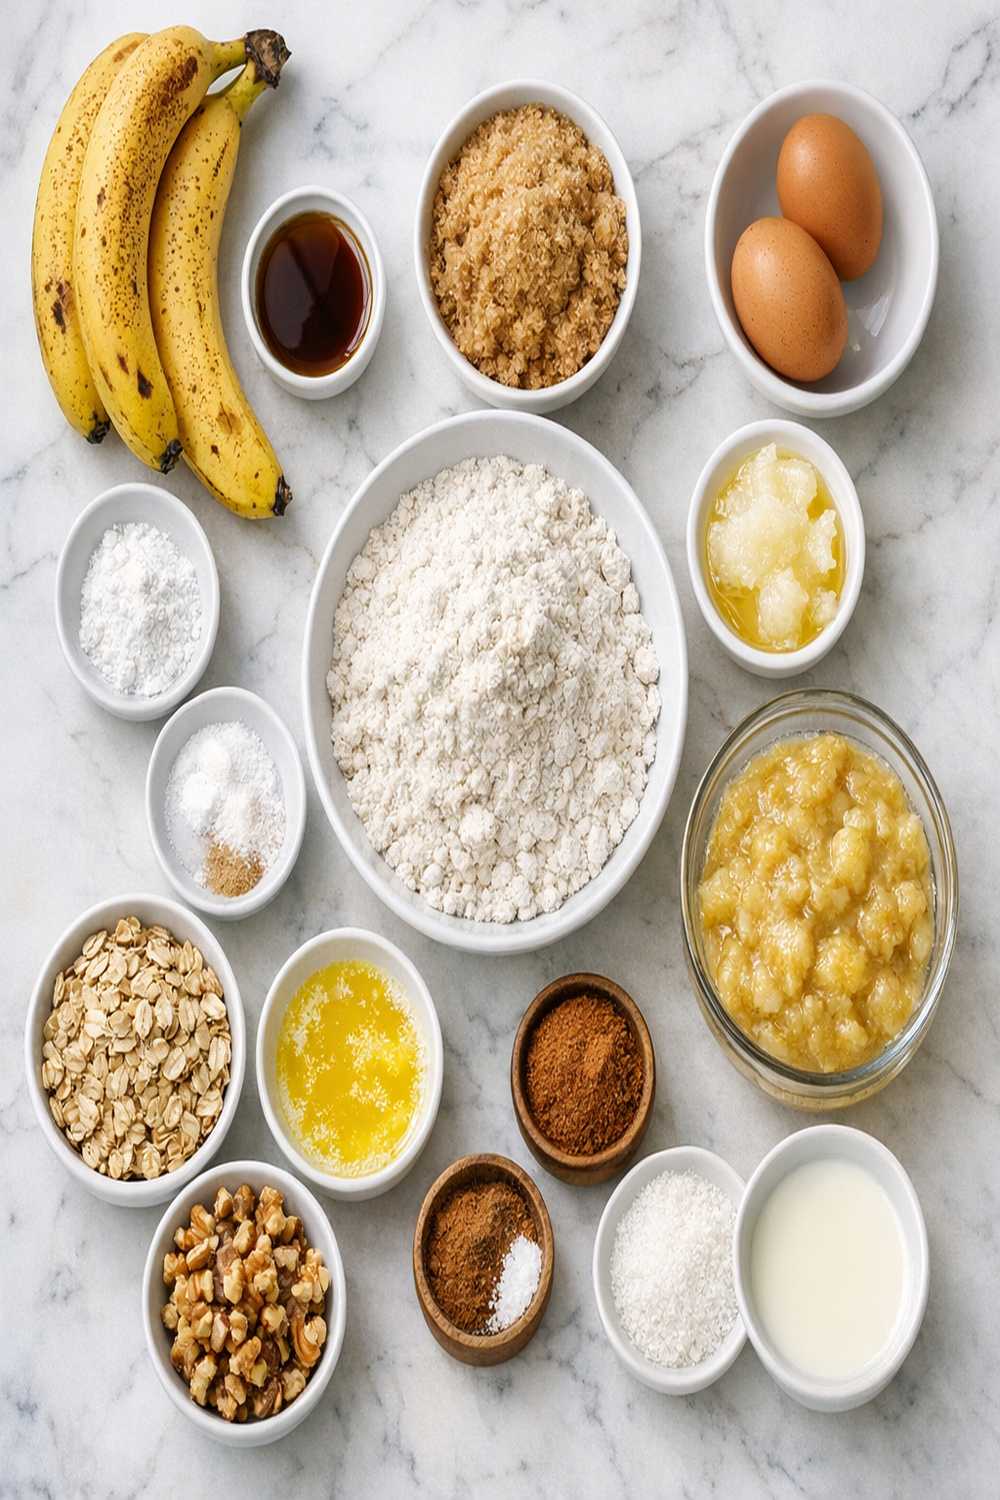
Here’s everything you need to create a loaf that rivals traditional banana bread while remaining completely gluten free. I’ve chosen each ingredient for both nutritional value and baking performance, so your results will be consistently excellent:
- 3 large eggs, beaten (room temperature produces better emulsion with butter)
- ½ cup chopped walnuts or pecans, optional (adds texture; toast briefly before adding for depth)
- ¾ cup granulated sugar (white sugar dissolves cleanly; brown sugar adds moisture if preferred)
- 2-3 very ripe bananas, mashed (brown-spotted fruit contains higher natural sugars and moisture)
- 1½ cups gluten free all-purpose flour with xanthan gum already integrated (prevents over-gumming)
- Pinch of sea salt (enhances banana flavor and balances sweetness)
- 1 teaspoon baking soda (provides rise and lift without chemical aftertaste)
- 1 teaspoon pure vanilla extract (not imitation; Madagascar or Tahitian varieties add depth)
- 1 teaspoon ground cinnamon (optional but recommended; pairs beautifully with banana)
- ⅓ cup unsalted butter, melted and slightly cooled (prevents cooking eggs; unsalted gives you salt control)
- ¼ teaspoon additional xanthan gum (add only if your flour blend doesn’t already contain it)
Yield: One 4×8 loaf, approximately 10-12 slices
How to Make Gluten Free Banana Bread Recipe for Your Occasion
This recipe comes together with remarkable ease, yet the results taste like you spent hours in the kitchen. I’ve structured these steps to maximize flavor development while keeping your active time minimal—perfect for weeknight baking or weekend preparation. The key is understanding each step’s purpose so you can adapt confidently if needed.
Step 1: Prepare Your Oven and Pan
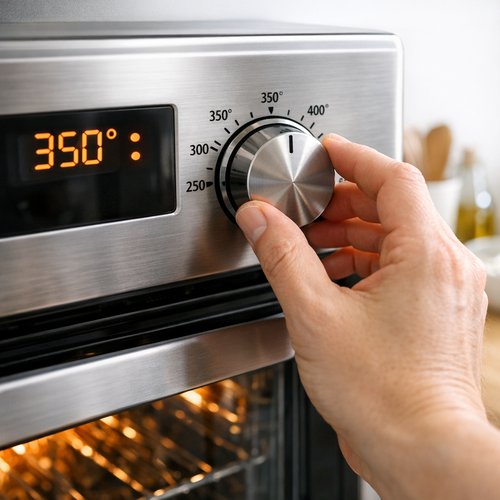
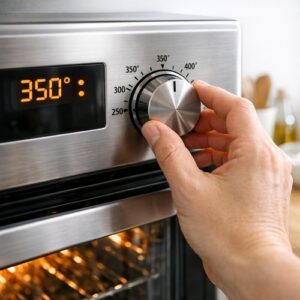
Start by preheating your oven to 350°F (177°C). This moderate temperature is critical for gluten free baked goods—higher heat can cause the exterior to set before the interior bakes through, creating a dense center. While the oven heats, thoroughly spray a 4×8 inch loaf pan with cooking spray, making sure to coat the bottom and all four sides. This prevents sticking and makes removal effortless. Some bakers line with parchment paper for extra insurance; I find this unnecessary with proper spraying, but it’s an excellent make-ahead step if you’re prepping multiple pans the night before an event.
Step 2: Mash and Combine Your Bananas
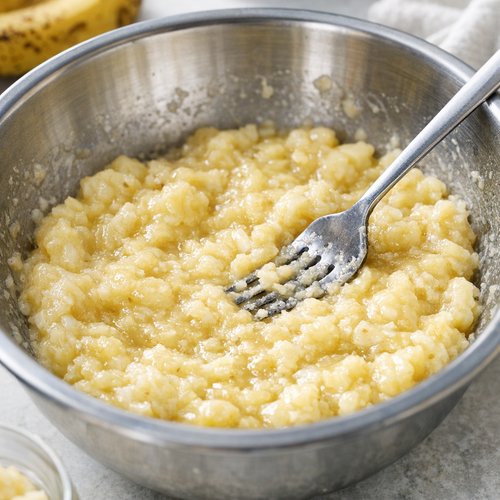
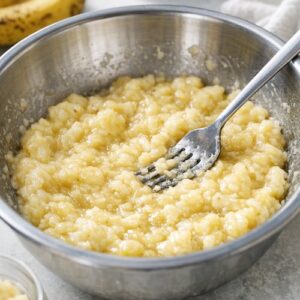
In a large mixing bowl, add your mashed bananas—I use a fork to break them down completely until you have a mostly smooth consistency with just a few small banana pieces remaining. Immediately add the baking soda and stir thoroughly. You’ll notice the mixture bubble slightly as the baking soda reacts with the bananas’ acids; this is exactly what you want. This reaction contributes to lift and tenderness. If you’re scaling this recipe, mash bananas directly in the bowl before measuring to ensure accurate portions. Let this sit for exactly 1-2 minutes while the reaction settles.
Step 3: Incorporate Your Wet Ingredients
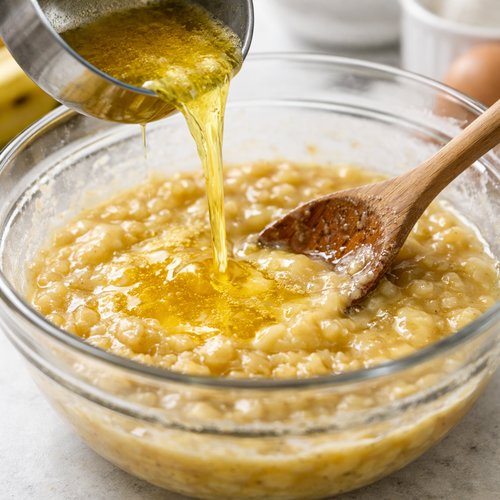
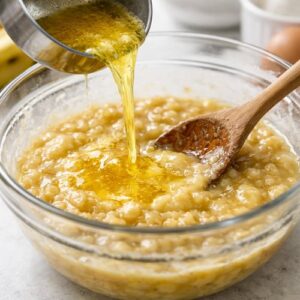
Pour the melted butter (cooled for about 3-4 minutes so it doesn’t cook your eggs) into the banana mixture and stir until combined. The batter should look smooth and glossy at this point. Next, add your beaten eggs, stirring constantly to incorporate them evenly. The mixture will lighten slightly. Add the vanilla extract and stir well. At this stage, if you’re making this for someone with nut allergies, you’d already be planning ahead—this is an excellent point to assess allergen concerns before proceeding to dry ingredients.
Step 4: Combine Dry Ingredients and Finish Your Batter
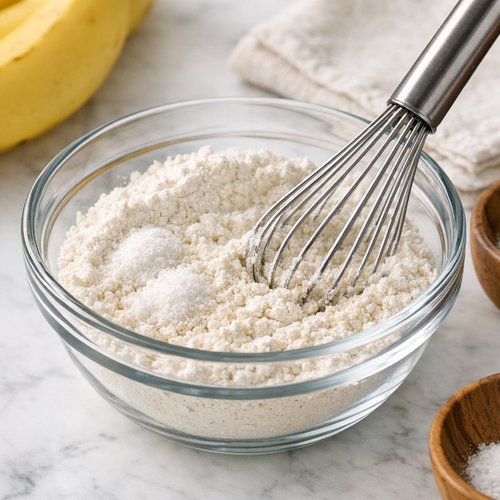
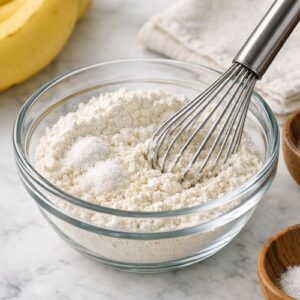
In a separate small bowl, whisk together your gluten free flour blend, xanthan gum (only if needed—check your flour’s label first), and salt. Whisking instead of just stirring helps distribute the xanthan gum evenly, which prevents lumps in your finished loaf. Gently fold the dry ingredients into your wet ingredients using a spatula or wooden spoon—fold rather than stir to avoid overmixing, which can develop toughness even in gluten free baking. Fold just until no flour streaks remain. If you’re adding nuts or cinnamon, fold them in at this final moment.
Step 5: Transfer Batter and Bake
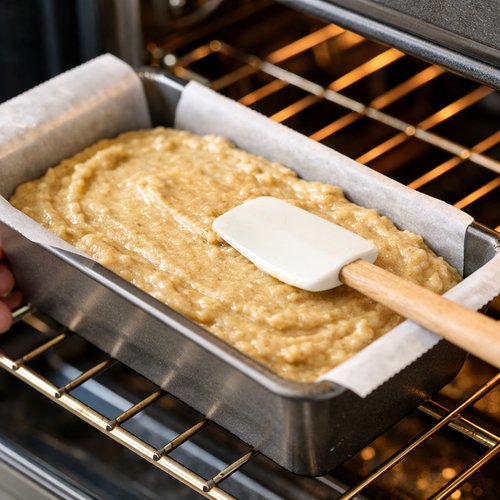
Pour your batter into the prepared loaf pan, smoothing the top gently with a spatula. Place the pan on the center rack of your preheated oven. Bake for 50 minutes to 1 hour, checking at the 50-minute mark with a toothpick inserted into the center. The toothpick should come out clean or with just a few moist crumbs—not wet batter. Every oven bakes differently based on calibration and air circulation, so this is critical. If the top begins browning too quickly, tent with foil during the final 15 minutes. Remove from the oven when a toothpick test succeeds, and the loaf should spring back slightly when lightly pressed.
Step 6: Cool and Serve
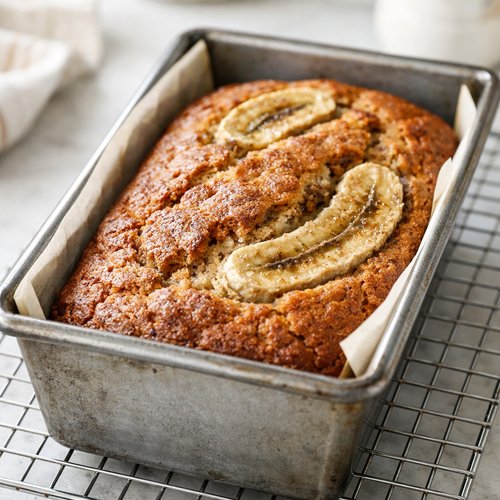
Allow the banana bread to cool in the pan for approximately 10-15 minutes. This resting period allows carryover cooking to finish and the crumb structure to set. Run a thin knife around the edges of the pan and invert onto a wire cooling rack. The bread should release easily if you’ve sprayed properly. Allow it to cool completely before slicing—I know the aroma is tempting, but slicing warm bread can cause crumbling. Completely cooled bread slices cleanly and beautifully, revealing that tender, moist crumb everyone will love.
Make-Ahead Timeline
Planning ahead transforms baking from stressful to seamless. As someone who manages multiple client consultations and meal prep workshops, I’ve learned that strategic preparation is the secret to consistent, delicious results. Here’s my professional approach:
- 3-4 Days Before Your Event – Bake your banana bread loaves and cool completely. Wrap tightly in plastic wrap (then foil for extra protection) and refrigerate. Gluten free baked goods dry out slightly faster than traditional ones, so proper wrapping is essential. They’ll stay fresh for up to 4 days refrigerated, giving you incredible flexibility for weekend gatherings or holiday events.
- 1 Week Before (Freezer Prep) – Bake and cool completely, then wrap individual slices in plastic wrap and place in a freezer-safe container. Banana bread actually freezes beautifully for up to 3 months. Thaw at room temperature for 2-3 hours or overnight in the refrigerator before serving. This is my favorite strategy for hosting frequent brunches—I always have beautiful banana bread ready.
- Day Before Your Gathering – If baking fresh, prepare everything the evening before: mash and measure bananas (store in an airtight container), beat eggs, and measure all dry ingredients into a separate container. The morning of your event, combine everything and bake fresh. Your guests will enjoy warm-from-the-oven banana bread, and your actual prep time that morning is under 10 minutes.
- Day Of (Final Touches) – Remove refrigerated loaves from the fridge 1 hour before serving to allow them to reach room temperature, which maximizes flavor. If serving warm, rewarm in a 300°F oven for 8-10 minutes wrapped in foil to prevent drying. Slice just before serving for the most beautiful presentation.
How to Present and Plate Gluten Free Banana Bread Recipe
Presentation matters, especially when you’re serving gluten free dishes at a gathering. I’ve noticed that beautifully presented gluten free foods immediately signal care and intention rather than restriction. Here are my professional plating strategies that elevate this simple loaf into a showstopping centerpiece:
- The Rustic Centerpiece Presentation – Place your completely cooled loaf on a wooden cutting board or ceramic serving platter. Using a serrated bread knife, slice the loaf into ½-inch pieces while still intact, creating that beautiful “fan” effect without separating slices. Garnish the cutting board with fresh banana slices, a light dusting of cinnamon, and a few candied nuts if desired. This creates an Instagram-worthy presentation that says “homemade” without requiring plating skills.
- The Individual Slice Method – For plated service at formal gatherings, slice banana bread and position each slice at a slight angle on white or neutral plates. Add a small dollop of Greek yogurt (dairy-free coconut whipped cream works beautifully for vegan guests) beside the slice, and garnish with fresh berries and a light drizzle of honey. This transforms banana bread from casual breakfast into elegant brunch fare.
- The Breakfast Board Strategy – Arrange several slices of banana bread on a large wooden board alongside other gluten free breakfast elements: fresh fruit, local honey, nut butters, and cheese. This approach works beautifully for crowd service and allows guests to build their own breakfast plate experience.
- The Toasted Enhancement – For make-ahead loaves, slicing and toasting creates texture contrast and reheats gently. Lightly toast slices in a 300°F oven for 5 minutes, then serve with unsalted butter, almond butter, or a light cream cheese spread. The toasted exterior and warm interior create an elevated eating experience.
Seasonal Variations
As a dietitian who celebrates seasonal eating, I’ve discovered that small ingredient adjustments honor the season while keeping this recipe’s essential character intact. Here’s how I adapt this banana bread throughout the year:
- Spring & Summer Version – Replace ¼ cup of sugar with ¼ cup honey for a lighter touch, and add 1 teaspoon of lemon zest to brighten the banana flavor. Fold in ½ cup fresh strawberries (lightly chopped) or raspberries. This variation celebrates lighter, brighter flavors while maintaining moisture. Baking time increases slightly to 60-65 minutes due to added fruit. The result feels fresh and garden-inspired.
- Fall & Winter Version – Add 1 teaspoon ground cinnamon, ½ teaspoon ground nutmeg, and ¼ teaspoon ground cloves to your dry ingredients. Fold in ½ cup chopped pecans or walnuts and ⅓ cup unsweetened applesauce (reduce sugar to ½ cup if adding applesauce). These warming spices and seasonal nuts make this loaf feel like autumn comfort. Baking time remains 50-60 minutes. This version pairs beautifully with hot apple cider.
Expert’s Nutritional Insight
As a registered dietitian, I approach every recipe through the lens of nutritional value alongside taste and satisfaction. What excites me about this banana bread is that it delivers genuine nutrition—not just empty calories masked as “healthy.”
The ripe bananas provide not just natural sweetness but also significant potassium (essential for heart health), resistant starch (which feeds beneficial gut bacteria), and B vitamins. Each banana contributes approximately 27g of carbohydrates, but here’s the professional insight most recipes miss: very ripe bananas’ starches have converted to simple sugars, making them more readily digestible while their fiber content supports satiety.
The eggs are equally valuable nutritionally. They contribute complete protein (all 9 essential amino acids), choline (crucial for brain health), and lutein and zeaxanthin (powerful eye-protective antioxidants). When I counsel clients managing celiac disease, I emphasize that gluten free eating shouldn’t mean nutrient-poor eating—this loaf proves that entirely.
One nutritional note: while gluten free flour blends often contain refined starches, the xanthan gum’s soluble fiber provides prebiotic benefits that support digestive health. This is why proper measurement matters—too little xanthan gum leaves you with a dense loaf; too much creates a gummy texture that can be difficult to digest.
Common Mistakes to Avoid
After developing and testing this recipe with hundreds of home bakers, I’ve identified the mistakes that derail otherwise careful cooks. Here’s how to sidestep them:
- Using Under-Ripe Bananas – I cannot overstate this: under-ripe bananas lack sufficient sugar and moisture. They’re still yellow, while perfect bananas for this recipe display brown spots. This directly impacts both texture and flavor. If you must use less-ripe bananas, increase sugar to 1 cup and reduce the amount to 2 bananas to prevent excessive moisture.
- Overmixing Your Batter – This is THE most common error I see, especially from home bakers accustomed to standard recipes. Overworking gluten free batter overdevelops the xanthan gum’s binding properties, creating a dense, gummy loaf instead of the tender crumb you’re after. Fold gently, stopping the moment flour streaks disappear. A few small lumps are fine.
- Neglecting to Check Your Flour’s Xanthan Gum Content – Many gluten free all-purpose flour blends already include xanthan gum. Adding additional xanthan gum without checking creates that rubbery texture that gives gluten free baking a bad reputation. Read your flour label carefully. If your flour contains xanthan gum, skip the additional ¼ teaspoon entirely.
- Slicing While Warm – Gluten free cakes and quick breads require complete cooling before slicing. The crumb structure sets as it cools, and slicing warm bread causes crumbling and uneven slices. This requires patience, but it transforms your presentation from rustic to polished.
- Opening the Oven Door Before 50 Minutes – Gluten free baked goods are more sensitive to temperature fluctuations than traditional baked goods. Resist the urge to peek before the 50-minute mark. Use your oven window or wait until it’s time to check with the toothpick test.
What to Serve Alongside Gluten Free Banana Bread Recipe
This banana bread shines as a breakfast or brunch centerpiece, but its true magic emerges when paired thoughtfully with complementary dishes. I build complete menus around it, creating variety without overwhelming preparation. For a beautiful brunch spread, consider pairing this with Breakfast Wraps With Eggs Recipe for savory contrast, or add 2 Ingredient Chaffle Recipe for those exploring low-carb options.
- Scrambled Eggs or Frittata – The savory protein element balances banana bread’s sweetness and creates a complete nutritional profile for sustained energy through the morning.
- Greek Yogurt with Berries and Honey – Tangy yogurt, fresh fruit, and floral honey create textural contrast and add live probiotics to your meal.
- Smoked Salmon and Cream Cheese – For brunch gatherings, this elegant combination elevates banana bread from casual breakfast into sophisticated fare.
- Fresh Fruit Salad – Spring berries, stone fruits in summer, apples and pears in fall—whatever’s seasonal provides freshness and natural sweetness.
- Nut Butters and Honey – Simple almond, peanut, or sunflower seed butter paired with local honey offers indulgence without complexity.
- Herbed Ricotta and Vegetables – For those building more protein-forward meals, herbed ricotta spread on toasted banana bread with cucumber and tomato creates unexpected balance.
Can I Store Gluten Free Banana Bread Recipe?
Storage strategy is crucial for gluten free baked goods, which naturally dry faster than traditional versions due to their different flour composition. I plan all my banana bread baking with storage in mind.
Room Temperature Storage (Best for 2 Days) – Keep your completely cooled loaf in an airtight container at room temperature. Gluten free bread dries more quickly than traditional bread, so I cover it tightly with plastic wrap or store it in a bread box. After 2 days, crumb quality begins declining noticeably.
Refrigerator Storage (Best for Up to 4 Days) – Wrap your cooled loaf tightly in plastic wrap and then aluminum foil (the double-wrapping prevents moisture loss and flavor absorption from other fridge foods). The cool, humid environment of refrigeration actually preserves gluten free baked goods longer than room temperature. Sliced loaves in airtight containers last similarly well.
Freezer Storage (Best for Up to 3 Months) – This is my preferred strategy for long-term storage. Wrap the completely cooled loaf in plastic wrap, then aluminum foil, then place in a freezer-safe bag with the date written clearly. For individual portions, wrap each slice separately. Thaw at room temperature (3-4 hours) or overnight in the refrigerator for best texture. Frozen banana bread maintains its crumb quality better than refrigerated for extended periods.
Individual Slice Storage – I often freeze banana bread in individual portions for busy mornings. Wrap each slice in plastic wrap and freeze in a gallon-sized freezer bag. Toast directly from frozen at 300°F for 8-10 minutes, creating that ideal warm interior with slightly crispy edges.
Nutrition Information
Per serving (one slice of a 12-slice loaf), this banana bread delivers approximately 210 calories, 8g protein, 28g carbohydrates, 8g fat, and 1.2g dietary fiber. These numbers reference USDA FoodData Central standards for comparable ingredients.
The protein comes primarily from eggs (contributing nearly 3g per serving) and the gluten free flour blend. The carbohydrates come from both banana sugars and the flour—this bread sits firmly in the “wholesome comfort food” category rather than low-carb territory, which is appropriate given its purpose.
The fat profile is primarily from eggs and butter, contributing saturated fats alongside beneficial nutrients like choline and fat-soluble vitamins. This is real food nutrition, not a diet product, which aligns with my philosophy as a dietitian: sustainable eating means choosing foods you genuinely enjoy.
Note: Nutrition varies slightly when adding optional ingredients like nuts (adds approximately 40 calories and 3g fat per serving) or cinnamon (negligible changes). Always calculate specific nutrition based on your actual ingredients and serving size.

Gluten Free Banana Bread Recipe
Ingredients
Method
- Start by preheating your oven to 350°F (177°C). This moderate temperature is critical for gluten free baked goods—higher heat can cause the exterior to set before the interior bakes through, creating a dense center. While the oven heats, thoroughly spray a 4x8 inch loaf pan with cooking spray, making sure to coat the bottom and all four sides. This prevents sticking and makes removal effortless. Some bakers line with parchment paper for extra insurance; I find this unnecessary with proper spraying, but it's an excellent make-ahead step if you're prepping multiple pans the night before an event.
- In a large mixing bowl, add your mashed bananas—I use a fork to break them down completely until you have a mostly smooth consistency with just a few small banana pieces remaining. Immediately add the baking soda and stir thoroughly. You'll notice the mixture bubble slightly as the baking soda reacts with the bananas' acids; this is exactly what you want. This reaction contributes to lift and tenderness. If you're scaling this recipe, mash bananas directly in the bowl before measuring to ensure accurate portions. Let this sit for exactly 1-2 minutes while the reaction settles.
- Pour the melted butter (cooled for about 3-4 minutes so it doesn't cook your eggs) into the banana mixture and stir until combined. The batter should look smooth and glossy at this point. Next, add your beaten eggs, stirring constantly to incorporate them evenly. The mixture will lighten slightly. Add the vanilla extract and stir well. At this stage, if you're making this for someone with nut allergies, you'd already be planning ahead—this is an excellent point to assess allergen concerns before proceeding to dry ingredients.
- In a separate small bowl, whisk together your gluten free flour blend, xanthan gum (only if needed—check your flour's label first), and salt. Whisking instead of just stirring helps distribute the xanthan gum evenly, which prevents lumps in your finished loaf. Gently fold the dry ingredients into your wet ingredients using a spatula or wooden spoon—fold rather than stir to avoid overmixing, which can develop toughness even in gluten free baking. Fold just until no flour streaks remain. If you're adding nuts or cinnamon, fold them in at this final moment.
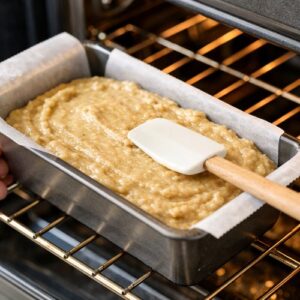
- Pour your batter into the prepared loaf pan, smoothing the top gently with a spatula. Place the pan on the center rack of your preheated oven. Bake for 50 minutes to 1 hour, checking at the 50-minute mark with a toothpick inserted into the center. The toothpick should come out clean or with just a few moist crumbs—not wet batter. Every oven bakes differently based on calibration and air circulation, so this is critical. If the top begins browning too quickly, tent with foil during the final 15 minutes. Remove from the oven when a toothpick test succeeds, and the loaf should spring back slightly when lightly pressed.
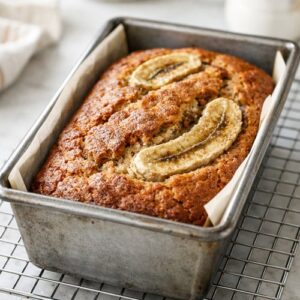
- Allow the banana bread to cool in the pan for approximately 10-15 minutes. This resting period allows carryover cooking to finish and the crumb structure to set. Run a thin knife around the edges of the pan and invert onto a wire cooling rack. The bread should release easily if you've sprayed properly. Allow it to cool completely before slicing—I know the aroma is tempting, but slicing warm bread can cause crumbling. Completely cooled bread slices cleanly and beautifully, revealing that tender, moist crumb everyone will love.
Notes
FAQs
Can I Make This Banana Bread Without Xanthan Gum?
This is the question I hear most frequently, and the answer is nuanced. If your gluten free flour blend already contains xanthan gum (check the label—most brands do), then absolutely yes, you can make this recipe exactly as written by simply skipping the additional ¼ teaspoon.
If you’re using a xanthan gum-free flour blend and want to omit xanthan gum entirely, you’ll need to compensate. Add one additional egg (total of 4 eggs) to provide binding and structure. The texture will be slightly more crumbly, but entirely acceptable. Alternatively, use a commercial gluten free flour blend that already includes xanthan gum—this is actually my recommended approach because it takes guesswork out of the equation.
What’s the Difference Between This Gluten Free Banana Bread and Regular Banana Bread?
Excellent question, and the answer reveals my professional philosophy. The structural difference is that gluten free flour blends use xanthan gum to mimic gluten’s binding properties. Gluten creates elasticity and chewiness that, frankly, isn’t desired in banana bread—we want tender crumb anyway.
The taste difference should be negligible. If banana bread tastes distinctly “gluten free,” that means either the flour blend is low-quality or the recipe lacks proper technique. My recipes always aim for genuine deliciousness, not “good for gluten free.”
The practical difference is that gluten free batter behaves slightly differently—it requires gentler handling and may bake slightly faster due to the different flour composition. These are small adjustments that make significant difference.
Can I Use a Banana Bread Mix Instead of Making From Scratch?
Technically yes, but I never recommend it to clients or friends. Commercial mixes often contain preservatives, added sugars, and less-than-ideal fat sources. Most require adding additional ingredients anyway—eggs, butter, liquid. The difference between mixing a box and mixing my from-scratch version is 3-4 minutes of active time.
More importantly, making banana bread from scratch gives you complete control over ingredient quality. You know exactly what’s in every bite. For someone with celiac disease or gluten sensitivity, this quality and safety control matters deeply.
Why Doesn’t My Banana Bread Rise Enough?
This usually points to one of three issues: under-ripe bananas (which don’t provide sufficient lift and moisture), old baking soda (baking soda loses potency over time—it should be fresh), or overmixing (which, as I mentioned, overdevelops the xanthan gum’s binding properties and prevents rise).
Less commonly, oven temperature is the culprit. If your oven runs cool, your loaf won’t rise adequately. Invest in a simple oven thermometer—they’re inexpensive and reveal oven temperature accuracy. Many home ovens run 25 degrees cooler or hotter than displayed.
Can I Add Chocolate Chips or Other Mix-Ins to This Recipe?
Absolutely. Chocolate chips, fresh berries, nuts, and even dried fruit work beautifully. My only guidance: don’t exceed ¾ cup total mix-ins, as excess additions can weigh down the batter and prevent proper rise. If using fresh berries, toss them lightly in gluten free flour before folding them in—this prevents them from sinking to the bottom of the loaf.
My favorite addition is ½ cup dark chocolate chips (70% cacao or higher) folded in gently at the very end. The melting chocolate creates pockets of richness without overwhelming the banana flavor.
More Recipes for Your Table
- Breakfast Wraps With Eggs Recipe – Savory, protein-rich complement to banana bread that creates a balanced brunch
- 2 Ingredient Chaffle Recipe – For guests exploring lower-carb options alongside your gluten free spread
- Breakfast Pineapple Recipe – Fresh tropical fruit element that rounds out a complete gluten free breakfast
Final Thoughts: Making Memories Around the Table
That Saturday morning with my nephew taught me something fundamental about cooking with purpose. Food isn’t just fuel—it’s connection, inclusion, and love made tangible. This gluten free banana bread has appeared at more family celebrations than I can count, always eliciting the same response: surprise that something so delicious is entirely gluten free, followed by requests for slices to take home.
As a registered dietitian, I’ve learned that the most nutritious, sustainable eating habits develop when food brings genuine joy rather than restriction. This recipe embodies that philosophy entirely. Whether you’re baking for someone managing celiac disease, exploring gluten free cooking for other reasons, or simply want banana bread that tastes absolutely incredible, you now have a trusted recipe in your kitchen.
Invite someone to your table. Bake this banana bread. Watch their faces light up at that first bite. Notice how food creates moments where the daily hustle pauses and genuine connection happens. That’s what I’m passionate about as a dietitian and as someone who loves feeding the people around me.
Join me on this cooking journey!
