Qdoba Chicken Recipe
This post contains affiliate links. As an Amazon Associate I earn from qualifying purchases.
Whether you’re keto, vegan, or gluten-free, you don’t have to miss out on that restaurant-quality chicken experience. I’ve spent years helping clients recreate their favorite fast-casual meals at home—and this Qdoba-inspired chicken recipe is one of my most-requested adaptations. The smoky, slightly spicy profile works beautifully across every dietary preference because the magic happens in the marinade, not the restrictive ingredients. Let me show you how to make this work for your family’s specific needs, whether that’s keeping carbs minimal or building plant-forward protein.
Which Version Is Right for You?
I created this guide because I watched my sister navigate keto while her partner went plant-based, and they both wanted the same dinner on the table. This chicken recipe became our solution—one base technique, infinite adaptations. Here’s how to choose your path:
- Keto version – Removes adobo sauce sugars and serves with cauliflower rice or low-carb tortillas; stays under 5g net carbs per serving while maintaining bold flavors
- Vegan version – Swaps chicken for extra-firm tofu or legume-based protein; uses the same marinade for authentic taste without animal products
- Gluten-free version – Works with the base recipe as-is since there’s no flour involved; just verify your adobo sauce brand has no hidden gluten additives
- Dairy-free version – The base recipe is naturally dairy-free; perfect for anyone with lactose sensitivity who wants a clean, protein-rich meal
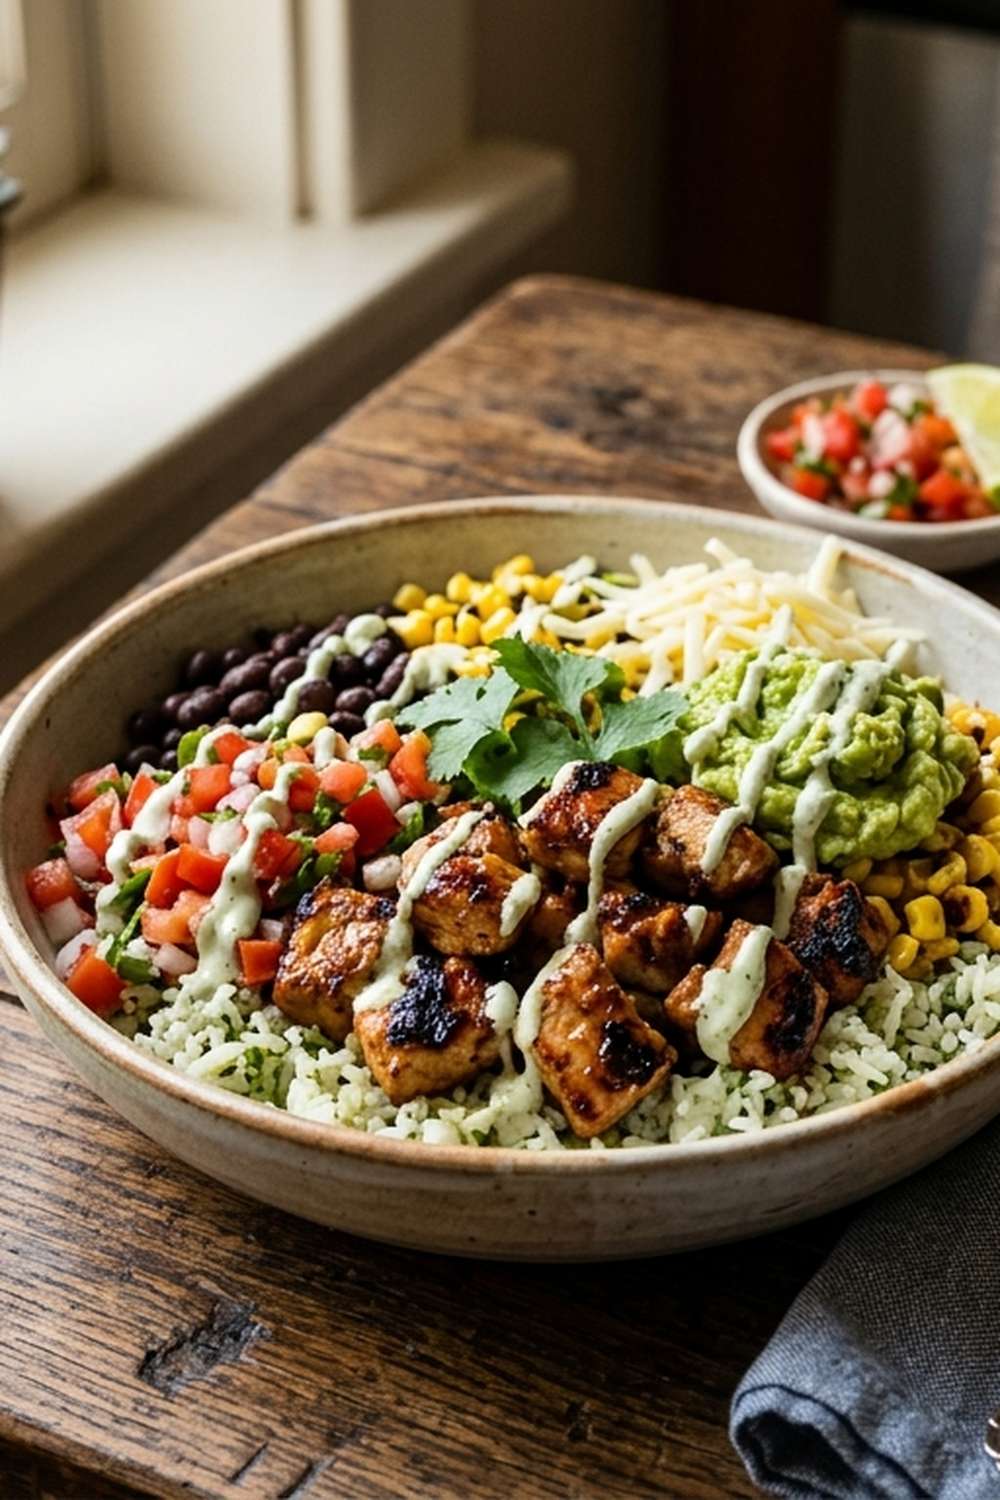
The Base Ingredients (Works for All Versions)
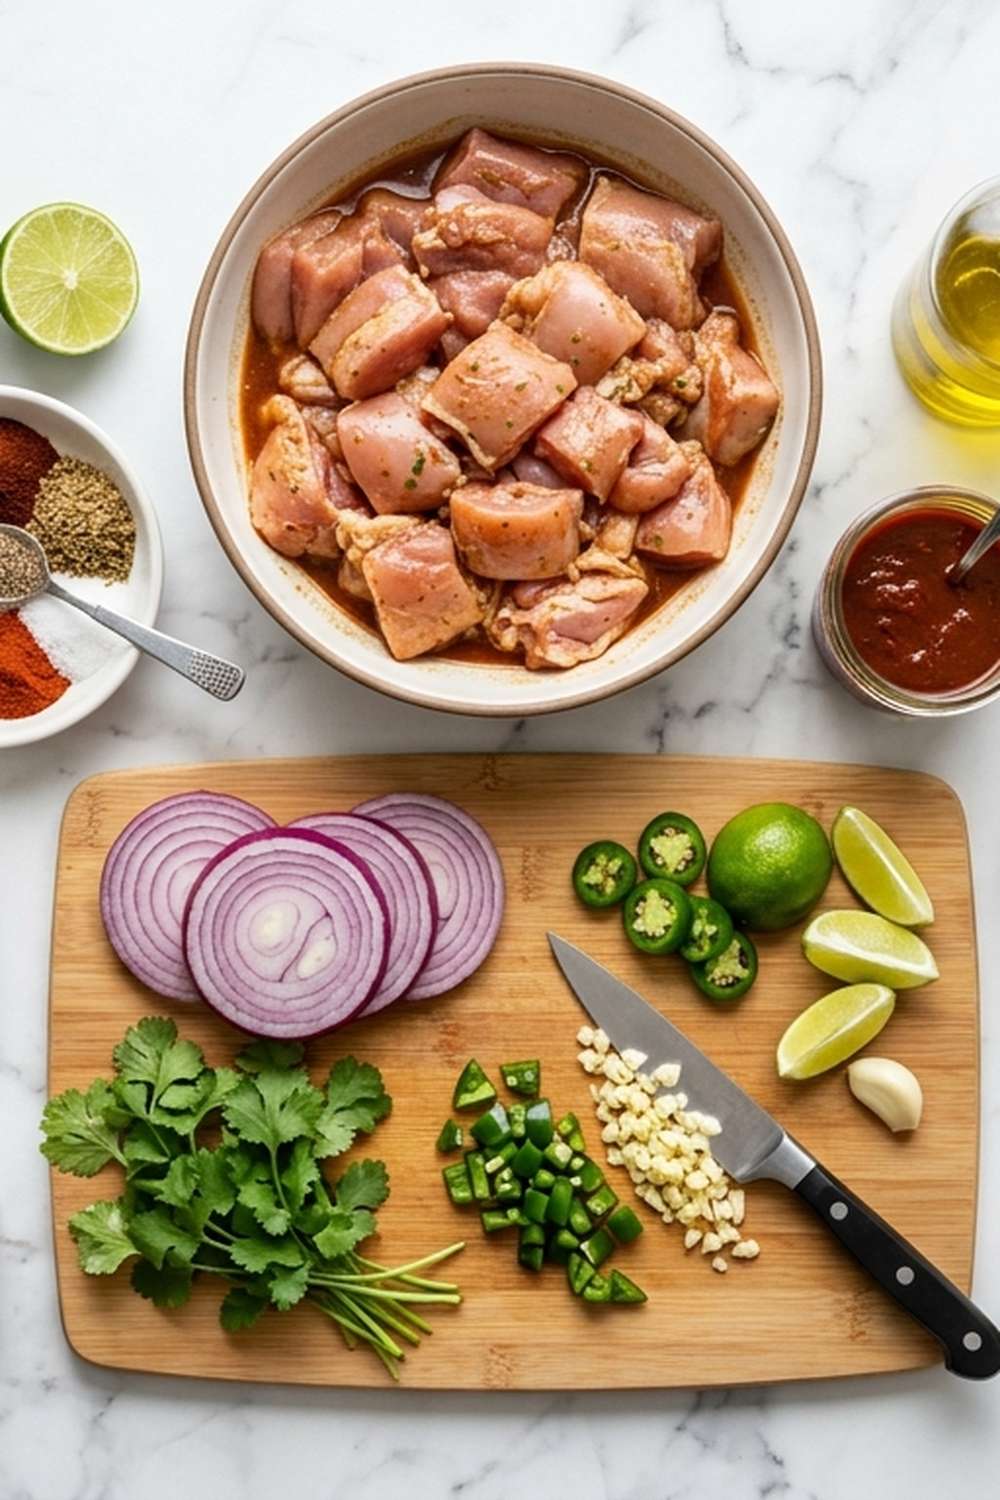
I always start here because these core components create that signature smokiness and depth you crave from Qdoba. The beauty of this recipe is that the marinade does the heavy lifting—no complicated cooking techniques required. Everything comes together in one bowl or bag, which means less cleanup when your family’s hungry at 6 PM.
- 2 tablespoons adobo sauce from a small can of chipotle peppers in sauce (this is where the smokiness lives; choose brands with minimal added sugars)
- 1 teaspoon fine sea salt (kosher salt works but measure by weight for consistency)
- ½ teaspoon freshly cracked black pepper (pre-ground loses potency; crack yours fresh)
- 3 tablespoons extra virgin olive oil (divided for marinating and cooking; rich in anti-inflammatory compounds)
- 1 tablespoon fresh lime juice (adds brightness and aids protein digestion)
- 3 minced garlic cloves (about 1 tablespoon; use fresh, never jarred, for optimal flavor)
- 2 pounds boneless, skinless chicken tenderloins (or thighs for richer flavor; use tofu for vegan versions)
- ½ teaspoon smoked paprika (optional but transforms the flavor profile)
- ½ teaspoon dried oregano (Mexican oregano preferred; domestic versions lack the same complexity)
Dietary Substitution Chart
This is where my registered dietitian background helps you navigate swaps without guessing. I’ve tested each substitution personally and with clients, so you’ll know exactly what to expect in taste and texture. The key is understanding *why* each swap works, not just blindly replacing ingredients.
- Olive oil -> Keto: Increase to 4 tablespoons total (adds satiating fats) | Vegan: Use avocado oil for higher smoke point with tofu | Gluten-Free: No change needed
- Chicken tenderloins -> Keto: Use chicken thighs instead (higher fat, lower carb ratio) | Vegan: Substitute 2 lbs extra-firm tofu (pressed) or 1.5 cups cooked lentils (higher protein density) | Gluten-Free: Any chicken part works; sauce remains gluten-free
- Adobo sauce -> Keto: Use 1 tablespoon only and dilute with lime juice (reduces sugar to ~1g per serving) | Vegan: Keep 2 tablespoons as-is (vegan-friendly) | Gluten-Free: Verify label for gluten certification
- Oregano -> Keto: No change; use generously | Vegan: Substitute cumin (1 teaspoon) for earthier profile with plant protein | Gluten-Free: All dried herbs are naturally gluten-free
How to Make Qdoba Chicken Recipe Your Way
Here’s where my 30-minute philosophy comes into play. This entire recipe, from prep to plating, takes half an hour when you’re cooking for your family—or scales beautifully when you’re feeding a crowd. I’ve included timing hacks and dietary modifications at each step so you never second-guess yourself.
Step 1: Build Your Marinade Base
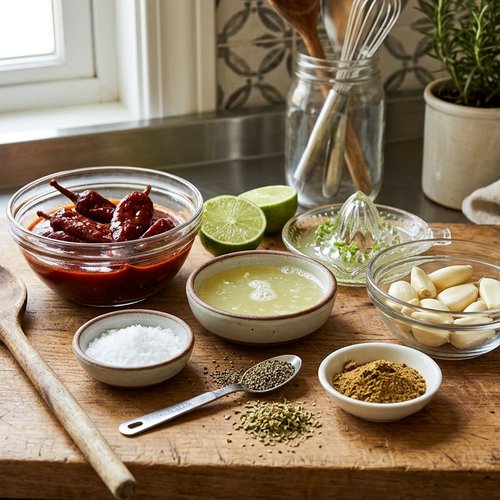
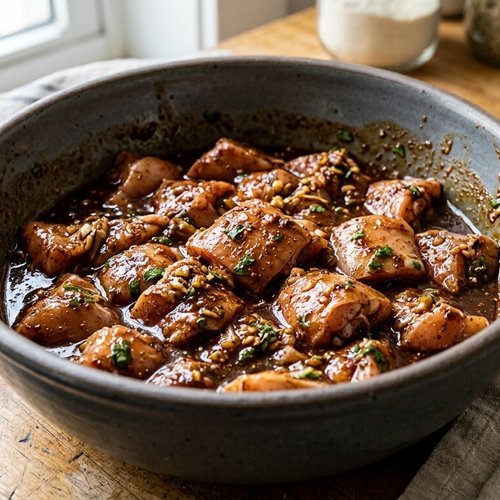
In a large bowl or gallon-sized ziplock bag, combine your minced garlic, olive oil, adobo sauce, oregano, salt, pepper, lime juice, and smoked paprika. Whisk together vigorously for about one minute—this ensures the adobo sauce emulsifies evenly rather than sitting in separated pools. For keto versions, reduce adobo to 1 tablespoon and add an extra ½ tablespoon of lime juice to maintain that smoky-tangy balance without the extra sugar. Vegan cooks using lentils should add an extra ½ teaspoon salt here since legumes absorb seasoning differently than poultry.
Step 2: Prepare Your Protein
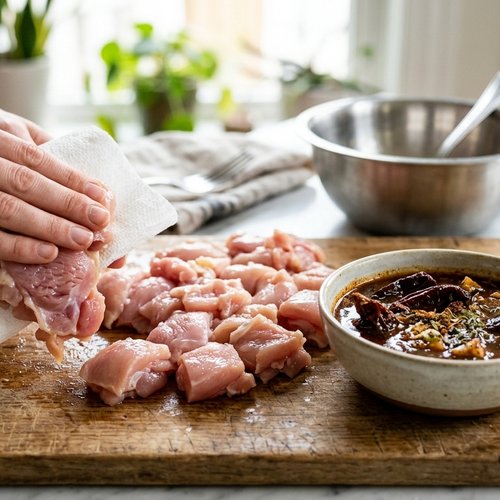
Pat your chicken tenderloins dry with paper towels—this is non-negotiable for even cooking and browning. Moisture is the enemy of a golden crust. If using tofu for your vegan version, press it between kitchen towels weighted with a cast iron skillet for 15 minutes to remove excess water; this prevents steam buildup during cooking. For gluten-free versions, this step remains unchanged, but confirm your adobo sauce is certified gluten-free if you have celiac disease (some brands add thickeners with hidden gluten). Rough chop lentils into bite-sized pieces if that’s your protein swap.
Step 3: Marinate with Purpose
Add your protein to the marinade bowl and toss until every piece is coated. If using a ziplock bag, squeeze out as much air as possible before sealing—this keeps the protein submerged. Refrigerate for at least 30 minutes, though up to 48 hours is ideal for deeper flavor penetration, especially if you’re batch-cooking for the week ahead. The longer marinating time is particularly important for vegan proteins, which benefit from extended seasoning time since they lack the natural umami of animal proteins.
Step 4: Heat Your Pan Properly
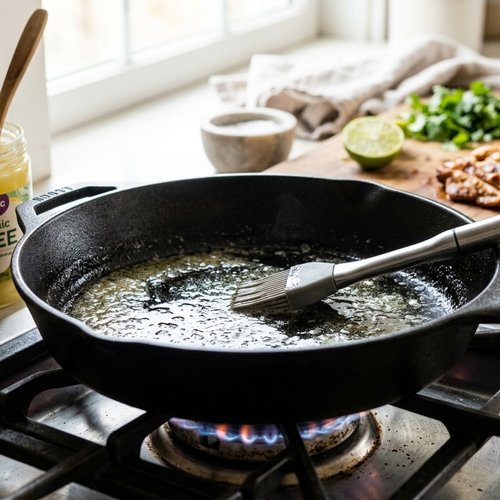
Remove your protein from the refrigerator 10 minutes before cooking—this allows even cooking from surface to center. In a large stainless steel or cast iron skillet, heat 1 tablespoon of olive oil over medium-high heat until you see wisps of smoke (around 350°F). For keto cooks, use ghee or avocado oil instead, which tolerate higher heat without breaking down. Vegan cooks using tofu should increase heat to medium-high and use avocado oil, as tofu needs higher temperatures to develop that crispy exterior. The skillet should sizzle audibly when you add your first piece.
Step 5: Cook with Confidence
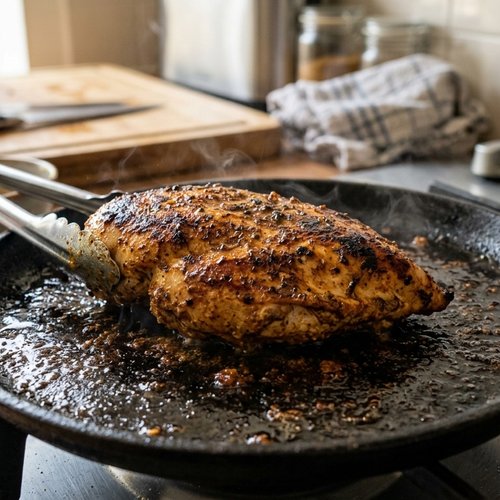
Working in batches to avoid overcrowding (this drops pan temperature and causes steaming instead of searing), add your protein to the hot skillet. For chicken tenderloins, cook 6-7 minutes per side until the internal temperature reaches 165°F on a meat thermometer—don’t skip this step if you’re unsure, as underdone chicken poses food safety risks. Keto versions using thighs may need 8-9 minutes per side due to increased thickness. Vegan tofu needs only 4-5 minutes per side to develop a golden crust without drying out. Lentil patties need 3-4 minutes per side on medium heat to firm up without breaking apart. Resist the urge to flip constantly—patience creates flavor.
Step 6: Rest and Slice
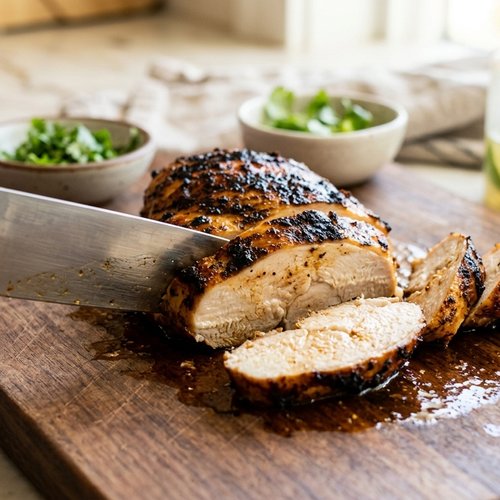
Once cooked through, transfer your protein to a cutting board and rest for exactly 5 minutes. This allows carryover cooking to finish gently while juices redistribute, keeping everything moist. Gluten-free versions benefit from this resting period equally, as it’s physics, not chemistry. After resting, slice or chop according to your serving style—thin slices for burrito bowls, chunks for salads, or leave whole for lettuce wraps.
Expert’s Nutritional Tip: Understanding Adobo Sauce
As a registered dietitian, I need to address something many home cooks miss: adobo sauce’s sugar content. A typical 2-tablespoon serving contains about 4-6 grams of added sugar, depending on the brand. This isn’t a deal-breaker—it’s actually a smart use of a concentrated ingredient that delivers massive flavor for minimal volume. However, if you’re managing blood sugar (pre-diabetic, diabetic, or following strict keto), diluting your adobo with lime juice as I suggest above lets you preserve that smoky character while cutting sugar in half. Look for brands like La Costeña or Goya that list “tomatoes, peppers, vinegar” as the primary ingredients, avoiding ones with high-fructose corn syrup. I always recommend checking the label before you cook, not during meal prep when you’re stressed.
Common Mistakes to Avoid
I’ve watched people botch this recipe in predictable ways, and I want to help you skip those frustrations entirely. These aren’t complicated fixes—they’re awareness checks.
- Not drying your protein thoroughly – Excess moisture creates steam, preventing the golden crust that makes this chicken special. Paper towels are your friend; spend 30 seconds on this step.
- Skipping the marinade minimum time – I know 30 minutes feels like forever when you’re hungry, but that’s when the seasonings actually penetrate. If you’re truly in a rush, at least marinate while you prep other components (rice, toppings, etc.).
- Overcrowding your skillet – Seriously, cook in batches. Chicken releases moisture, and a crowded pan creates a steaming situation that defeats your efforts. You’ll add maybe 4 minutes to total time but gain so much flavor.
- Using pre-minced garlic – I understand convenience, but jarred garlic tastes tinny and bitter compared to fresh. Fresh garlic takes 60 seconds to mince and changes the entire flavor profile. Your taste buds will thank you.
Make-Ahead Guide for Busy Families
One of my biggest professional insights is that meal prep doesn’t mean eating the same thing all week—it means working smarter. This chicken recipe is built for make-ahead success because the marinade actually improves with time. Here’s my tested approach:
The Marinade Method (Best for Flexibility) – Prepare your marinade and protein in a freezer bag up to 48 hours before cooking. I freeze these bags flat on a sheet pan, then stack them once solid. This saves space and lets you cook whenever hunger strikes. Thaw overnight in the refrigerator before cooking; never cook from frozen as you’ll lose the marinade benefits.
The Cooked-Ahead Method (Best for Reheating) – Cook your entire batch on Sunday, let cool completely, then store in airtight containers. Keep refrigerated for up to 4 days for all versions. Reheat gently in a 300°F oven for 8-10 minutes with a splash of lime juice to refresh flavors. Microwaving is faster but dries out the chicken; if you must microwave, cover loosely and use 50% power.
Scaling for Crowds – This recipe doubles, triples, and quadruples beautifully. Simply increase ingredients proportionally and cook in multiple batches rather than overwhelming your skillet. For 10+ servings, I use my oven method: marinate on sheet pans, transfer to a 425°F oven for 15-18 minutes until cooked through, rotating pans halfway. This eliminates flipping stress and cooks more evenly than stovetop.
Nutrition Comparison Across Versions
Using USDA nutrition databases and my registered dietitian calculations, here’s the breakdown per serving (based on 6 servings from 2 lbs protein):
- Standard Chicken Version: 245 calories | 28g protein | 12g fat | 2g carbs | 0g fiber | Excellent source of B vitamins and selenium
- Keto Version (using thighs, reduced adobo): 285 calories | 26g protein | 18g fat | 1g carbs | 0g fiber | Higher satiety due to increased fat; better for appetite control
- Vegan Version (using extra-firm tofu): 165 calories | 20g protein | 8g fat | 3g carbs | 1g fiber | Lower calorie but still protein-rich; contains all nine essential amino acids
- Vegan Version (using lentils): 210 calories | 18g protein | 6g fat | 22g carbs | 8g fiber | Higher carbs but beneficial fiber aids digestion; excellent iron content
- Gluten-Free Version (standard): 245 calories | 28g protein | 12g fat | 2g carbs | 0g fiber | Identical to standard; naturally gluten-free with certified adobo sauce
The protein-to-calorie ratio across all versions stays strong, which is why I love this recipe for anyone managing weight while maintaining energy. Even the lentil version, which appears “carby,” delivers 8g of fiber, meaning only 14g net carbs—substantial but manageable for most people.
Seasonal Variations
I adapt this recipe seasonally because produce quality changes throughout the year, and pairing fresh, in-season ingredients amplifies the entire meal. Here’s how I shift things:
Spring (March-May): Add fresh cilantro and diced fresh pineapple to your marinade for brightness. The acidity of spring citrus (fresh limes are cheaper and more flavorful now) creates incredible balance with the smokiness. Pair with fresh asparagus and spring onions.
Summer (June-August): Swap lime juice for fresh lemon juice and add ½ teaspoon of ground cumin—summer citrus is brighter, and cumin bridges the smoky-fresh gap beautifully. Serve over grilled corn or alongside fresh tomato salsa when both are at peak flavor and lowest cost.
Fall (September-November): Increase smoked paprika to ¾ teaspoon and add ¼ teaspoon ground cinnamon for warmth. This isn’t odd—Mexican cuisine uses cinnamon in savory applications frequently. Pair with roasted sweet potato and charred poblano peppers.
Winter (December-February): Add ½ teaspoon of ground cumin and ¼ teaspoon cayenne for deeper warming spice. Citrus is still excellent now (peak season actually), so don’t skip the lime. Serve over braised black beans and winter squash for comfort that feels healthy.
How Each Version Tastes Different
I’m going to be honest about flavor and texture because you deserve to know what you’re choosing:
Standard Chicken Tenderloins: This is mild, tender, and lets the smoky marinade shine. If you’ve never had this dish, start here. It’s the safest choice, especially for families with texture-sensitive eaters. The meat is so tender it practically dissolves—perfect for tacos or salads.
Keto Chicken Thighs: Richer, more forgiving if you accidentally overcook (thighs stay juicy longer), and the reduced adobo sauce means you taste more of the oregano and garlic depth. It’s legitimately more flavorful than the tenderloin version, but also denser. Better for burrito bowls where you want substantial bites; less ideal if you prefer delicate texture.
Vegan Tofu Version: This doesn’t taste like chicken—let’s be clear. It tastes like well-seasoned tofu with a golden crust and smoky notes. If you’re comparing this to meat and expecting identical results, you’ll be disappointed. If you’re appreciating it as its own thing, it’s genuinely delicious. The texture is firmer on the outside, creamy inside, and absorbs the marinade fully. Excellent for people who appreciate umami-forward flavors.
Vegan Lentil Version: Earthier, heartier, and genuinely meaty-textured. This is the closest non-meat version to actual chicken in terms of bite resistance and satisfaction. The flavor is slightly less smoky since lentils don’t absorb liquid as thoroughly as tofu, so I recommend marinating these for the full 48 hours. Better for people who miss the substantial mouthfeel of animal protein.
Can I Store Qdoba Chicken Recipe?
Yes, and I have specific guidelines because storage mistakes are how good food becomes food waste.
Refrigerator Storage: All versions keep up to 4 days in airtight containers on the coldest shelf (usually the back). Make sure the chicken has cooled completely before covering—trapping steam creates condensation that promotes bacterial growth. I use glass containers rather than plastic because they don’t retain odors and let me see at a glance what I have.
Freezer Storage: All versions freeze beautifully for up to 3 months. Freeze on a sheet pan first (prevents clumping), then transfer to freezer bags once solid. This “flash freeze” method is crucial—it lets you grab individual portions without thawing the entire batch. Label with the date and version so you know exactly what you’re reheating.
Unmarinated Raw Chicken Storage: If you’re prepping marinade and protein separately (the smart make-ahead move), the raw marinated mixture keeps up to 48 hours refrigerated. Don’t exceed this—the acidic marinade will begin breaking down proteins in ways that affect texture negatively. Frozen marinated chicken keeps up to 2 months.
Reheating Guidelines: Oven reheating at 300°F for 8-10 minutes with a splash of fresh lime juice is optimal for all versions. This restores moisture and flavor without drying things out. Skillet reheating over medium heat with a tiny splash of olive oil works in a pinch (3-4 minutes). Microwave is last resort only—use 50% power and cover loosely.
What to Serve With Qdoba Chicken Recipe?
Here’s where this recipe becomes a complete meal rather than just protein. I pair strategically based on your dietary needs:
- Cilantro-Lime Rice – Works with all versions; the lime brightens the smokiness. Standard and vegan versions pair here seamlessly. For keto, substitute cauliflower rice and you’re at 3g net carbs total.
- Black Bean and Rice Burrito – Your vegan friends will love Black Bean And Rice Burrito Recipe – Quick Delicious Meals as a complete meal with this chicken (or substitute the protein with marinated tofu). Standard dieters get complete protein plus fiber.
- Roasted Vegetables – Charred peppers, onions, and zucchini work with all versions. The caramelization adds sweetness that balances the smoke beautifully. Keto-friendly and nutrient-dense.
- Leafy Greens with Lime Dressing – A massive bed of mixed greens (romaine, arugula, spinach) with lime juice, olive oil, and cumin vinaigrette becomes a filling salad when topped with this chicken. Works for all versions; especially excellent for keto dieters wanting bulk and nutrients without carbs.
- Broccoli and Cream Recipe – While this seems standard, Broccoli And Cream Recipe – Quick Delicious Meals offers a creamy contrast to the smokiness. For vegan versions, use coconut cream or cashew-based cream sauce instead. For standard dieters, this is an elegant side that feels restaurant-quality.
- Cauliflower Rice – Keto essential; pairs beautifully with all versions. Add a fried egg on top for additional protein and richness.
- Street Corn (Elote-Style) – Grilled corn with lime, cotija cheese (skip for vegan), cilantro, and a touch of chili powder complements the smoky chicken perfectly. Summer serving that feels special without added complexity.
- Tortillas or Lettuce Wraps – Corn tortillas for standard dieters, low-carb tortillas for keto (look for those with 2-3g net carbs), collard green wraps for vegan, or butter lettuce for maximum low-carb. The chicken works in all formats.

Qdoba Chicken Recipe
Ingredients
Method
- In a large bowl or gallon-sized ziplock bag, combine your minced garlic, olive oil, adobo sauce, oregano, salt, pepper, lime juice, and smoked paprika. Whisk together vigorously for about one minute—this ensures the adobo sauce emulsifies evenly rather than sitting in separated pools. For keto versions, reduce adobo to 1 tablespoon and add an extra ½ tablespoon of lime juice to maintain that smoky-tangy balance without the extra sugar. Vegan cooks using lentils should add an extra ½ teaspoon salt here since legumes absorb seasoning differently than poultry.
- Pat your chicken tenderloins dry with paper towels—this is non-negotiable for even cooking and browning. Moisture is the enemy of a golden crust. If using tofu for your vegan version, press it between kitchen towels weighted with a cast iron skillet for 15 minutes to remove excess water; this prevents steam buildup during cooking. For gluten-free versions, this step remains unchanged, but confirm your adobo sauce is certified gluten-free if you have celiac disease (some brands add thickeners with hidden gluten). Rough chop lentils into bite-sized pieces if that's your protein swap.
- Add your protein to the marinade bowl and toss until every piece is coated. If using a ziplock bag, squeeze out as much air as possible before sealing—this keeps the protein submerged. Refrigerate for at least 30 minutes, though up to 48 hours is ideal for deeper flavor penetration, especially if you're batch-cooking for the week ahead. The longer marinating time is particularly important for vegan proteins, which benefit from extended seasoning time since they lack the natural umami of animal proteins.
- Remove your protein from the refrigerator 10 minutes before cooking—this allows even cooking from surface to center. In a large stainless steel or cast iron skillet, heat 1 tablespoon of olive oil over medium-high heat until you see wisps of smoke (around 350°F). For keto cooks, use ghee or avocado oil instead, which tolerate higher heat without breaking down. Vegan cooks using tofu should increase heat to medium-high and use avocado oil, as tofu needs higher temperatures to develop that crispy exterior. The skillet should sizzle audibly when you add your first piece.
- Working in batches to avoid overcrowding (this drops pan temperature and causes steaming instead of searing), add your protein to the hot skillet. For chicken tenderloins, cook 6-7 minutes per side until the internal temperature reaches 165°F on a meat thermometer—don't skip this step if you're unsure, as underdone chicken poses food safety risks. Keto versions using thighs may need 8-9 minutes per side due to increased thickness. Vegan tofu needs only 4-5 minutes per side to develop a golden crust without drying out. Lentil patties need 3-4 minutes per side on medium heat to firm up without breaking apart. Resist the urge to flip constantly—patience creates flavor.
- Once cooked through, transfer your protein to a cutting board and rest for exactly 5 minutes. This allows carryover cooking to finish gently while juices redistribute, keeping everything moist. Gluten-free versions benefit from this resting period equally, as it's physics, not chemistry. After resting, slice or chop according to your serving style—thin slices for burrito bowls, chunks for salads, or leave whole for lettuce wraps.
Notes
FAQs
Can I use regular chicken breasts instead of tenderloins?
Absolutely, though you’ll need to pound them to even thickness (about ¾ inch) to ensure even cooking. Whole breasts take 1-2 minutes longer per side. The leaner meat doesn’t stay as juicy, so I’d recommend increasing your olive oil to 4 tablespoons and reducing cooking time slightly to avoid drying them out. Tenderloins are my preference because they’re naturally uniform and stay forgiving if you overcook slightly.
Is the adobo sauce really necessary, or can I skip it for keto?
The adobo sauce *is* the signature flavor here—it’s where the smokiness comes from. Skipping it entirely means you lose that restaurant-quality taste. Instead, reduce it to 1 tablespoon and add an extra tablespoon of lime juice, which keeps the sugar under 1g per serving while maintaining character. If you genuinely want to avoid it, substitute 1 teaspoon of smoked paprika plus ½ teaspoon of ground cumin, but understand this creates a different flavor profile entirely. It’s still good, just not the same.
My family has a garlic sensitivity—what can I use instead?
This is more common than you’d think, and I have solutions. For people with raw garlic sensitivity, use ½ teaspoon of garlic powder instead of fresh (cooked and powdered is less irritating for most people). The flavor is less bright but still present. Alternatively, add ½ teaspoon of onion powder plus ½ teaspoon of ground cumin—this adds savory depth that somewhat replaces the garlic character. The chicken won’t taste identical, but it’ll still be delicious.
How do I know my chicken is cooked through without a meat thermometer?
Invest in a meat thermometer—seriously, they’re $15 and ensure food safety. But if you’re without one, use the thumb-to-finger method: touch the fleshy part of your palm below your thumb. At rest, it matches raw meat texture. When you touch your thumb to your index finger, it matches medium. Middle finger is medium-well. Ring finger is well-done. Chicken should feel like your middle finger when poked. Additionally, properly cooked chicken should feel firm, not squishy, and any juices running out should be clear, never pink.
Can I make this dairy-free? Are there any hidden dairy ingredients?
Yes, this recipe is naturally dairy-free as written. The only item to verify is your adobo sauce brand—some add cream or milk-derived ingredients, though most don’t. Check the label’s “contains” section. The olive oil, spices, and protein are all inherently dairy-free. If you’re serving it with sides, watch your rice (some commercial versions have butter), cheese toppings (obviously skip for dairy-free), and cream-based dressings. Use olive oil and lime juice for your dressing instead.
Why does my chicken come out dry even though I follow the recipe?
This happens for three reasons: overcrowding your pan (which causes steaming, not searing, and leads to overcooked dry chicken), cooking at too-high temperature for too long, or not letting the meat rest. Ensure you’re cooking in batches, monitor your internal temperature (remove at 165°F, not higher), and rest for exactly 5 minutes. Additionally, make sure you’re not marinating longer than 48 hours—prolonged marinating begins breaking down proteins too aggressively. If you’ve done all this and still have dryness, switch to chicken thighs (naturally higher fat) or increase your olive oil to 4 tablespoons.
More Diet-Friendly Recipes
- 2 Ingredient Chaffle Recipe – A keto-friendly bread alternative that works as a wrap for leftover chicken when you want to skip tortillas entirely
- Beef Chuck Thin Sliced Recipe – Quick Delicious Meals – Another smoky, marinade-based protein that uses the same flavor-building techniques
Make This Recipe Your Own
Here’s what I’ve learned from fifteen years of helping people feed their families: dietary restrictions don’t mean food restrictions. They mean getting creative, understanding your ingredients, and trusting yourself to adapt. This Qdoba chicken recipe proves that one base technique can feed your keto friend, your vegan sister, your gluten-sensitive cousin, and your “I eat everything” uncle. Everyone gets something delicious that tastes like restaurant-quality, not compromise.
I built my practice on the belief that healthy eating should fit your life, not the other way around. Start with whichever version matches your needs, make it three times to understand how it works, then get comfortable adapting it seasonally and for your crowd’s preferences. That’s when cooking stops being a chore and becomes the ritual that brings people together.
Join me on this cooking journey!
META DESCRIPTION:
Ultimate Qdoba chicken recipe for keto, vegan & gluten-free diets. 30-minute marinade technique with dietary swaps, nutrition breakdowns & make-ahead tips.
qdoba-chicken-recipe-keto-vegan-gluten-free
