Healthy Pesto Chicken Recipe
This post contains affiliate links. As an Amazon Associate I earn from qualifying purchases.
If you’ve always wanted to make a restaurant-quality pesto chicken but felt intimidated by the technique, this is your starting point. I’m going to walk you through every single step so that you feel confident the moment you start seasoning that chicken. This dish has been a game-changer in my own kitchen since I started blending my dietitian knowledge with quick cooking methods. It’s creamy, flavorful, and packed with nutrients that make you feel good about feeding it to your family. When you master this recipe, you’ll also have the skills to create dishes like Pork Milanese, which uses the same pan-searing technique.
How to Make Healthy Pesto Chicken for the First Time (You’ve Got This)
I remember the first time I tried making pesto chicken at home. It was a Tuesday evening, and I had promised my family something “special” that didn’t involve takeout. I was nervous about the pesto—would it burn? Would the chicken be dry?—but I decided to trust the process. What I discovered that night changed how I cook: the combination of herb-forward pesto with the creaminess of plant-based milk creates a sauce that tastes indulgent but is genuinely wholesome. Now, nearly a decade later, this recipe appears on my table at least twice a month because it hits that sweet spot between nutrition and pure comfort.
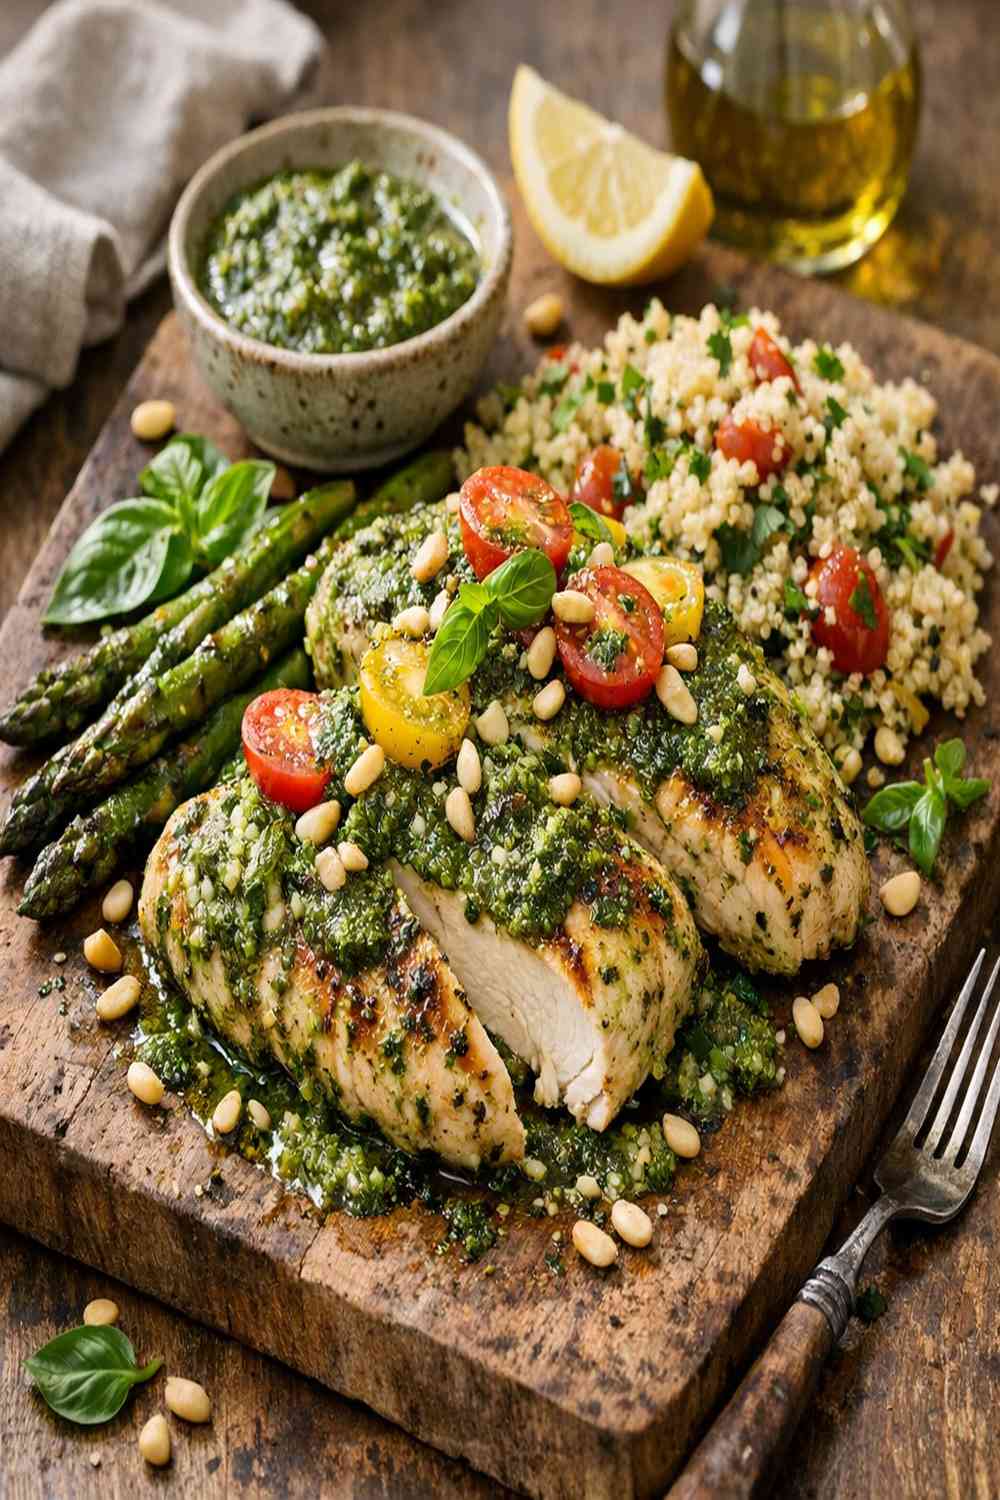
What to Expect Before You Start
This recipe takes about 30 minutes of active cooking time, though I recommend marinating the chicken for at least one hour beforehand (or overnight if you’re planning ahead). The difficulty level is beginner-to-intermediate: you’re essentially marinating protein, searing it in a pan, and simmering it in a sauce. If you’ve ever made a pan sauce or cooked chicken breast before, you already have the foundational skills. What makes this feel special is the combination of techniques—but nothing here is advanced.
- The marinade step is your friend, not a hassle – It seasons the chicken deeply and keeps it incredibly moist. Even 30 minutes makes a difference, but overnight transforms it into something restaurant-quality. This is the secret most home cooks skip.
- Searing chicken perfectly is easier than you think – The biggest beginner fear is dry chicken, but using a proper pan temperature and not moving the chicken constantly prevents this. You’re aiming for a golden crust, not charred edges.
- The sauce comes together in minutes – By the time your chicken is seared, you’re just whisking together five simple ingredients and pouring them over. The heat does the work of thickening it naturally.
Equipment You’ll Need (And What You Can Skip)
I’m a firm believer that good cooking isn’t about fancy gadgets—it’s about understanding technique. Here’s what actually matters for this recipe:
- Large nonstick skillet (10 to 12 inches) – This is where the magic happens. It prevents sticking and makes cleanup effortless. A regular stainless steel pan works too, but requires more oil and attention. Budget option: any 10-inch pan you already own.
- Instant-read meat thermometer – Optional but game-changing. It removes all guesswork about doneness. A good one costs $15 and lasts years. No thermometer? Cut the thickest part of the chicken; it should show no pink inside.
- Small mixing bowl – For whisking the sauce ingredients together before adding to the pan. Nothing fancy required.
- Measuring spoons and cups – Accuracy matters here because the ratios affect sauce consistency. Use actual measuring tools, not guessing.
- Ziploc bag or glass container – For marinating. A Ziploc bag uses less space in the fridge and is easier to manipulate while coating the chicken.
The Ingredients – A Beginner’s Shopping Guide
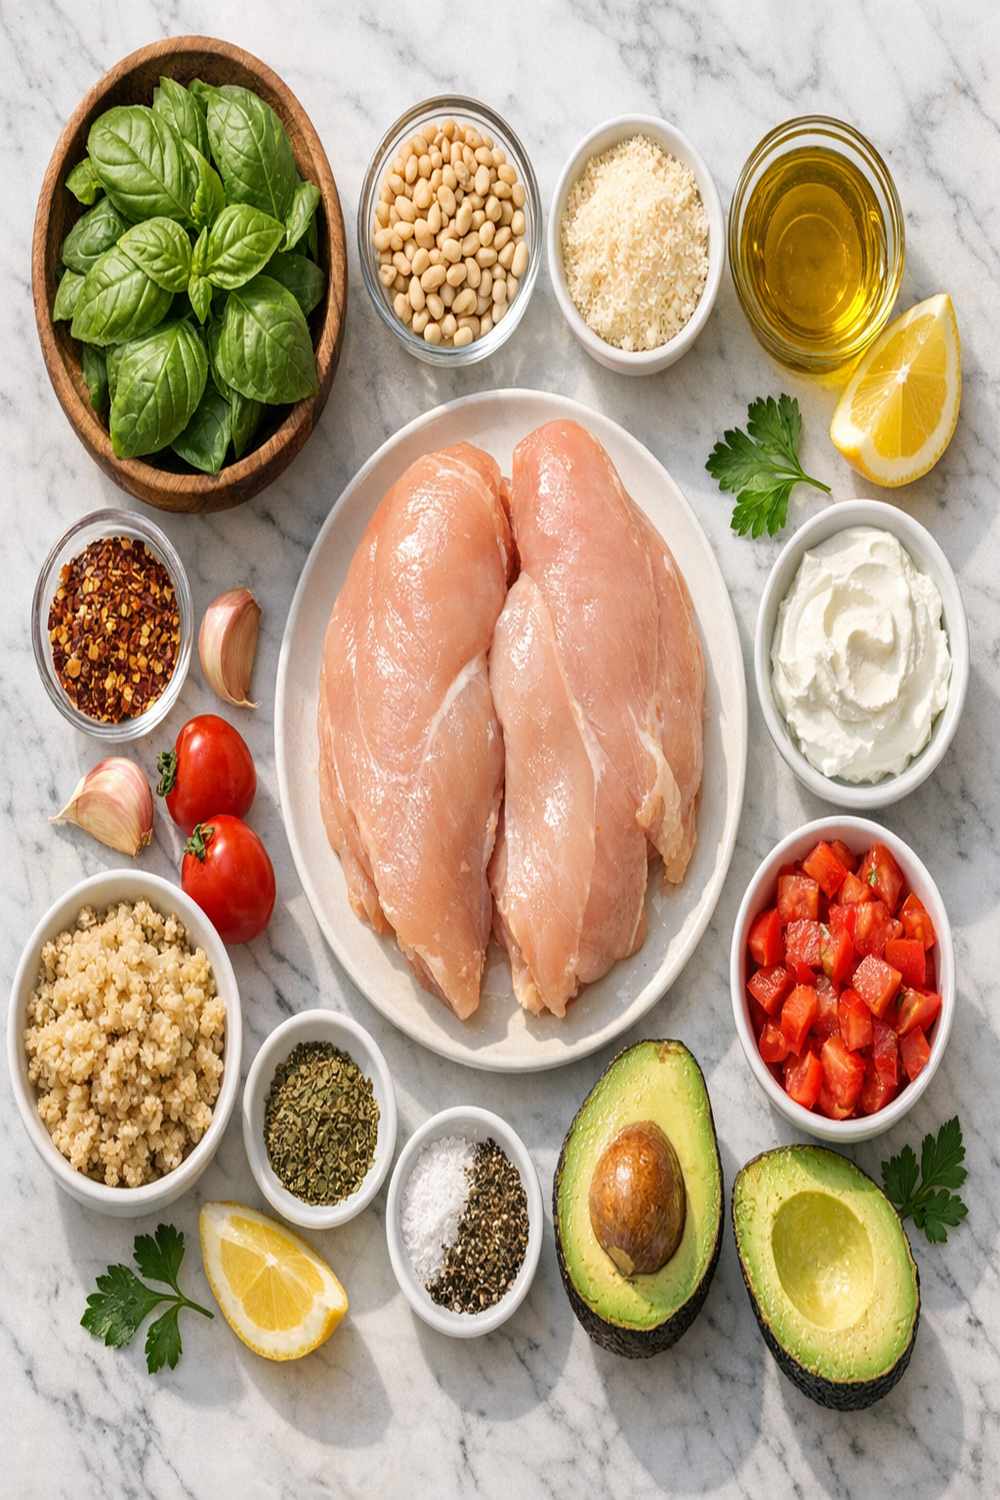
Shopping for these ingredients is straightforward, but let me point out exactly where to find everything and what to look for. I shop at regular grocery stores in Fairfield, and I know these items are available everywhere. Pay attention to the quality notes—they genuinely affect your final dish.
- 3 tablespoons basil pesto, divided (store-bought is fine; Banza and Barilla make excellent versions, or make your own if you have fresh basil on hand)
- 2 tablespoons extra virgin olive oil (cold-pressed, first-press creates better flavor; this is not the time to use light olive oil)
- 1 pound boneless, skinless chicken breasts (look for breasts that are roughly the same thickness; if one is significantly thicker, gently pound it to ½-inch even thickness so it cooks evenly)
- Freshly shaved Parmesan cheese (use a vegetable peeler to create thin shards; pre-grated has anti-caking agents that affect meltability)
- ¾ cup unsweetened almond milk (or any plant-based milk you prefer; oat milk creates a slightly richer sauce, while almond milk is more neutral)
- Kosher salt and freshly ground black pepper (to taste; never use pre-ground pepper from a container older than 6 months—the flavor genuinely fades)
- 2 garlic cloves (minced; fresh garlic makes a visible difference compared to jarred, and it takes 30 seconds to mince)
- 1 tablespoon cornstarch or arrowroot powder (this thickens the sauce; gluten-free flour also works if that’s your preference)
- 2 cups cherry tomatoes (halved; look for tomatoes that give slightly when pressed; cherry tomatoes in winter are picked greener, so spring through fall tastes noticeably better)
- Fresh basil leaves (for garnish; tear them by hand rather than cutting to prevent browning)
Step-by-Step: Your First Healthy Pesto Chicken Recipe
I’m about to walk you through this recipe as if you’ve never cooked chicken before. I’m doing this because even experienced cooks sometimes second-guess themselves, and I want you to feel completely supported. Each step builds on the previous one, so read through the entire recipe once before starting. This is your roadmap.
Step 1: Prepare Your Chicken for Marinating
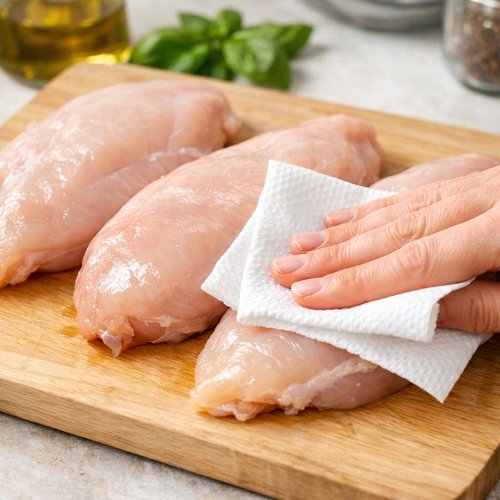
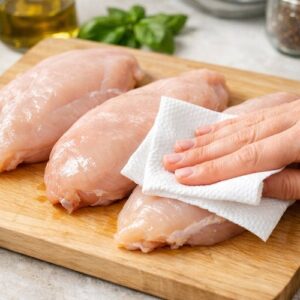
Take your pound of chicken breasts and place them on a clean cutting board. Pat them completely dry with paper towels—this is the detail most beginners miss, and it matters. Wet chicken won’t absorb the marinade as effectively. Now, look at the thickness: are both breasts roughly the same size? If one looks noticeably thicker (more than ½-inch difference), you need to pound it. Place the thicker breast between two pieces of plastic wrap and use the flat side of a meat mallet to gently tap it until it’s even. This ensures even cooking.
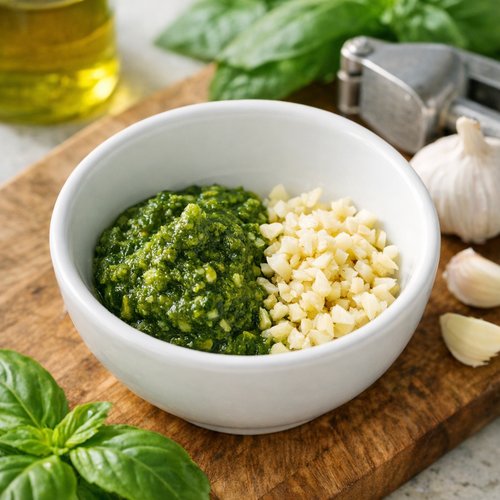
Open your Ziploc bag and pour in 2 tablespoons of basil pesto directly into the bottom. Place the chicken breasts on top of the pesto. Do not seal the bag yet. This is important because you’re about to work the pesto into the chicken, and you need access.
Step 2: Coat the Chicken in Pesto Marinade
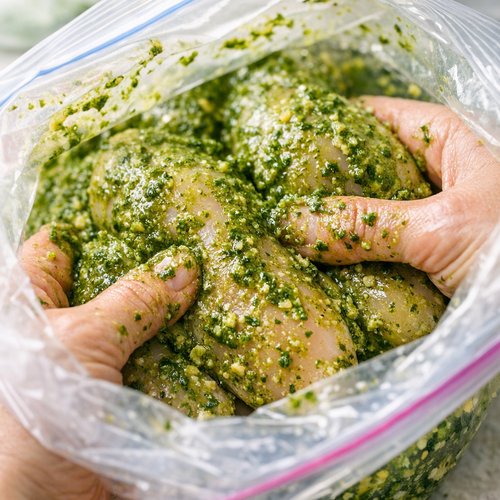
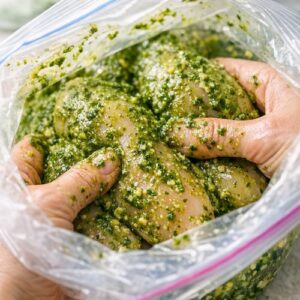
Here’s where technique matters: gently massage the pesto over every surface of each chicken breast. Use your hands (yes, inside the bag) to work it in. Think of it like giving the chicken a light massage—you’re not aggressively forcing pesto into the meat, just ensuring every part is coated. The pesto should look like it’s stuck to the chicken, not pooling at the bottom of the bag. This takes about two minutes of gentle work.
Once both breasts are coated, seal the Ziploc bag and place it in the refrigerator. The minimum time is one hour, but overnight is ideal. If you’re in a rush, even 30 minutes helps. The salt in the pesto is already beginning to season the meat at a cellular level, which keeps it incredibly juicy when cooked.
Step 3: Prepare Your Sauce Ingredients While the Chicken Marinates
While the chicken is marinating, you can get ahead. Take a small mixing bowl and gather these ingredients: 1 tablespoon fresh basil pesto, 2 minced garlic cloves, 1 tablespoon cornstarch, ¾ cup unsweetened almond milk, and a pinch of kosher salt and black pepper. Don’t whisk them together yet—that comes right before you need the sauce. If you whisk too early, the cornstarch will begin to hydrate and won’t incorporate smoothly.
Step 4: Get Your Pan Ready
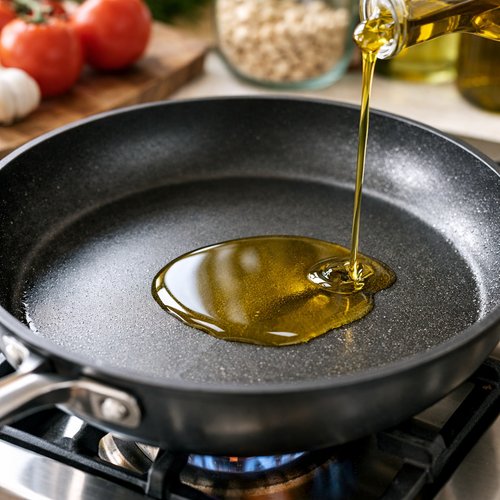
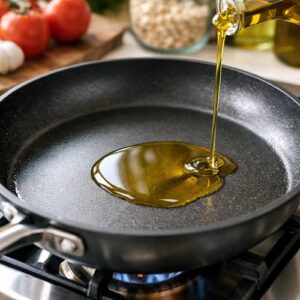
When you’re ready to cook, place your large nonstick skillet on the stove over medium-high heat. Add 2 tablespoons of extra virgin olive oil. Wait for the oil to shimmer—this means it’s hot enough. Here’s the test: hold your hand about 3 inches above the pan (not touching it). If you feel distinct heat in about 3 seconds, the pan is ready. If you’ve never tested pan temperature before, this feels uncertain, so let me be clear: when the oil moves freely in the pan and has a slight shimmer, not quite smoking, you’re there.
Step 5: Sear the Chicken to Golden Perfection
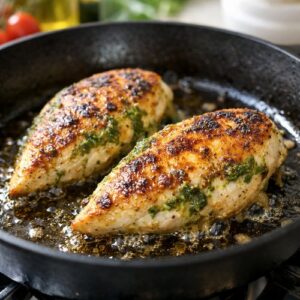
Remove the chicken from the refrigerator. Gently place both breasts in the hot oil. Do not move them immediately. This is the mistake that ruins chicken. Let them sit for 5 minutes without touching them. During this time, the bottom is developing a golden-brown crust through a process called the Maillard reaction—that’s where the flavor comes from. Your kitchen will smell incredible.
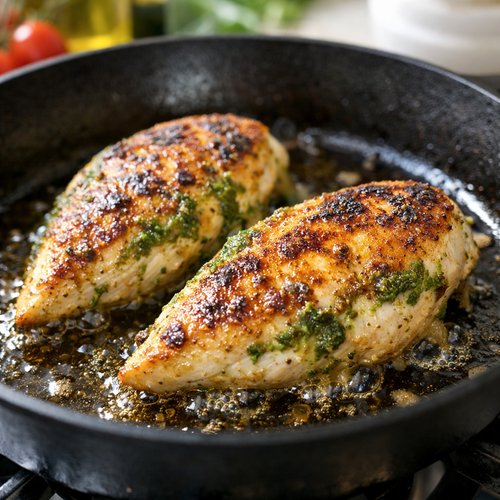
After 5 minutes, flip each breast once. Cook the second side for another 5 minutes. The chicken should release easily from the pan—if it’s sticking, it’s not done browning yet, so wait another 30 seconds. By the end, both sides should be deep golden brown. Don’t worry if it’s not perfectly brown; it still tastes amazing.
Step 6: Whisk and Add Your Sauce
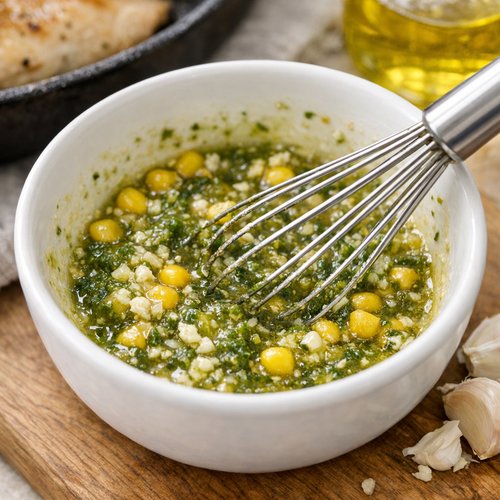
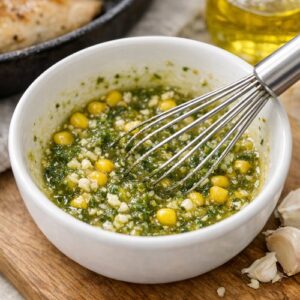
While the chicken is searing, whisk together your sauce ingredients in that small bowl: 1 tablespoon pesto, 2 minced garlic cloves, 1 tablespoon cornstarch, ¾ cup almond milk, salt, and pepper. Whisk vigorously for about 30 seconds until the cornstarch is completely dissolved and there are no lumps. A lumpy sauce is one of the most common beginner mistakes, and it’s completely preventable with thorough whisking.
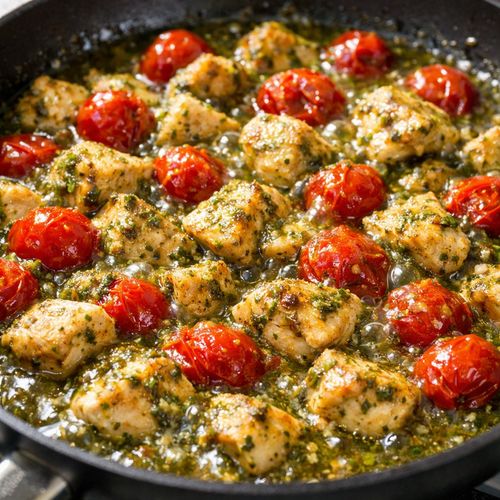
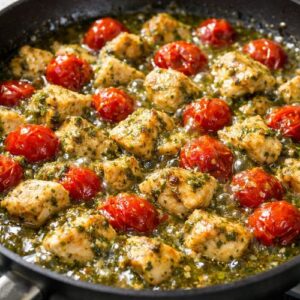
Once the chicken has finished its second side, pour this sauce directly over the chicken in the pan. Add the 2 cups of halved cherry tomatoes around and over the chicken. The sauce will seem thin—that’s exactly right. Trust the process.
Step 7: Simmer Until the Sauce Thickens and Tomatoes Burst
Reduce the heat to medium-low. Simmer for 5 to 6 minutes without covering the pan. This is when the magic happens: the cornstarch gelatinizes and thickens the sauce, and the cherry tomatoes heat through and begin to burst. You’ll see the sauce go from thin to creamy and coat the back of a spoon. This visual change is how you know you’re done.
About halfway through simmering, give the pan a gentle shake or stir to ensure the tomatoes are heating evenly. The chicken should reach 165°F internally (use that meat thermometer if you have it, or check the thickest part for no pink). By this point, it definitely will be.
Step 8: Garnish and Serve
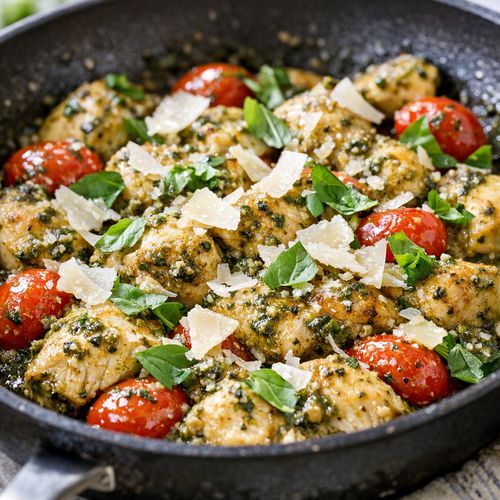
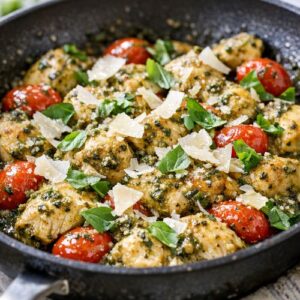
Remove the pan from heat. Top with freshly shaved Parmesan cheese and torn fresh basil leaves. The warm sauce will soften the Parmesan slightly, creating pockets of creamy flavor. Serve immediately over your choice of side—rice, pasta, roasted vegetables, or simply on its own.
How to Tell If You Did It Right
Success in this recipe has very clear markers. Here’s what you’re looking and feeling for at each stage:
- Chicken after searing: Both sides should be deep golden brown, almost caramel-colored. When you press it gently with your finger, it should spring back slowly—not immediately (which would mean undercooked) and not stay indented (which would mean overcooked).
- Sauce consistency when done: It should coat the back of a spoon thickly. If you draw your finger across the spoon, the line should hold for a moment before the sauce flows back together. This is the visual confirmation that cornstarch has done its job.
- Cherry tomatoes: They should look slightly blistered and collapsed, with some bursting open. This releases their juices into the sauce and concentrates the flavor.
- Aroma: Fresh basil should be prominent, garlic should smell fragrant and slightly sweet, and there should be no burnt smells. If something smells like charcoal, your heat was too high—it still tastes fine, just with a slightly darker edge.
- Taste: The sauce should be creamy and herb-forward, with a slight saltiness from the Parmesan. The chicken should be tender and juicy, never tough or stringy. If it’s tough, the chicken was overcooked, which is preventable next time by cooking to exactly 165°F rather than beyond.
What Went Wrong? Beginner Fixes
- The chicken is dry and tough – This happens when chicken is cooked above 165°F. Use a thermometer next time. For this batch: slice the chicken and serve it directly in the creamy sauce, which adds back moisture. You’re still eating something delicious. Pro tip: pounding the chicken to even thickness prevents the thicker parts from overcooking while waiting for thin parts to finish.
- The sauce is lumpy or grainy – The cornstarch wasn’t fully dissolved before hitting the hot pan. Next time, whisk the sauce ingredients thoroughly before adding them. This batch: strain the sauce through a fine-mesh sieve if you want it smooth, or simply explain to your family that the texture comes from the natural thickening process. Honestly, most people don’t notice and still love it.
- The sauce is too thin and watery – Either the cornstarch wasn’t fully hydrated or the pan wasn’t hot enough to activate it. Next time, ensure you’re at a true simmer with visible bubbles forming. This batch: whisk 1 teaspoon cornstarch with 1 tablespoon cold water in a small bowl, then stir it into the sauce while simmering for another 2 minutes. This rescue works instantly.
- The pesto looks separated or greasy in the sauce – Store-bought pesto is oil-based, and when exposed to heat, the oil and herbs can separate. This is purely visual and doesn’t affect taste. Stir well before serving. Next time, add the pesto to the sauce right before serving, after the pan cools slightly, to prevent separation.
- The chicken sticks to the pan during searing – Your pan wasn’t hot enough or you moved it too early. Next time, use medium-high heat and test with a water droplet: if it sizzles and evaporates immediately, you’re ready. This batch is already cooked, so no fix needed—but future batches will improve dramatically.
Your Next Steps After Mastering This Recipe
Once you’re comfortable with this pesto chicken, you have the skills to make dozens of other dishes. You’ve learned how to marinate protein properly, how to sear for flavor, and how to build a sauce from simple ingredients. These same techniques apply to pan-seared fish, like puff pastry wrapped salmon, where you’d use the exact same searing method but with gentler handling. You’ve also learned how to use cornstarch as a thickening agent, which is foundational for any sauce-based dish.
From here, experiment with different proteins: this sauce works beautifully with turkey cutlets, pork tenderloin, or even firm white fish. You can also vary the herbs—swap basil for cilantro to create an entirely different flavor profile, or use sun-dried tomato pesto for deeper earthiness. The technique is the constant; the flavors are where you play.
Expert’s Nutritional Insight: Why This Sauce Works for Your Health
As a registered dietitian, I’m always thinking about how meals serve the whole person, not just the taste buds. This recipe is nutritionally clever in ways that might not be obvious. The basil pesto provides polyphenols and volatile oils that research shows support cardiovascular health and reduce inflammation. When you use almond milk instead of heavy cream, you’re cutting saturated fat significantly while maintaining that creamy sensation through the cornstarch, which gelatinizes beautifully.
The cherry tomatoes are where the real nutritional magic happens: they’re loaded with lycopene, a carotenoid that becomes more bioavailable when gently heated, which is exactly what happens during the 5-to-6-minute simmer. You’re not just eating delicious food; you’re creating a dish where the cooking method actively enhances nutrient absorption. The minced garlic contains allicin, which forms when garlic is cut and heated, another powerful compound for immune support.
One pound of boneless, skinless chicken breast provides approximately 110 grams of high-quality protein across two servings, making this a perfect recovery meal after exercise or a satisfying dinner that won’t leave you hungry. Pair it with the sides I recommend below, and you have a nutritionally complete meal that hits macronutrient and micronutrient targets without feeling like you’re “dieting.”
Can I Store Healthy Pesto Chicken Recipe?
Refrigerator storage: 3 to 4 days. Let the dish cool to room temperature first, then transfer it to an airtight glass container. The chicken stays moist and the sauce firms up slightly as it cools, making it even easier to reheat. To reheat, place it in a skillet over medium heat with a splash of almond milk or water, stirring gently until warmed through, about 5 minutes.
Freezer storage: up to 2 months. Freeze in a flat glass container or even a Ziploc bag. Thaw overnight in the refrigerator, then reheat as described above. The texture remains excellent because the high protein content and sauce prevent drying.
Make-ahead tip for meal planning: This recipe is perfect for batch cooking. Marinate 3 to 4 pounds of chicken breasts overnight, then sear and sauce them all in succession the next day. Divide into individual containers. This gives you three weeknight dinners ready to reheat in minutes, which is exactly how I stay on top of nutrition during my busiest weeks.
Do not freeze the marinated chicken raw. While freezing doesn’t harm the chicken, the marinade won’t penetrate as effectively after thawing, and you lose some of that deep seasoning benefit. Marinate fresh, cook, and freeze the cooked dish instead.
Nutrition Information (Per Serving, Based on USDA Data)
Per serving of chicken with sauce (assumes 2 servings): Calories: 385 | Protein: 48g | Carbohydrates: 8g | Fat: 19g | Fiber: 2g | Sodium: 420mg (varies by pesto brand and added salt). This data is consistent with USDA FoodData Central entries for lean chicken breast, basil pesto, and plant-based milk.
The protein-to-calorie ratio makes this exceptional for muscle recovery and satiety. The carbohydrates come primarily from the cherry tomatoes and the small amount of cornstarch, keeping this low-carb without sacrifice. The fat comes from the olive oil and pesto, both sources of heart-healthy monounsaturated fats.
What Can I Serve With Healthy Pesto Chicken Recipe?
This dish is flexible and plays beautifully with countless sides. Here are my go-to pairings based on what I serve at my own table:
- Creamy polenta or mashed cauliflower – The pesto sauce pools gorgeously over these mild bases. Polenta is traditional; cauliflower is lower-carb. Both create an incredibly comforting plate.
- Roasted Brussels sprouts or broccoli – The slight bitterness of roasted vegetables contrasts beautifully with the herby, creamy sauce. Toss vegetables in olive oil, salt, and pepper, then roast at 425°F for 18 minutes while your chicken cooks.
- Brown rice or wild rice – If you want something filling and neutral, rice soaks up the sauce wonderfully. Cook according to package directions while you prepare the chicken.
- Garlic bread or crusty whole-grain bread – The sauce is too good not to soak up with something. My garlic bread pizzas would pair beautifully here, though even plain bread works.
- Fresh arugula salad with lemon vinaigrette – For a lighter plate, serve the chicken on a bed of peppery arugula dressed simply with lemon juice and olive oil. The salad adds acid that brightens the richness of the sauce.
- Pasta (any shape you prefer) – Toss the cooked pasta with olive oil, then top with the chicken and sauce. Penne, rigatoni, or spaghetti all work beautifully.
Seasonal Variations: How to Adapt This Recipe Year-Round
Spring: Replace store-bought pesto with fresh basil pesto you make yourself using tender spring basil (it’s noticeably more delicate). Swap cherry tomatoes for snap peas and fresh morels if you can find them, creating a lighter, more herbaceous version. The sauce still thickens beautifully, and the vegetables taste like spring on a plate.
Summer: This is when cherry tomatoes are at peak flavor and the recipe shines brightest. Use them abundantly—double the amount if you’d like. Fresh basil is plentiful, so make your own pesto if possible. Add fresh corn kernels to the sauce during the final simmer for sweetness and texture.
Fall: Incorporate roasted butternut squash cubes into the sauce during the simmer for depth and slight sweetness. Use Italian flat-leaf parsley alongside basil to add an earthy note. The warmer, richer versions feel cozy when the weather shifts.
Winter: When fresh tomatoes aren’t great, use high-quality canned cherry tomatoes (check the label: should be tomatoes, salt, and nothing else). Incorporate sun-dried tomato pesto instead of fresh basil pesto for concentrated flavor. Add roasted root vegetables around the chicken. The dish becomes more grounding and deeply flavorful.

Healthy Pesto Chicken Recipe
Ingredients
Method
- Take your pound of chicken breasts and place them on a clean cutting board. Pat them completely dry with paper towels—this is the detail most beginners miss, and it matters. Wet chicken won't absorb the marinade as effectively. Now, look at the thickness: are both breasts roughly the same size? If one looks noticeably thicker (more than ½-inch difference), you need to pound it. Place the thicker breast between two pieces of plastic wrap and use the flat side of a meat mallet to gently tap it until it's even. This ensures even cooking. Open your Ziploc bag and pour in 2 tablespoons of basil pesto directly into the bottom. Place the chicken breasts on top of the pesto. Do not seal the bag yet. This is important because you're about to work the pesto into the chicken, and you need access.
- Here's where technique matters: gently massage the pesto over every surface of each chicken breast. Use your hands (yes, inside the bag) to work it in. Think of it like giving the chicken a light massage—you're not aggressively forcing pesto into the meat, just ensuring every part is coated. The pesto should look like it's stuck to the chicken, not pooling at the bottom of the bag. This takes about two minutes of gentle work. Once both breasts are coated, seal the Ziploc bag and place it in the refrigerator. The minimum time is one hour, but overnight is ideal. If you're in a rush, even 30 minutes helps. The salt in the pesto is already beginning to season the meat at a cellular level, which keeps it incredibly juicy when cooked.
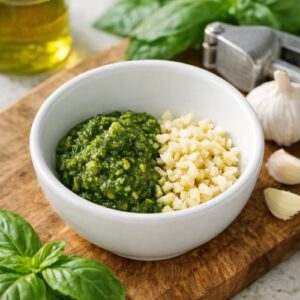
- While the chicken is marinating, you can get ahead. Take a small mixing bowl and gather these ingredients: 1 tablespoon fresh basil pesto, 2 minced garlic cloves, 1 tablespoon cornstarch, ¾ cup unsweetened almond milk, and a pinch of kosher salt and black pepper. Don't whisk them together yet—that comes right before you need the sauce. If you whisk too early, the cornstarch will begin to hydrate and won't incorporate smoothly.
- When you're ready to cook, place your large nonstick skillet on the stove over medium-high heat. Add 2 tablespoons of extra virgin olive oil. Wait for the oil to shimmer—this means it's hot enough. Here's the test: hold your hand about 3 inches above the pan (not touching it). If you feel distinct heat in about 3 seconds, the pan is ready. If you've never tested pan temperature before, this feels uncertain, so let me be clear: when the oil moves freely in the pan and has a slight shimmer, not quite smoking, you're there.
- Remove the chicken from the refrigerator. Gently place both breasts in the hot oil. Do not move them immediately. This is the mistake that ruins chicken. Let them sit for 5 minutes without touching them. During this time, the bottom is developing a golden-brown crust through a process called the Maillard reaction—that's where the flavor comes from. Your kitchen will smell incredible. After 5 minutes, flip each breast once. Cook the second side for another 5 minutes. The chicken should release easily from the pan—if it's sticking, it's not done browning yet, so wait another 30 seconds. By the end, both sides should be deep golden brown. Don't worry if it's not perfectly brown; it still tastes amazing.
- While the chicken is searing, whisk together your sauce ingredients in that small bowl: 1 tablespoon pesto, 2 minced garlic cloves, 1 tablespoon cornstarch, ¾ cup almond milk, salt, and pepper. Whisk vigorously for about 30 seconds until the cornstarch is completely dissolved and there are no lumps. A lumpy sauce is one of the most common beginner mistakes, and it's completely preventable with thorough whisking. Once the chicken has finished its second side, pour this sauce directly over the chicken in the pan. Add the 2 cups of halved cherry tomatoes around and over the chicken. The sauce will seem thin—that's exactly right. Trust the process.
- Reduce the heat to medium-low. Simmer for 5 to 6 minutes without covering the pan. This is when the magic happens: the cornstarch gelatinizes and thickens the sauce, and the cherry tomatoes heat through and begin to burst. You'll see the sauce go from thin to creamy and coat the back of a spoon. This visual change is how you know you're done. About halfway through simmering, give the pan a gentle shake or stir to ensure the tomatoes are heating evenly. The chicken should reach 165°F internally (use that meat thermometer if you have it, or check the thickest part for no pink). By this point, it definitely will be.
- Remove the pan from heat. Top with freshly shaved Parmesan cheese and torn fresh basil leaves. The warm sauce will soften the Parmesan slightly, creating pockets of creamy flavor. Serve immediately over your choice of side—rice, pasta, roasted vegetables, or simply on its own.
Notes
FAQs
Can I make this recipe with chicken thighs instead of breasts?
Absolutely. Chicken thighs are actually more forgiving because they contain more fat, which keeps them juicy even if cooked slightly longer. Use boneless, skinless thighs and extend the searing time to 6-7 minutes per side, and the simmering time to 7-8 minutes. The internal temperature should still reach 165°F. The sauce will be slightly richer because of the fat rendering from the thighs. This is a wonderful variation if you prefer more flavorful chicken.
What if I don’t have almond milk? Can I use regular dairy milk?
Yes, you can use whole milk, 2% milk, or even oat milk. The only difference is texture: dairy milk creates a slightly thinner sauce than almond milk because almond milk has natural thickening compounds. If using dairy milk, add an extra ½ teaspoon cornstarch to compensate. The flavor will be richer with dairy milk because of the natural fat content, which is perfectly lovely.
The marinade seems thin. Is that normal?
Absolutely. Pesto is herb-forward and oil-based, so a marinade made primarily from pesto looks thin. Don’t add extra liquid. The pesto will seep into the chicken during marinating, which is the goal. By the time you’re ready to cook, you’ll notice the chicken has absorbed the flavors beautifully.
Can I prepare the marinated chicken in the morning and cook it in the evening?
Yes, that’s ideal. Refrigerate the marinated chicken for up to 24 hours. The longer it marinates, the more deeply flavored it becomes. When you’re ready to cook, remove it from the refrigerator about 10 minutes before searing so it comes closer to room temperature, which ensures more even cooking.
What if the sauce breaks or looks curdled?
This occasionally happens if the almond milk is overheated or the cornstarch wasn’t fully hydrated. To fix it: remove the pan from heat and let it cool for 2 minutes. Whisk vigorously for about 30 seconds. In almost all cases, it comes back together. If it truly doesn’t, strain the sauce through a fine-mesh sieve and serve it as a lighter coating rather than a thick sauce—still delicious, just different texture. For next time: ensure the sauce ingredients are fully whisked before adding to the pan, and keep the heat at medium-low during the simmer.
More Beginner-Friendly Recipes to Build Your Skills
- Breakfast Wraps With Eggs Recipe – Master the egg-cooking technique that transfers to countless other dishes.
- Broccoli and Cream Recipe – Learn how to build creamy vegetable dishes using the same sauce logic you’ve just mastered.
- Beef Chuck Shoulder Steak Thin Recipe – Apply your new searing technique to beef for an entirely different protein experience.
You’ve done it. You’ve made a healthy pesto chicken that tastes like something you’d order at a restaurant, but it’s sitting on your own table in less than 30 minutes of active cooking. That’s not a small accomplishment. This is the recipe that proves nutrition and flavor aren’t in competition—they’re actually partners. Next time you make this, you’ll feel even more confident. You’ll know exactly what to look for when the pan is hot enough. You’ll recognize the exact moment the sauce thickens. You’ll plate it without second-guessing yourself.
This is how cooking confidence is built: one recipe at a time, one technique at a time, one successful dinner at a time. I’m genuinely proud of you for trying something that felt uncertain before you started. That willingness to learn, to follow instructions carefully, and to trust the process—that’s what makes great home cooks. Keep that spirit alive as you experiment with variations and serve this meal to the people you love. Join me on this cooking journey!
