Cauliflower Rice Recipe
This post contains affiliate links. As an Amazon Associate I earn from qualifying purchases.
This dish looks and tastes like it costs $40 at a restaurant—when you’re actually spending under $5 on ingredients. I’ve watched countless families in my Fairfield practice transform their weeknight dinners by mastering this single technique. It’s the foundation for everything from grain bowls to stir-fries, and it takes less time than ordering takeout. If you’re looking for equally impressive sides that won’t drain your budget, try pairing this with my Broccoli And Cream Recipe for a restaurant-quality vegetable lineup.
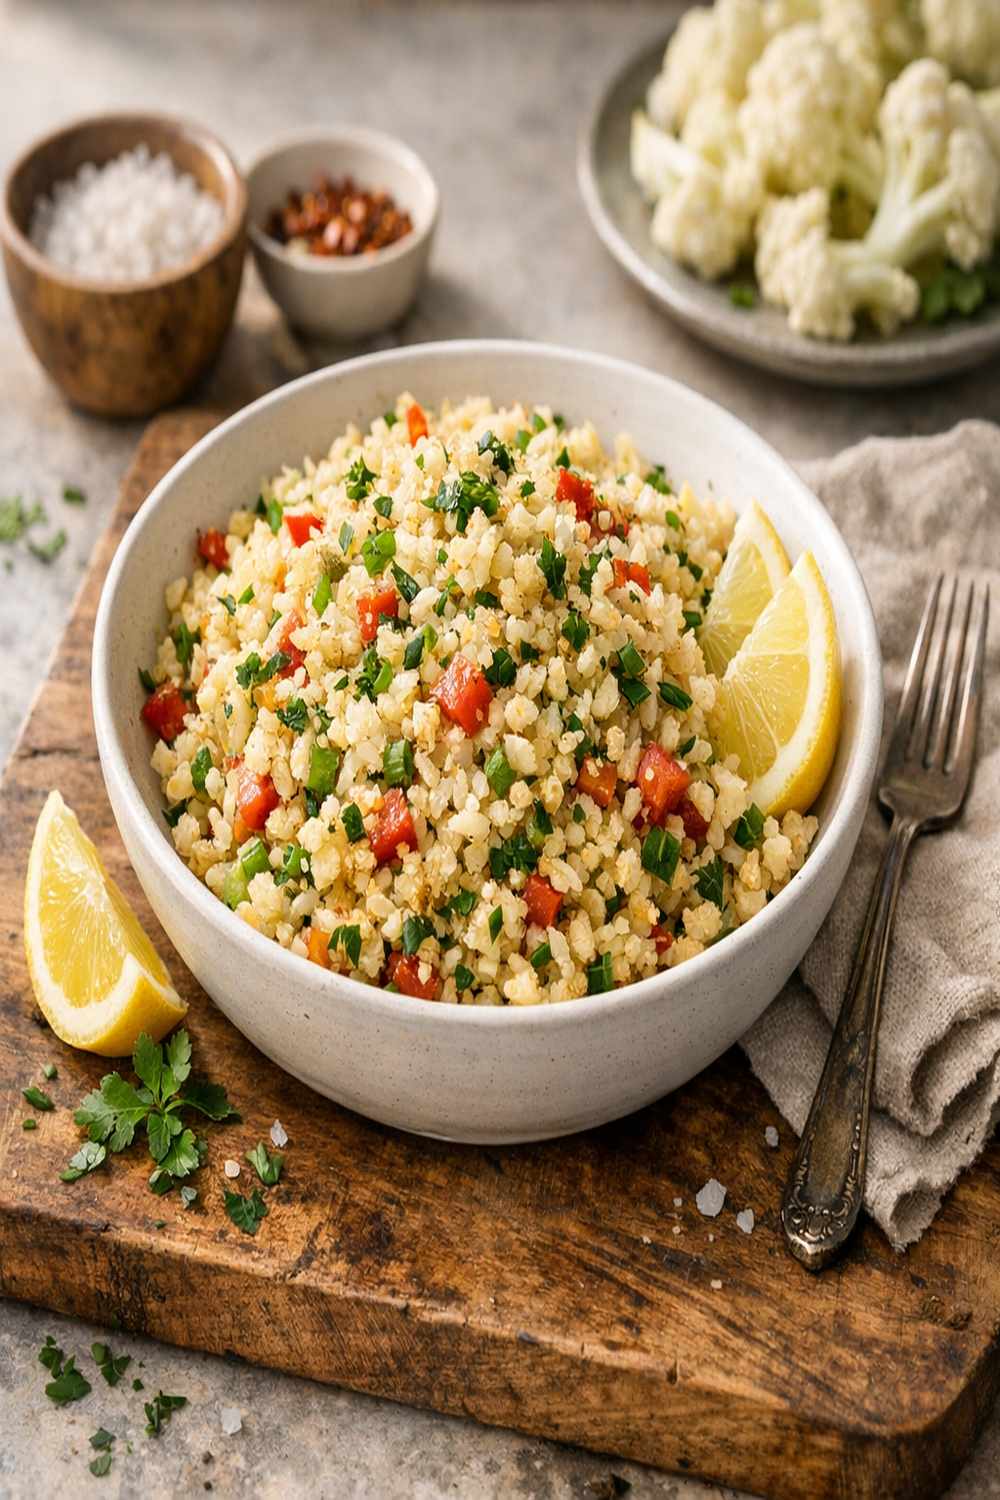
Restaurant-Quality Cauliflower Rice Recipe for Under $5 (No Shortcuts on Flavor)
I created this recipe during my early years as a registered dietitian when I was feeding my own family on a tight budget while managing long clinic hours. My kitchen counter became my laboratory—I was determined to prove that eating well didn’t mean sacrificing either time or money. One evening, I stood over a head of cauliflower with my food processor, and something clicked. What emerged was this incredibly simple technique that’s become non-negotiable in my meal prep routine and my clients’ kitchens.
That night, my family didn’t realize they were eating something I’d optimized for nutrition and cost. They just knew it tasted incredible and felt satisfied. That’s exactly what this recipe does—it delivers real results without the pretense or the price tag.
The Real Cost Breakdown
Let me show you exactly what you’re spending and why this beats restaurant pricing by a significant margin. I source these ingredients from standard grocery stores in my area, and I’ve calculated the per-serving cost based on a four-serving yield. A restaurant side of cauliflower rice typically costs $8-12 per person, often as part of a grain bowl. You’re doing this for a fraction of that—and controlling every ingredient.
- One head of cauliflower – $2.50-3.50 (seasonal pricing varies; cheapest at farmer’s markets in fall through spring)
- ½ medium yellow onion – $0.35 (buying whole onions and using portions across multiple recipes)
- Extra virgin olive oil – $0.60 per use (buying bulk 51-oz bottles from Costco or restaurant supply stores cuts this to nearly half)
- Kosher salt – $0.05 (one container lasts months)
- Freshly ground black pepper – $0.10 (freshly ground from whole peppercorns is cheaper long-term than pre-ground)
- Garlic powder – $0.15 (adds restaurant-quality depth without fresh garlic waste)
Total per batch: $3.75-4.50 | Cost per serving (feeds 4): $0.94-1.13
Compare that to a $10 restaurant side dish. You’re looking at saving $36-40 per month if your family eats this twice weekly. That’s real money back in your budget.
Smart Shopping Tips for This Recipe
- Buy cauliflower on markdown days (usually Wednesdays and Thursdays) – Most grocery stores reduce prices on produce mid-week when they’re rotating stock. I check my local Safeway and Trader Joe’s on these days and grab 2-3 heads to batch-prep and freeze.
- Frozen cauliflower florets save time and money if fresh feels wasteful – Frozen pre-cut cauliflower is already prepped and often costs $0.50 less. Simply skip the floret-removal step and feed frozen pieces directly through your food processor (they thaw quickly as they’re grated).
- Splurge on extra virgin olive oil; skip premium sea salt – The oil’s flavor is non-negotiable in this recipe since it’s the primary fat. But kosher salt performs identically to fancy sea salt here, and your savings compound.
- Buy whole onions and store properly to minimize waste – A $1 bag of yellow onions gives you 4-5 onions. Store them in a cool, dark place (never the fridge—they get soft). Half an onion keeps for 3-4 days wrapped tightly in plastic wrap.
The Ingredients
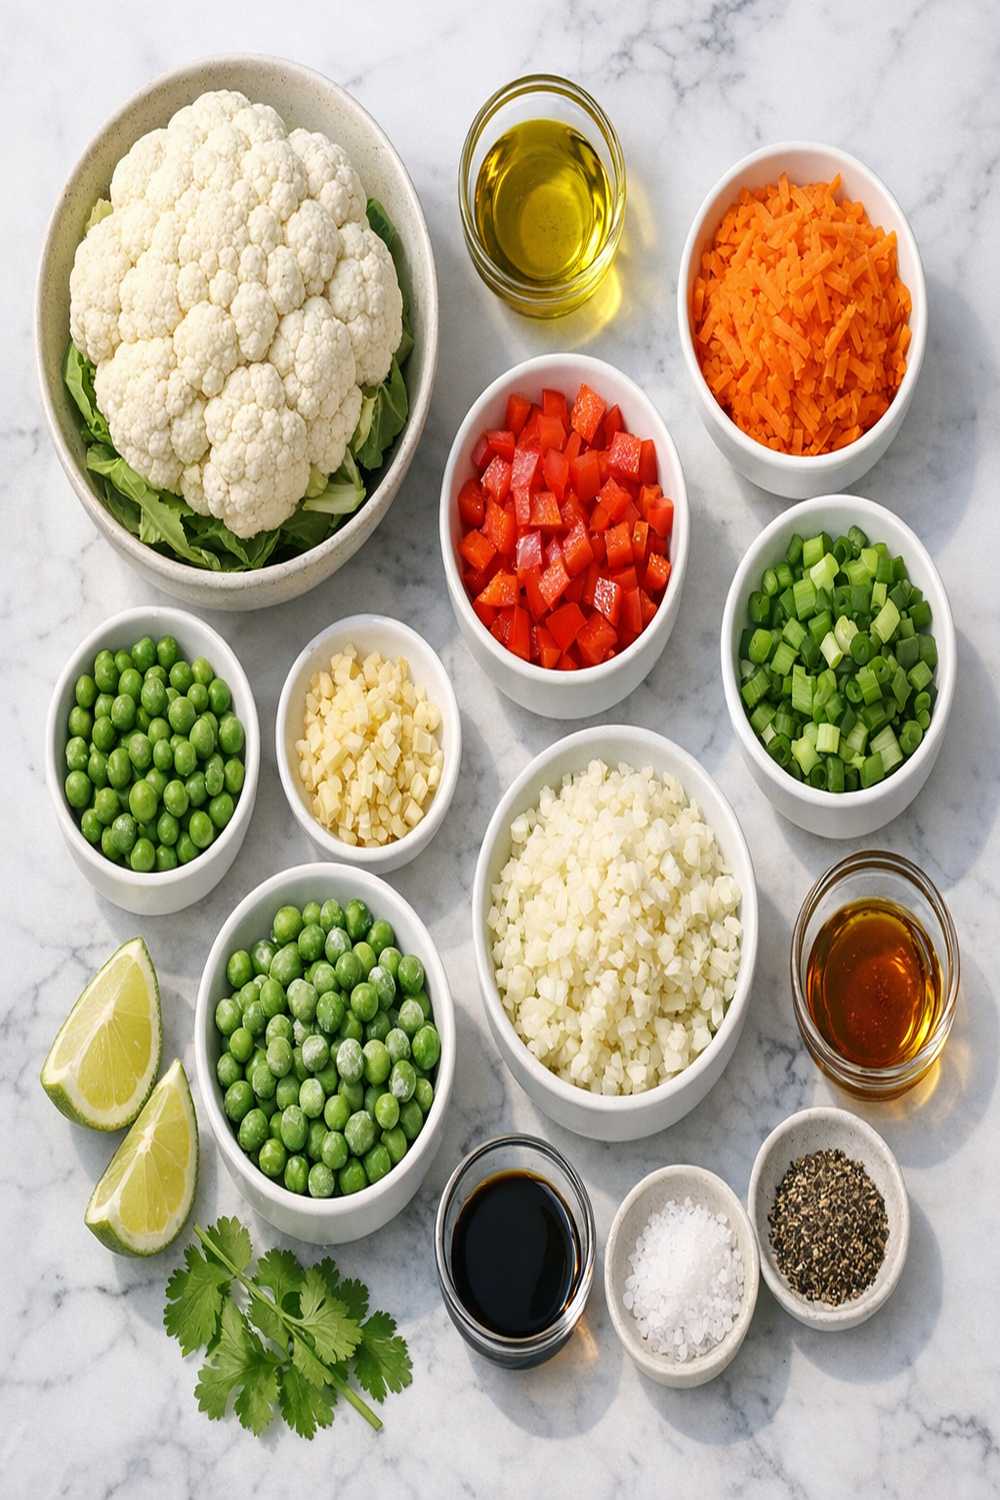
Every single ingredient in this recipe earns its place and its cost. Nothing is here out of habit or tradition—it’s all here because it builds genuine flavor and nutrition that makes this feel luxurious rather than budget-conscious.
- ¼ teaspoon garlic powder (optional but highly recommended for restaurant-quality depth without garlic prep work)
- 2 tablespoons extra virgin olive oil (use a robust, peppery variety for best flavor)
- 1 teaspoon kosher salt (add gradually and taste as you go)
- ½ teaspoon freshly ground black pepper (grind just before using for maximum aroma and flavor)
- ½ medium yellow onion (diced into small, even pieces for consistent cooking)
- 1 medium head of cauliflower (about 4 cups of florets; choose one that’s bright white or pale green with tightly packed florets)
Serves: 4 as a side dish | Prep time: 8 minutes | Cook time: 12 minutes | Total: 20 minutes
How to Make Cauliflower Rice Recipe Without Breaking the Bank
I’m going to walk you through this technique in a way that emphasizes where your smart choices matter most. This isn’t about cutting corners—it’s about understanding exactly why each step matters so you can execute it confidently and consistently. Professional execution at home is what separates good results from great ones.
Step 1: Prepare Your Cauliflower Florets
Start by cutting your cauliflower head in half from top to bottom using a sharp chef’s knife. This gives you a stable base. Now, with the flat side down, use your knife to slice away the florets from the central core by working along the natural seams where they attach. Save that core—it’s edible and valuable. You can chop it finely and add it to the pan, or reserve it for my Cauliflower Potato Soup later in the week. This mindset of zero waste is how you maximize what you spend.
Look at the florets you’ve cut away. Some will be large crown-shaped pieces, others smaller. Cut the larger ones into smaller chunks—about 2 inches across—so they fit easily through your food processor chute. This prevents jamming and means you don’t lose time troubleshooting. Smaller pieces also process more evenly, giving you consistent cauliflower rice texture rather than a mix of powder and chunks.

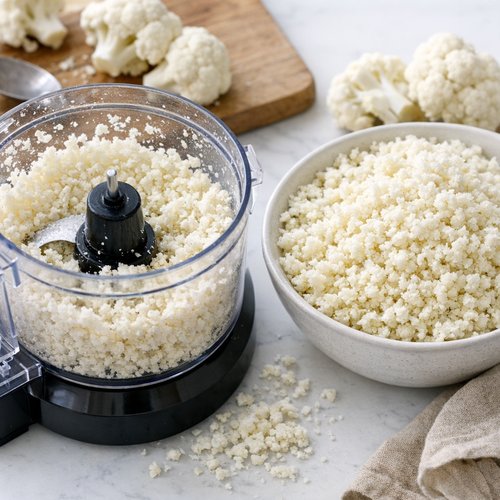
Step 2: Process Your Cauliflower Into Rice
Insert the grater/shredding disk attachment into your food processor (this is different from the blade attachment—check your manual if you’re uncertain). Feed the cauliflower florets through the top chute, pushing gently with the plunger. Let the machine do the work; don’t force it. You’ll hear the rhythm of processing change when the hopper empties—that’s your cue to pause and check the bowl.
Depending on your food processor size, you may need to empty the bowl halfway through. That’s completely normal and not a sign anything’s wrong. Simply transfer what’s processed to a separate bowl and continue with remaining florets. This takes about 4-5 minutes total and produces what looks identical to restaurant-prepared cauliflower rice. The texture should be granular, resembling couscous or short-grain rice, not powdery.
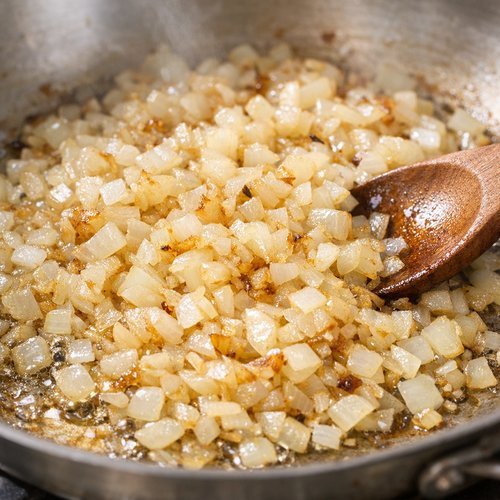
Step 3: Sauté Your Onion Base
Heat your olive oil in a large skillet (I use a 12-inch stainless steel or cast iron pan) over medium heat. Let it warm for about 60 seconds—you’ll see it shimmer but not smoke. This is the temperature sweet spot where onions caramelize gently rather than brown harshly. Add your diced onion and stir occasionally for 3-4 minutes until the pieces turn translucent and the edges begin to soften and lighten in color.
You’re building flavor here. The onions release their natural sugars, and the oil carries that sweetness. Don’t skip this step or rush it—those 3-4 minutes are where your “under $5” dish earns its “restaurant quality” reputation. Your home will smell incredible, which is also part of the value you’re getting.
Step 4: Add and Sauté Your Cauliflower Rice
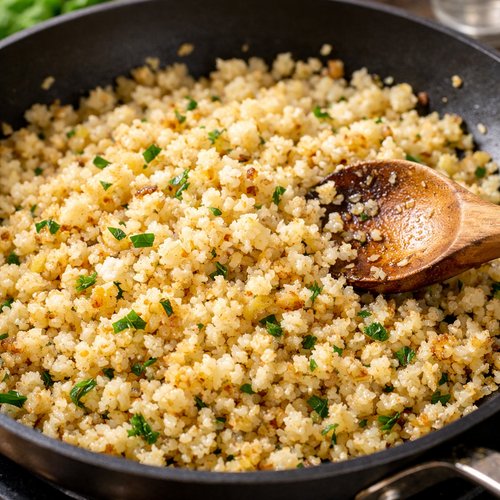
Pour all your processed cauliflower rice into the pan with the softened onions. Stir everything together and spread it into an even layer. Now sauté for 5-7 minutes, stirring every minute or so. What you’re looking for is warmth throughout, a slight softening of texture, and the development of very light golden-brown spots on some of the pieces. This is where the magic happens—raw processed cauliflower becomes something that feels intentional and prepared.
The timing here depends on how wet your cauliflower was and your stove’s heat output. If after 5 minutes it still looks very wet and pale, give it another 2 minutes. If it’s already taking on color and looks dry, you’re done. Taste a small piece—it should be tender enough to bite through easily but not mushy or falling apart.
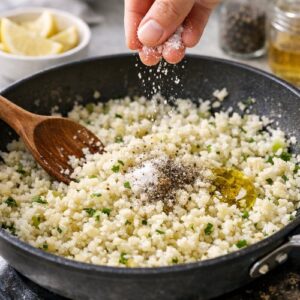
Step 5: Season and Finish
Add your salt, pepper, and garlic powder (if using). Start with three-quarters of your salt, stir well, then taste. Season in layers—add a little, taste, adjust—rather than dumping everything in at once. This is professional technique that prevents over-salting and gives you control. The finished dish should taste savory and balanced, with the garlic adding subtle background depth. Serve immediately while warm.

Expert’s Nutritional Tip
As a registered dietitian, I want you to understand what’s really happening nutritionally with this recipe. One cup of cooked cauliflower rice contains approximately 25 calories, 2 grams of protein, 5 grams of carbohydrates, and 2 grams of fiber—all from whole food with zero processing. Compare that to white rice at 206 calories and 45 grams of carbs per cooked cup. You’re getting a volume of food that satisfies your eyes and stomach for a fraction of the calories and carbohydrate load.
The fiber is what matters most here. That 2 grams per cup supports digestive health and stable blood sugar, making this an exceptional choice for anyone managing energy levels throughout their day. Add the olive oil (healthy monounsaturated fat) and you’ve created a dish that keeps you satisfied longer than grain-based sides would. This is why families who start using cauliflower rice regularly report feeling less sluggish mid-afternoon.
How to Stretch This Recipe Further
- Double or triple the batch for 8-12 servings – Buy 2-3 cauliflower heads and process them all at once (or do it in batches). Increase your onion to 1 full medium onion and scale oil to ¼ cup. Everything else scales proportionally. This is how you feed a crowd for $12-15 total while a restaurant would charge $80+ for the same volume.
- Transform leftovers into fried rice – Leftover cauliflower rice becomes the base for a completely different dish. Reheat in a hot skillet with a beaten egg, some soy sauce, frozen peas and carrots, and diced ham or shrimp. You’ve created a second meal from your first meal’s foundation.
- Batch-prep and freeze for weekly meal assembly – Prepare 3-4 batches, let cool completely, portion into freezer bags (flatten them for space efficiency), and freeze for up to 3 months. Reheat straight from frozen in a skillet for 5 minutes. This is meal prep without the effort of cooking during busy weeks.
Make-Ahead Guide
Prepare up to 4 days ahead: Process your cauliflower and store florets in an airtight container in the refrigerator. When you’re ready to cook, simply follow the pan-cooking steps. This cuts your active time to 12 minutes on the day you’re serving.
Cook fully 2 days ahead: Prepare the entire recipe, let it cool to room temperature, transfer to an airtight container, and refrigerate. Reheat gently in a skillet over medium heat for 3-4 minutes, stirring occasionally, until warmed through. The texture stays excellent.
Freeze for up to 3 months: Cool completely, divide into meal-sized portions (I use 1-cup portions in individual containers), label with the date, and freeze. Thaw in the refrigerator overnight, or reheat directly from frozen in a skillet over medium-low heat for 6-7 minutes.
Why this matters for your budget: Batch cooking means you’re using your olive oil and time efficiently. Cooking four batches at once uses only slightly more oil than cooking one, but gives you four meals’ worth of prep completed. You’re paying for active time and fuel once but getting a week’s worth of side dishes ready.
Budget Substitutions That Don’t Sacrifice Quality
- Fresh cauliflower -> Frozen cauliflower florets: Frozen costs 30-40% less and is already prepped. The texture becomes slightly softer once thawed, but actually processes into rice even more consistently. No quality loss in the final dish, only financial gain.
- Extra virgin olive oil -> Light olive oil (for cooking): Light olive oil costs about 40% less and has a higher smoke point (better for cooking). You lose the robust flavor that makes this special, so use regular olive oil only if budget is critical—but splurge here when possible.
- Fresh onion -> Onion powder or dried minced onion: ¼ teaspoon onion powder replaces ½ fresh onion in a pinch. It’s not identical (lacks fresh onion’s slight sweetness and texture), but it works. Use only if you have onion on hand elsewhere and truly want to minimize ingredients.
- Kosher salt -> Table salt: Use half the amount (table salt is denser and saltier per volume). It works identically in terms of seasoning, though some prefer kosher salt’s cleaner taste. Either is fine.
Common Mistakes to Avoid
- Processing cauliflower into powder instead of rice grains – This happens when you overfill the food processor or use the blade attachment instead of the shredder. Process in smaller batches and use the correct attachment. The texture should resemble rice, not flour.
- Cooking on too-high heat and burning the onions – Burnt onions taste bitter and ruin the entire dish. Stick to medium heat and stir occasionally. If your stove runs hot, use medium-low. The process takes 3-4 minutes; you’re not trying to speed it up.
- Skipping the seasoning taste-test – Cauliflower is mild and can easily become under-seasoned. Always taste as you go. What seems like a lot of salt when you add it often tastes perfect once it’s distributed throughout the finished dish.
- Cooking until it’s mushy rather than tender – You want slight resistance when you bite, not mush. 5-7 minutes is your target range. Beyond 8 minutes, you’re losing the pleasant texture and the dish becomes unappetizing.
Seasonal Variations
Fall/Winter (September-February): Add ¼ cup diced mushrooms when you sauté the onion. They add umami depth and extend the recipe to feed one additional person for minimal cost. Mushrooms are cheapest and most flavorful during cooler months.
Spring/Summer (March-August): Finish the cooked rice with 2 tablespoons fresh herbs—chopped parsley, basil, or cilantro—added right after seasoning. Fresh herbs are at peak affordability and flavor during warm months. They add brightness that feels seasonal and restaurant-quality.
Any season – Spice variation: Replace garlic powder with ½ teaspoon curry powder (fall/winter) or ¼ teaspoon cumin (spring/summer) for a completely different flavor profile using the same base recipe. Both spices cost pennies and transform the dish into something globally inspired.
Can I Store Cauliflower Rice Recipe?
Refrigerator: 3-4 days in an airtight container. The texture softens slightly over time but remains pleasant and completely edible. I’ve never had any spoil before we ate it at the 4-day mark.
Freezer: 3 months in a freezer-safe container or bag. Frozen cauliflower rice actually reheats beautifully because the slight softening from freezing matches its texture after warming. Thaw overnight in the refrigerator, or reheat directly from frozen.
Can you refreeze? Technically yes, but quality declines with each freeze-thaw cycle. I don’t recommend refreezing if it’s thawed to room temperature. If it’s still cold from refrigerator thawing, you can refreeze once.
Why this storage window matters financially: This recipe’s true budget power emerges when you batch-cook and freeze. Making four batches in one cooking session costs you perhaps $18-20 total in ingredients but creates 16 servings across 4 weeks. That’s $1.13-1.50 per serving for an entire month’s worth of premium side dish. No waste, maximum value.
Nutrition Information
Per serving (¾ cup cooked cauliflower rice, based on 4 servings per batch):
- Calories: 65
- Total Fat: 7g (mostly monounsaturated from olive oil)
- Saturated Fat: 1g
- Cholesterol: 0mg
- Sodium: 580mg (adjust based on your salt preference)
- Total Carbohydrate: 3g
- Dietary Fiber: 1.5g
- Protein: 2g
- Vitamin C: 40% Daily Value
- Potassium: 8% Daily Value
This data is based on USDA FoodData Central for raw cauliflower and olive oil composition. What impresses me nutritionally is the vitamin C content—cauliflower provides significant immune support—and the fiber-to-calorie ratio. You’re getting substantial nutritional bang for minimal calories. That’s what makes this recipe valuable as a weight-management tool and as a genuinely nutritious side that doesn’t feel restrictive.
What Can I Serve With Cauliflower Rice Recipe?
This is where cauliflower rice proves its versatility. It’s a foundation, not a starring role. Here’s exactly how I use it:
- Grilled chicken breast – Cook seasoned chicken breasts (about $2.50 each) and slice them over warm cauliflower rice. Add a squeeze of lemon. You’ve created a complete, balanced meal for $5-6 per serving.
- Ground beef stir-fry – Brown 1 pound ground beef ($4-5) with garlic, soy sauce, and bell peppers, then serve over cauliflower rice. My Blade Beef Recipe follows this exact structure if you want specific technique guidance.
- Roasted salmon – Pan-seared salmon fillets (budget about $3-4 per portion) are exceptional over cauliflower rice with a drizzle of honey and fresh dill.
- Black bean and vegetable bowl – Build a complete bowl with cauliflower rice base, topped with warmed black beans, roasted sweet potato, avocado, and lime crema. My Black Bean And Rice Burrito Recipe uses similar components if you want another idea.
- Thai-inspired coconut curry – Simmer cauliflower rice in light coconut milk with curry paste, vegetables, and chickpeas for a completely plant-based meal that costs under $3 per serving.
- Pair with Butternut Squash Kale Salad – Create a two-vegetable dinner plate that covers multiple nutritional bases for under $6 total per person.
Ingredients
Method
- Start by cutting your cauliflower head in half from top to bottom using a sharp chef's knife. This gives you a stable base. Now, with the flat side down, use your knife to slice away the florets from the central core by working along the natural seams where they attach. Save that core—it's edible and valuable. You can chop it finely and add it to the pan, or reserve it for my Cauliflower Potato Soup later in the week. This mindset of zero waste is how you maximize what you spend. Look at the florets you've cut away. Some will be large crown-shaped pieces, others smaller. Cut the larger ones into smaller chunks—about 2 inches across—so they fit easily through your food processor chute. This prevents jamming and means you don't lose time troubleshooting. Smaller pieces also process more evenly, giving you consistent cauliflower rice texture rather than a mix of powder and chunks.

- Insert the grater/shredding disk attachment into your food processor (this is different from the blade attachment—check your manual if you're uncertain). Feed the cauliflower florets through the top chute, pushing gently with the plunger. Let the machine do the work; don't force it. You'll hear the rhythm of processing change when the hopper empties—that's your cue to pause and check the bowl. Depending on your food processor size, you may need to empty the bowl halfway through. That's completely normal and not a sign anything's wrong. Simply transfer what's processed to a separate bowl and continue with remaining florets. This takes about 4-5 minutes total and produces what looks identical to restaurant-prepared cauliflower rice. The texture should be granular, resembling couscous or short-grain rice, not powdery.

- Heat your olive oil in a large skillet (I use a 12-inch stainless steel or cast iron pan) over medium heat. Let it warm for about 60 seconds—you'll see it shimmer but not smoke. This is the temperature sweet spot where onions caramelize gently rather than brown harshly. Add your diced onion and stir occasionally for 3-4 minutes until the pieces turn translucent and the edges begin to soften and lighten in color. You're building flavor here. The onions release their natural sugars, and the oil carries that sweetness. Don't skip this step or rush it—those 3-4 minutes are where your "under $5" dish earns its "restaurant quality" reputation. Your home will smell incredible, which is also part of the value you're getting.

- Pour all your processed cauliflower rice into the pan with the softened onions. Stir everything together and spread it into an even layer. Now sauté for 5-7 minutes, stirring every minute or so. What you're looking for is warmth throughout, a slight softening of texture, and the development of very light golden-brown spots on some of the pieces. This is where the magic happens—raw processed cauliflower becomes something that feels intentional and prepared. The timing here depends on how wet your cauliflower was and your stove's heat output. If after 5 minutes it still looks very wet and pale, give it another 2 minutes. If it's already taking on color and looks dry, you're done. Taste a small piece—it should be tender enough to bite through easily but not mushy or falling apart.

- Add your salt, pepper, and garlic powder (if using). Start with three-quarters of your salt, stir well, then taste. Season in layers—add a little, taste, adjust—rather than dumping everything in at once. This is professional technique that prevents over-salting and gives you control. The finished dish should taste savory and balanced, with the garlic adding subtle background depth. Serve immediately while warm.
Notes
FAQs
Can I make cauliflower rice without a food processor?
Yes, though it requires more effort. Use the large holes of a box grater or a microplane. You’ll hand-grate the cauliflower florets, which takes about 10-12 minutes instead of 4-5 minutes. The result is identical. If you don’t own a food processor and this recipe appeals to you, honestly a basic food processor costs $25-40 and pays for itself after using it 15-20 times. It’s an investment in your budget-cooking success.
What if my cauliflower is already cut into florets from the store?
Perfect—you’re ahead. Pre-cut florets cost $1-2 more than whole heads but save you 5 minutes of prep. For a recipe this quick, that premium might be worth it depending on your schedule and budget priority. Proceed directly to processing them into rice.
Can I use cauliflower rice that’s already been processed (from the frozen section)?
Yes, completely. Frozen pre-riced cauliflower costs about the same as fresh heads but is already prepared. Simply thaw it in the refrigerator, pat it dry with paper towels (excess moisture makes it soggy), and proceed to Step 3 (sautéing onions). You cut prep time to just 12 minutes of actual cooking. For busy families, this is a legitimate budget-saving shortcut.
Why does my cauliflower rice come out watery?
Cauliflower contains natural moisture, and some varieties are wetter than others. If your finished rice seems wet, you have three fixes: (1) Cook it 2-3 minutes longer over medium-high heat to evaporate excess moisture, (2) Use frozen cauliflower (the freezing process removes some water), or (3) Pat fresh-processed cauliflower with paper towels before adding it to the pan. The texture should be tender, not wet.
Can I add cauliflower rice to other dishes like soups or grain bowls mid-cooking?
Absolutely. Cook it completely using this recipe, then add it to soups in the final 2 minutes (so it stays slightly firm), or layer it into grain bowls as a base. Pre-cooking it this way ensures it’s flavor-developed and tender rather than raw. This is how I use leftover batches—they become components in larger dishes throughout the week.
What’s the difference between this recipe and store-bought cauliflower rice blends?
Homemade gives you complete control over ingredients and cost. Store-bought blends (cauliflower mixed with broccoli, carrots, etc.) cost 2-3 times more per serving and often contain additives. You also can’t customize them. Make your own base and add vegetables as desired—you’ll spend less and eat better.
More Budget-Friendly Recipes
- Naan Bread – Homemade flatbread that costs $0.40 per serving and pairs beautifully with any curry-style cauliflower rice.
- Broccoli And Cream Recipe – Another vegetable side that proves restaurant-quality dishes don’t require restaurant prices.
Your Turn to Master This
I’ve given you everything I know about making cauliflower rice that tastes like you spent serious money and effort—when you actually spent under $5 and 20 minutes total. This is the recipe that changed how my own family approaches weeknight dinners and how countless clients in my practice think about healthy eating on a budget.
The real win here isn’t just the money you save, though that matters. It’s knowing that you can prepare something genuinely nourishing and delicious without compromising on either quality or cost. That’s the foundation of sustainable, real-life healthy eating. You’re not choosing between your budget and your nutrition—you’re optimizing both simultaneously.
Try this recipe this week. Batch it if you can. Notice how it becomes the base for three different meals. Feel how much more capable you become in your kitchen when you understand a technique this deeply. That’s the entire philosophy of my cooking approach distilled into one simple vegetable side dish.
Join me on this cooking journey!
