Spicy Buffalo Wing Recipe
This post contains affiliate links. As an Amazon Associate I earn from qualifying purchases.
Game day, family gathering, or just a Friday night with friends—these crispy spicy buffalo wings are my secret weapon for bringing people together around the table. I’ve learned over years of family dinners that the best meals aren’t complicated; they’re confident, flavorful, and made with intention. These wings deliver all three, and they pair beautifully with refreshing sides like Jarlsberg Cheese Dip or a simple celery platter. Trust me, your guests will ask for this recipe.
The Night My Kitchen Became the Neighborhood Gathering Spot
I remember the exact moment I realized how powerful a plate of wings could be. My family was in transition—new jobs, different schedules, everyone scattered across the week. One Friday, I decided to stop fighting the chaos and instead lean into it. I threw together a batch of crispy wings tossed in buffalo heat, and suddenly everyone came home hungry and stayed longer than expected.
My teenager set down their phone. My partner actually sat at the table instead of eating standing up. Even our neighbor stopped by, drawn in by the aroma wafting onto the street. It wasn’t fancy or complicated—it was just delicious, made with real ingredients, and served with intention. That night reminded me why I became a dietitian: food is the easiest way to say “I care about you” without actually saying it.
Since then, this recipe has become my go-to whenever I want to create that same magic. As a registered dietitian, I’ve spent countless hours perfecting techniques that deliver flavor without sacrificing nutrition. These wings are crispy on the outside, juicy on the inside, and absolutely coated in a tangy-spicy sauce that makes you reach for the next one immediately.
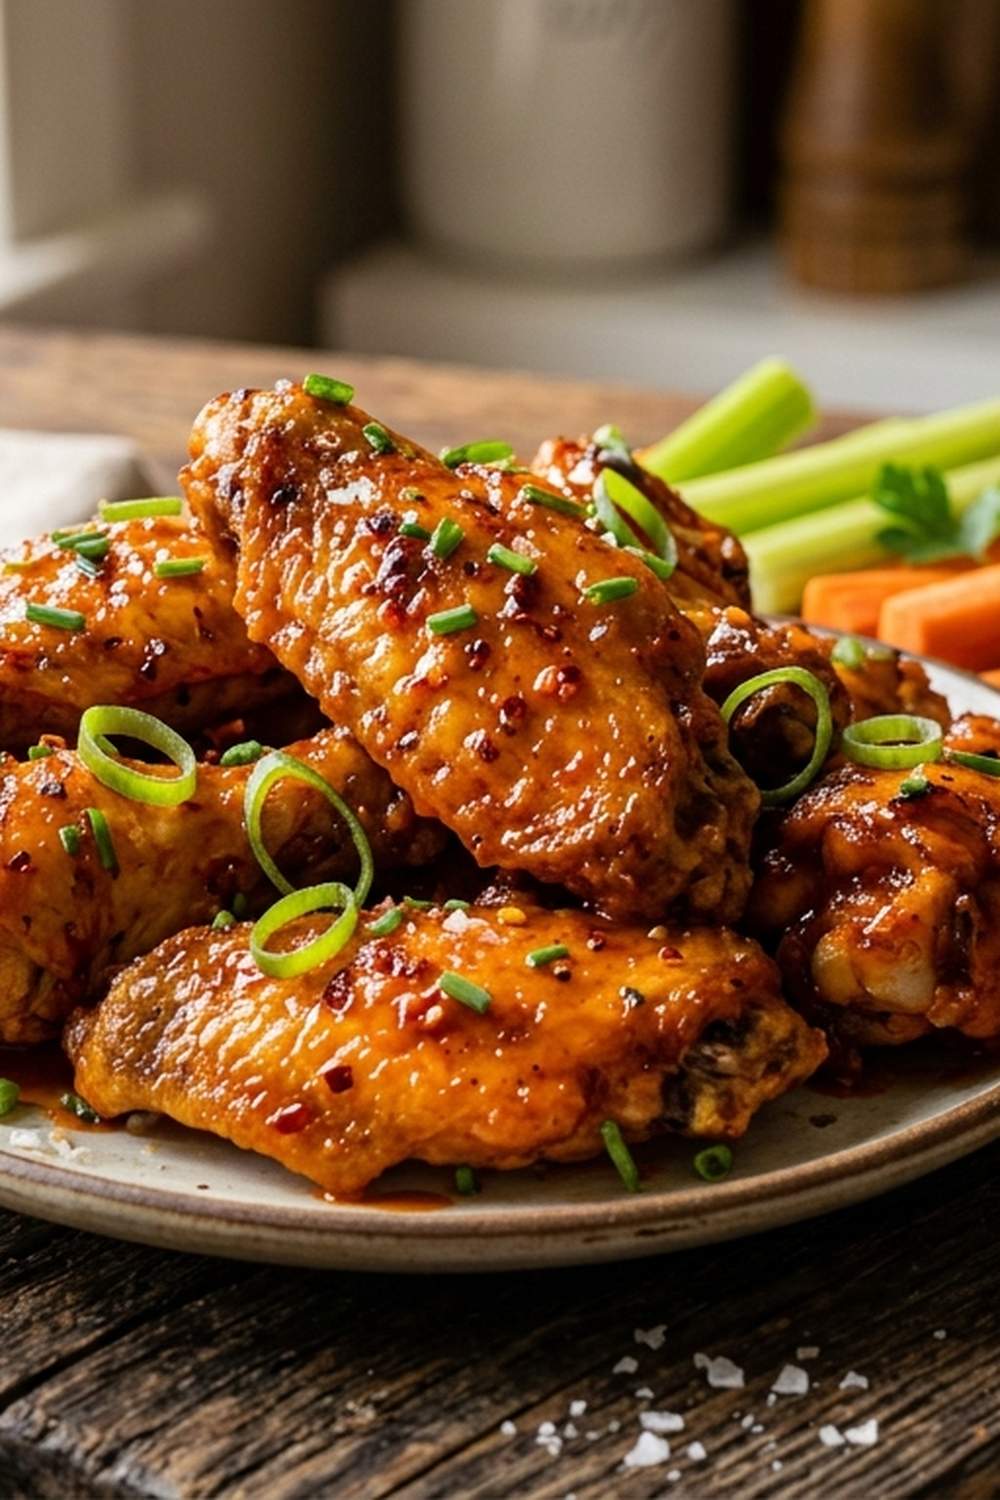
What is Spicy Buffalo Wing Recipe?
Buffalo wings originated in Buffalo, New York, during the 1960s when a restaurant owner combined fried chicken wings with a spicy vinegar-based hot sauce and a creamy blue cheese dip. What started as a casual bar appetizer became an American icon because it works—the combination of crispy, spicy, and cool is irresistible.
The magic of authentic buffalo wings lies in the technique, not complexity. You dry the wings thoroughly, coat them with a leavening agent that creates insane crispiness, bake them until golden, then toss them in a sauce that balances heat with tang and richness. My version respects the tradition while adding my own professional touch: I use baking powder instead of flour because it creates an even crispier exterior without the heaviness.
What makes this version special is the balance. Too many recipes go heavy on heat and forget flavor. Others focus so much on sauce that the wings become soggy. I’ve spent years refining this recipe to hit that sweet spot where every bite crunches, then releases that perfect spicy-tangy punch, followed by the cooling relief of the blue cheese dip.
Why You’ll Love This Spicy Buffalo Wing Recipe
- Crispy exterior every single time – The baking powder coating creates a shatteringly crispy surface that stays crunchy even after sauce is applied, thanks to a professional technique most home cooks don’t know about.
- Restaurant-quality results in under an hour – No deep fryer needed, no oil splatters on your stovetop, no complicated steps. Just efficient, practical cooking that fits into real life.
- Balanced heat and flavor – Frank’s Original Red Hot Sauce provides consistent spice without overwhelming the chicken, while brown sugar adds subtle sweetness that rounds out the tang.
- Crowd-friendly and scalable – Whether you’re feeding 4 people or 20, this recipe doubles, triples, and even quadruples beautifully without changing technique or timing.
- Naturally protein-rich and satisfying – Chicken wings offer high-quality protein and are less wasteful than breasts. The creamy blue cheese dip adds calcium and probiotics if you choose quality brands.
- Built-in healthy sides – The celery isn’t just tradition; it provides hydration and fiber that balances the richness of the sauce and dip.
The Ingredients
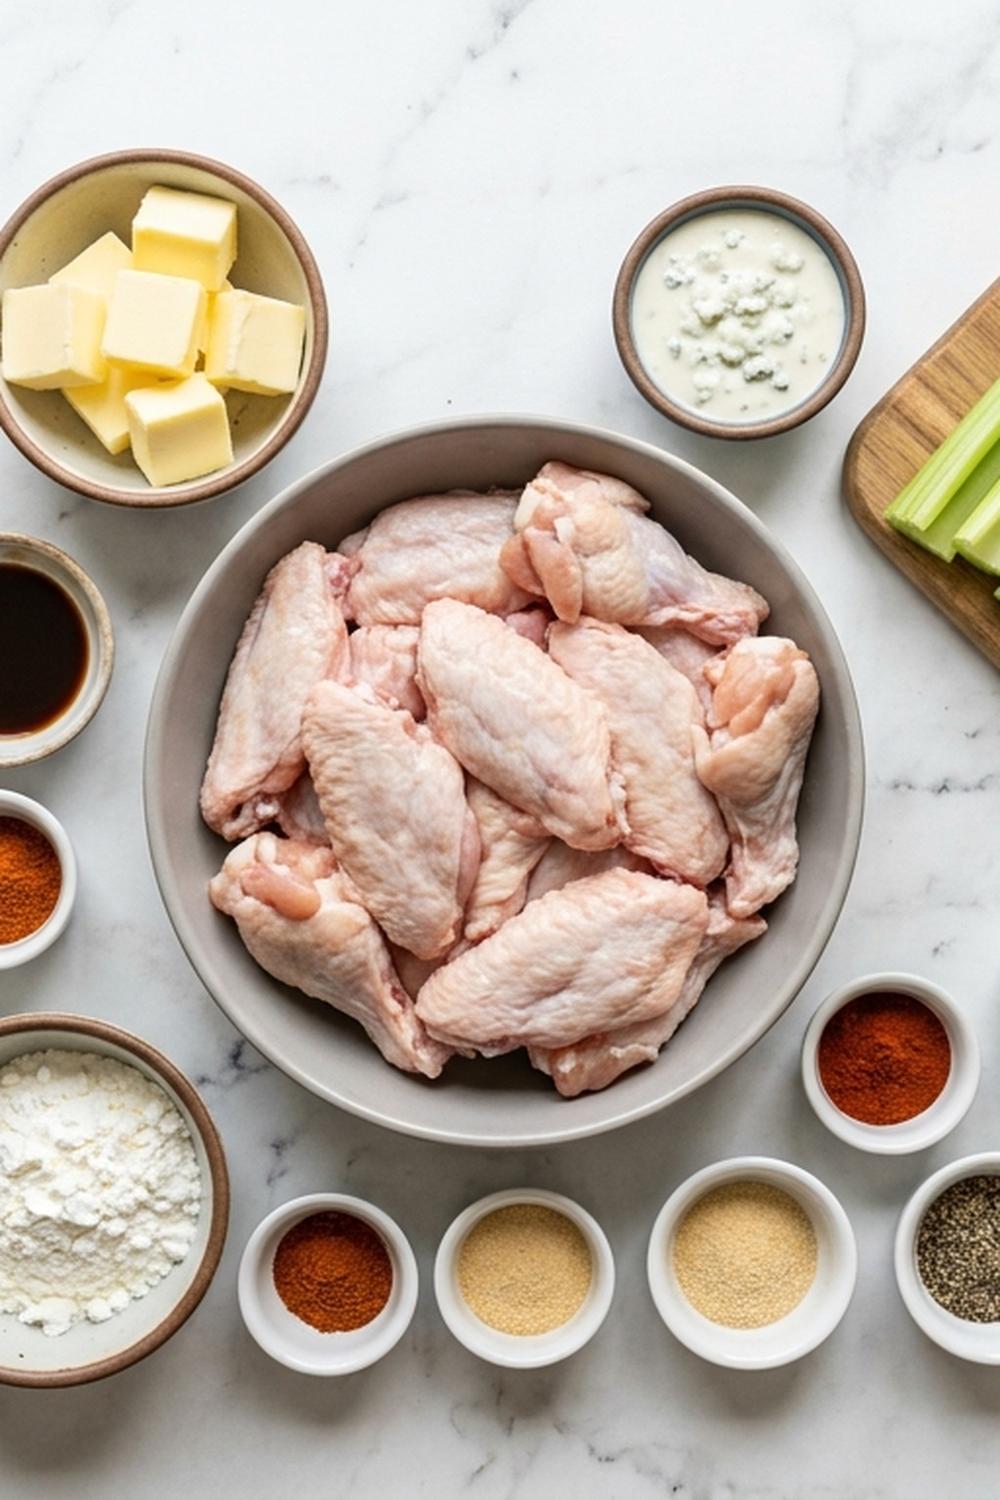
I’ve organized these ingredients into two sections: the wings themselves and the sauce-dip components. This makes it easier to prep and understand how each element contributes to the final dish. One important note: I’ve removed unnecessary ingredients that add only complexity, and I’ve added a couple of game-changers that elevate the whole experience.
For the Crispy Wings
- 4 pounds chicken wings (separated into wingettes and drumettes, tips discarded or reserved for stock)
- ¼ teaspoon garlic powder (optional but recommended for extra umami)
- ¾ teaspoon kosher salt (coarser grind than table salt, which dissolves too quickly and tastes harsh)
- ½ teaspoon freshly ground black pepper (adds subtle depth)
- 5 teaspoons baking powder (aluminum-free preferred; this is NOT baking soda, which creates a metallic taste)
For the Spicy Buffalo Sauce
- 4 tablespoons unsalted butter (melted and cooled slightly)
- ¼ teaspoon Worcestershire sauce (amplifies savory depth)
- 1 tablespoon brown sugar (adds complexity and balances heat)
- ½ cup Frank’s Original Red Hot Sauce (this brand matters; it’s milder and more vinegary than competitors)
- ¼ teaspoon kosher salt (to taste after sauce combines)
For the Blue Cheese Dip
- ½ cup sour cream (full-fat creates better texture than low-fat versions)
- Black pepper to taste
- 1 to 3 tablespoons whole milk (to reach desired dipping consistency)
- ¼ cup mayonnaise (whole-egg mayo tastes richer than varieties with added water)
- ½ cup crumbled blue cheese (aged gorgonzola works beautifully, or use any quality blue variety)
- 1 small clove garlic (minced fresh, not powder)
- 2 tablespoons fresh lemon juice (adds brightness that cuts through richness)
- ½ teaspoon kosher salt (to taste)
For Serving
- Fresh celery sticks (cut into 3-inch pieces for easy dunking)
- Lots of cold beer, sparkling water, or your favorite beverage
Yield: This recipe serves 4 to 6 people as a main course, or 8 to 10 as an appetizer.
How to Make Spicy Buffalo Wings?
I’ve broken this into clear, manageable steps that respect your time. The beauty of this recipe is that once you understand the technique, you’ll make these wings confidently forever. Read through all steps first, then execute. Pro tip: prepare your blue cheese dip while the wings bake—it’s one less thing to do at the end.
Step 1: Prepare Your Wings for Maximum Crispiness
Start by patting your chicken wings completely dry with paper towels. This step feels small, but it’s everything. Moisture is the enemy of crispy skin. I pat each piece individually, rotating them to catch any hidden wetness. Take your time here—I spend about 5 minutes drying 4 pounds of wings thoroughly.
Next, in a medium bowl, combine your baking powder, kosher salt, black pepper, and garlic powder if using. Mix thoroughly with a fork to break up any lumps in the baking powder. This coating is what creates that shatteringly crispy exterior that distinguishes restaurant-quality wings from soggy homemade versions.
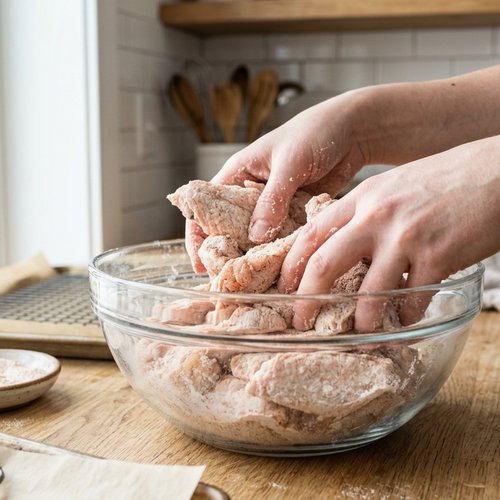
Transfer your dried wings to a large bowl and sprinkle the baking powder mixture over them generously. Using your hands (this is the best tool), toss the wings until every piece is evenly coated. Make sure you’re working with dry hands and that the coating adheres to the chicken. This should take about 2 to 3 minutes. You’ll notice the coating starts to stick as you toss—that’s exactly what you want.
Step 2: Arrange Wings on Your Baking Sheet
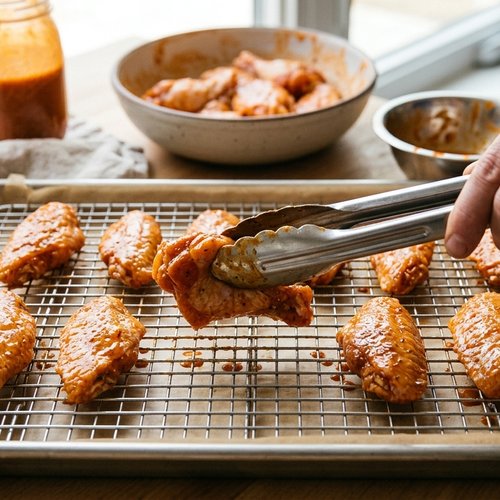
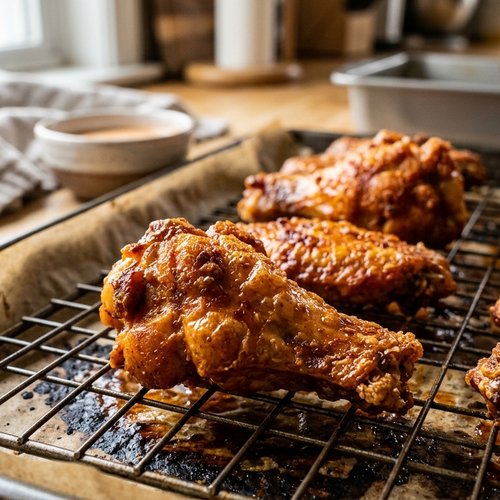
Line a large baking sheet with foil for easy cleanup, then arrange an oven-safe wire rack on top. This two-layer approach is non-negotiable for even cooking and maximum air circulation underneath the wings. If you don’t have a wire rack, you can use a second baking sheet, but the rack truly makes a difference in achieving that all-over crispiness.
Arrange your coated wings in a single layer on the rack, spacing them about ½ inch apart. They shouldn’t touch or overlap. If your baking sheet is crowded, use two sheets and rotate them halfway through baking. Crowded wings steam instead of crisp, and we’re not going for that texture.
Step 3: Bake Until Golden and Crispy
Preheat your oven to 250°F (120°C) and allow it to fully reach temperature before placing your wings inside. I know this seems low compared to traditional wing recipes, but here’s the dietitian secret: lower heat for longer time creates perfectly cooked chicken throughout while the baking powder coating crisps up beautifully without burning.
Place your prepared baking sheet in the oven and bake for 30 minutes. Your wings won’t look crispy yet—that’s okay. After 30 minutes, increase your oven temperature to 425°F (220°C) and bake for another 15 to 20 minutes, until the wings are deep golden brown and the skin is noticeably crispy when you tap them. The skin should shatter slightly when you bite into it.
This two-temperature approach ensures the chicken cooks through gently (so it stays juicy) while the exterior becomes legitimately crispy. Remove from the oven and let the wings rest on the baking sheet for 2 minutes before tossing with sauce.
Step 4: Make Your Spicy Buffalo Sauce
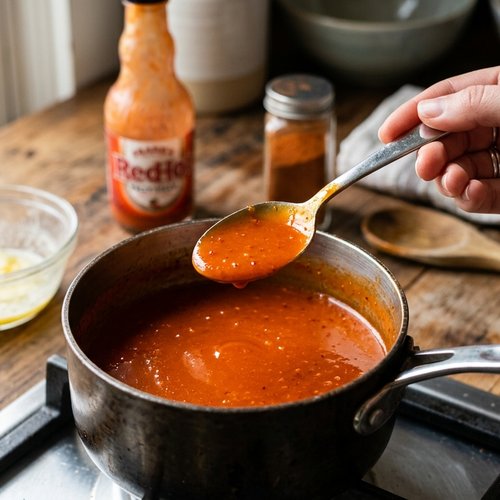
While your wings finish baking, prepare the sauce. In a small saucepan over medium-low heat, combine your melted butter, Frank’s Original Red Hot Sauce, brown sugar, kosher salt, and Worcestershire sauce. Stir constantly for about 2 to 3 minutes until the mixture is warm and the sugar dissolves completely. You want the sauce to be steaming but not boiling—boiling can cause the flavors to become harsh.
Taste your sauce and adjust seasoning. If you prefer more heat, add a few dashes of additional hot sauce. If you want more sweetness, add another ½ teaspoon of brown sugar. The sauce should be balanced between spicy, tangy, and slightly sweet—none of those flavors should overpower the others.
Remove from heat and let cool for 1 minute. The sauce should still be hot enough to coat the wings beautifully but cooled enough that it won’t re-crisp them into brittleness.
Step 5: Combine Wings and Sauce
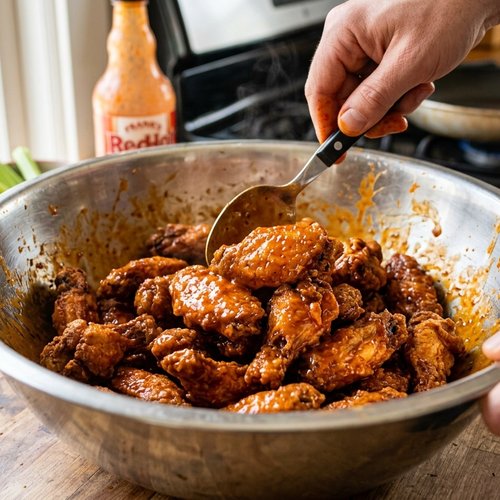
Transfer your baked wings to a large bowl—I use a stainless steel mixing bowl because it’s easy to handle and won’t absorb sauce flavors. Pour your warm buffalo sauce over the wings. Using tongs or two forks, toss the wings gently but thoroughly until every piece is evenly coated in sauce. This should take about 1 to 2 minutes.
Work quickly but carefully here. Your wings are hot and crispy, and you want to maintain that texture. Rough tossing can break delicate crispy skin. Aim for thorough coating without aggressive movement.
Step 6: Prepare Your Blue Cheese Dip
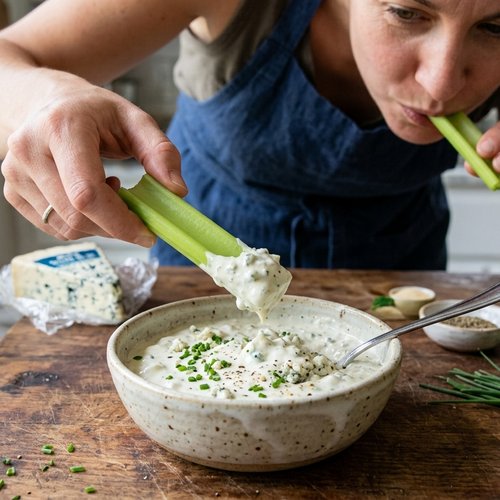
While your wings were baking, you could have prepared this dip, but if you’re timing everything fresh, do it now while the wings rest for 1 to 2 minutes after tossing with sauce. In a medium bowl, combine your crumbled blue cheese, sour cream, mayonnaise, minced garlic, fresh lemon juice, kosher salt, and black pepper.
Using a fork or small whisk, mash the blue cheese into the creamy base until you reach your desired texture. I prefer a slightly chunky dip with visible pieces of cheese, but some people like it smoother. Stir in milk, 1 tablespoon at a time, until you reach a dipping consistency—thick enough to coat a celery stick but not so thick it clumps.
Taste and adjust seasonings. The dip should taste rich and tangy with subtle garlic notes. If it tastes too pungent, add another tablespoon of sour cream. If it needs more tang, add a few drops of lemon juice.
Step 7: Serve Immediately
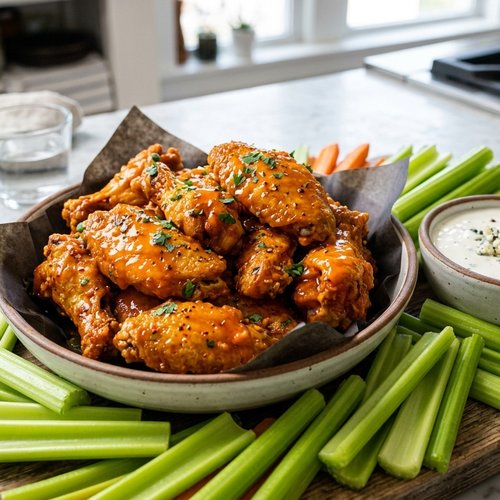
Transfer your sauce-coated wings to a serving platter, arranging them with space around each piece so they stay as crispy as possible. Pour any extra sauce from the bottom of the bowl over the wings. Arrange your blue cheese dip in a bowl in the center or off to the side, and surround everything with fresh celery sticks.
Serve immediately while the wings are hot and crispy. This is not a recipe that improves with sitting. The magic happens in those first 10 to 15 minutes while the sauce is still warm and the coating hasn’t softened.
Expert’s Nutritional Tip
As a registered dietitian, I want to highlight something important about this recipe: chicken wings are actually an excellent protein choice for balanced eating. While they contain fat, that fat includes oleic acid—the same beneficial monounsaturated fat found in olive oil. One serving of these wings (about 6 to 8 pieces) provides roughly 35 grams of high-quality protein while containing approximately 300 to 350 calories, depending on how much sauce adheres during tossing.
The blue cheese dip adds calcium and live cultures if you choose quality brands with active probiotics. The celery provides fiber and hydrating compounds that balance the richness of the meal. Eaten together—wing, dip, vegetable—you’re creating a surprisingly complete nutritional profile. This isn’t indulgent eating; it’s intentional eating that happens to taste incredible.
Tips and Tricks
- The baking powder difference is non-negotiable – Use only aluminum-free baking powder (check your label). Baking soda will not work and will create a metallic taste. Some wings recipes use a flour coating; skip that. Baking powder alone creates superior crispiness because it contains both leavening acid and base, which react during cooking to create tiny air pockets in the coating.
- Don’t skip the wire rack – Air circulation underneath the wings is what separates crispy from steamed. If you absolutely don’t have a wire rack, elevate the wings on crumpled foil balls so they’re not sitting directly on the baking sheet.
- Pat wings dry immediately before coating – Don’t coat them and then let them sit. Moisture will migrate back to the surface. From drying to oven should be no more than 5 minutes.
- Use Frank’s Original specifically – I’ve tested other hot sauces, and they taste different enough to change the entire flavor profile. Frank’s has lower sodium and more vinegar tang than competitors. It’s worth seeking out.
- Scale this recipe confidently for crowds – These wings double beautifully. For 8 pounds of wings, use 10 teaspoons baking powder and scale all other ingredients proportionally. Use two baking sheets and rotate them halfway through the higher-temperature baking phase. Timing stays exactly the same.
- Make the dip up to 4 hours ahead – Prepare the blue cheese dip earlier in the day and refrigerate it. Let it come to room temperature for 15 minutes before serving, or serve it cold—both work beautifully. The flavors actually improve as they meld together.
- Save your wing tips – Don’t throw away the tips from your wings. Freeze them and use them to make rich chicken stock for soups like our this cozy soup.
- Adjust heat level gradually – If you’re serving people with varying spice tolerances, start with ⅜ cup hot sauce instead of ½ cup. Taste after tossing and add more sauce to individual portions as desired. It’s easier to add heat than remove it.
Make-Ahead Guide
One of the questions I get most often is how to prepare these wings ahead of time without sacrificing quality. Here’s my professional approach to make-ahead planning:
The night before: Separate and pat dry your chicken wings. Store them uncovered on a paper-towel-lined plate in your refrigerator for up to 24 hours. The refrigerator’s dry environment actually helps them stay dry. About 30 minutes before baking, remove them from the fridge to bring to closer to room temperature—this ensures even cooking.
4 hours ahead: Prepare your blue cheese dip completely and refrigerate it in a covered container. Make your baking powder coating in a small bowl and set aside. Arrange your rack and foil on your baking sheet so it’s ready to go.
2 hours ahead: Prepare your sauce ingredients in small bowls—melted butter, hot sauce, brown sugar measured out. Don’t combine yet; just have everything ready. This makes the final steps incredibly quick.
Do NOT coat the wings ahead of time. The coating will absorb moisture from the raw chicken and become gummy rather than crispy. Coat immediately before baking.
Reheating strategy: If you’ve baked wings ahead and need to reheat them, place them on a wire rack at 350°F (175°C) for 5 to 8 minutes to re-crisp the exterior without drying out the meat. Reheat your sauce separately and toss the wings just before serving. The result won’t be quite as perfect as fresh, but it’s remarkably close.
Common Mistakes to Avoid
- Mistake #1: Using baking soda instead of baking powder – This creates a bitter, metallic taste and doesn’t crisp properly. They’re completely different products. Baking soda is pure sodium bicarbonate; baking powder includes an acid and other ingredients that create the crispy reaction we want.
- Mistake #2: Skipping the initial low-temperature bake – Many recipes jump straight to 425°F and end up with crispy skin surrounding undercooked chicken. The 30-minute low bake at 250°F cooks the chicken through gently while the baking powder starts activating. Then the higher temperature finishes the crisping.
- Mistake #3: Overcrowding the baking sheet – Wings need space to crisp. Crowded wings steam, not roast. If you need to fit 4 pounds and your sheet is small, use two sheets and rotate them. Plan for this ahead of time.
- Mistake #4: Letting the wings sit after saucing – Serve them immediately. The sauce softens the crispy coating as it sits. Everything should go from oven to bowl to table within 5 minutes for optimal texture.
Seasonal Variations
Spring version: Replace half the buffalo sauce with equal parts buffalo sauce and a fresh lemon-garlic mixture. Add a tablespoon of fresh herbs like tarragon or dill to your blue cheese dip for brightness.
Summer version: Make a Thai buffalo sauce by combining buffalo sauce with 1 tablespoon of fish sauce, 1 tablespoon of honey, and a squeeze of lime juice. Serve the dip with cilantro stirred through it and fresh lime wedges on the side. Add cucumber slices to your vegetable platter alongside celery.
Fall version: Add ½ teaspoon of smoked paprika and ¼ teaspoon of cayenne pepper to your sauce base for deeper, warmer heat. Serve the blue cheese dip with apple slices alongside celery for sweetness that complements the spice.
Winter version: Create a honey-sriracha buffalo sauce by replacing half the Frank’s with sriracha and adding 2 tablespoons of honey. The richness of honey plays beautifully in cold weather. Add a pinch of ground ginger to your coating for subtle warmth.
Can I Store Spicy Buffalo Wings?
These wings taste best fresh and warm, but I understand real life doesn’t always cooperate with ideal circumstances. Here’s how to handle storage:
Refrigerator storage: Transfer any leftover wings to an airtight container and refrigerate for up to 3 days. Store the sauce and dip separately in covered containers. The wings will lose crispiness as they sit; this is expected and normal.
Reheating: Rather than using a microwave, which steams them and makes them soggy, place leftover wings on a wire rack at 350°F (175°C) for 5 to 8 minutes until warmed through and the exterior re-crisps slightly. Reheat the sauce separately in a small saucepan over low heat and toss the wings just before serving.
Freezer storage: Yes, you can freeze cooked wings for up to 2 months. Cool them completely, transfer to a freezer-safe container with parchment between layers so they don’t stick together, and label with the date. Thaw overnight in the refrigerator before reheating. The texture will be noticeably softer than fresh, but the flavor remains.
Important note: Don’t freeze the sauce or dip separately unless necessary. The sauce separates when frozen, and the dip becomes grainy. If you must freeze dip, plan to re-blend it with a little fresh cream when thawing.
Nutrition Information
Based on USDA nutrition database analysis, one serving of this recipe (approximately 6 to 8 wings with 2 tablespoons of blue cheese dip, per the yield of 4 to 6 servings) contains approximately:
- Calories: 310 to 350 (depending on sauce adherence)
- Protein: 32 to 36 grams (excellent for muscle maintenance and satiety)
- Fat: 15 to 18 grams (mostly from poultry skin and cheese; includes beneficial monounsaturated fats)
- Carbohydrates: 3 to 4 grams (minimal, mostly from brown sugar in sauce)
- Sodium: 680 to 720 milligrams (about 29-31% of daily value; Frank’s Original is relatively lower-sodium than other hot sauces)
- Calcium: 85 to 95 milligrams (from blue cheese and dip)
- Iron: 1.2 to 1.4 milligrams (from chicken)
This is a relatively balanced appetizer or main course protein serving. The high protein content makes it particularly satisfying, and the fat is primarily from whole-food sources rather than added oils. If you’re monitoring sodium intake, rinse celery in water before serving (celery naturally contains sodium, and rinsing reduces it slightly), and pair the meal with hydrating beverages.
What Can I Serve With Spicy Buffalo Wings?
These wings shine as a main course or appetizer, but thoughtful sides elevate the entire meal. I’ve learned from years of family dinners that the best meals include contrast—temperature, texture, flavor. Here are my tried-and-true pairings:
- Fresh celery and carrots – Absolutely traditional, and there’s a reason. Cool, hydrating vegetables provide textural contrast and help your palate reset between spicy bites. The natural sweetness of carrots balances the heat beautifully.
- Simple green salad with ranch dressing – Crisp lettuce, cool dressing, and subtle herbs create a cleansing element that prevents spice fatigue. The richness of ranch dressing bridges between the wings and the vegetables.
- Creamy sides – Mashed potatoes, potato salad, or mac and cheese serve as comforting anchors alongside the spicy-tangy wings. The starch and cream soothe heat while adding satisfying heft to the meal.
- Grains and bread – Serve with dinner rolls, cornbread, or even rice if you’re making this a more substantial meal. Starch is an excellent companion to spicy foods because it helps absorb capsaicin (the heat compound) and prevents it from lingering too intensely.
- Additional dips – Beyond blue cheese, consider serving a Jarlsberg Cheese Dip for variety, or simple ranch. Having multiple creamy dips lets guests choose their cooling agent based on preference.
- Beverages – Cold beer, sparkling water with lemon, iced tea, or even milk provide relief from heat. Avoid plain water; capsaicin is fat-soluble, so creamy or carbonated beverages work better.
Substitutes
- Hot sauce alternatives – If Frank’s Original isn’t available, use Louisiana-style hot sauce as your closest substitute. Avoid vinegar-forward sauces like Tabasco, which are too thin and acidic. Texas Pete works in a pinch, though it’s slightly thicker. Avoid spicy mayo-based sauces like sriracha mayo; they won’t achieve the same coating texture.
- Blue cheese alternatives – If you don’t enjoy blue cheese, use gorgonzola (slightly creamier), feta (more tangy), or even quality cheddar mixed with a bit of cream cheese. The goal is creamy richness that cools heat. Avoid completely mild cheeses like fresh mozzarella.
- Sour cream alternatives – Full-fat Greek yogurt works beautifully, though it’s slightly tangier. Crème fraîche is luxurious but pricey. Avoid non-fat or low-fat versions, which create a grainy dip texture.
- Baking powder alternatives – This is not where to substitute. There is no true replacement for baking powder in creating this specific crust. Some recipes use cornstarch, which creates a different (and inferior) crust texture. If you don’t have baking powder, make a simple coating with salt and a tiny amount of paprika instead, understanding the crispiness will be different.
- Lemon juice alternatives – Fresh lime juice works equally well in the dip, creating a slightly different but equally brightening flavor. Lime is particularly nice if you’re doing the summer Thai variation. Avoid bottled lemon or lime juice if possible; the flavor is noticeably muted.
- Celery alternatives – If you don’t have celery, serve with cucumber slices, bell pepper strips, or even apple slices. The goal is cool, crisp, hydrating vegetable or fruit. Carrot sticks are classic for a reason and are always a solid backup.

Spicy Buffalo Wing Recipe
Ingredients
Method
- Start by patting your chicken wings completely dry with paper towels. This step feels small, but it's everything. Moisture is the enemy of crispy skin. I pat each piece individually, rotating them to catch any hidden wetness. Take your time here—I spend about 5 minutes drying 4 pounds of wings thoroughly. Next, in a medium bowl, combine your baking powder, kosher salt, black pepper, and garlic powder if using. Mix thoroughly with a fork to break up any lumps in the baking powder. This coating is what creates that shatteringly crispy exterior that distinguishes restaurant-quality wings from soggy homemade versions. Transfer your dried wings to a large bowl and sprinkle the baking powder mixture over them generously. Using your hands (this is the best tool), toss the wings until every piece is evenly coated. Make sure you're working with dry hands and that the coating adheres to the chicken. This should take about 2 to 3 minutes. You'll notice the coating starts to stick as you toss—that's exactly what you want.
- Line a large baking sheet with foil for easy cleanup, then arrange an oven-safe wire rack on top. This two-layer approach is non-negotiable for even cooking and maximum air circulation underneath the wings. If you don't have a wire rack, you can use a second baking sheet, but the rack truly makes a difference in achieving that all-over crispiness. Arrange your coated wings in a single layer on the rack, spacing them about ½ inch apart. They shouldn't touch or overlap. If your baking sheet is crowded, use two sheets and rotate them halfway through baking. Crowded wings steam instead of crisp, and we're not going for that texture.
- Preheat your oven to 250°F (120°C) and allow it to fully reach temperature before placing your wings inside. I know this seems low compared to traditional wing recipes, but here's the dietitian secret: lower heat for longer time creates perfectly cooked chicken throughout while the baking powder coating crisps up beautifully without burning. Place your prepared baking sheet in the oven and bake for 30 minutes. Your wings won't look crispy yet—that's okay. After 30 minutes, increase your oven temperature to 425°F (220°C) and bake for another 15 to 20 minutes, until the wings are deep golden brown and the skin is noticeably crispy when you tap them. The skin should shatter slightly when you bite into it. This two-temperature approach ensures the chicken cooks through gently (so it stays juicy) while the exterior becomes legitimately crispy. Remove from the oven and let the wings rest on the baking sheet for 2 minutes before tossing with sauce.
- While your wings finish baking, prepare the sauce. In a small saucepan over medium-low heat, combine your melted butter, Frank's Original Red Hot Sauce, brown sugar, kosher salt, and Worcestershire sauce. Stir constantly for about 2 to 3 minutes until the mixture is warm and the sugar dissolves completely. You want the sauce to be steaming but not boiling—boiling can cause the flavors to become harsh. Taste your sauce and adjust seasoning. If you prefer more heat, add a few dashes of additional hot sauce. If you want more sweetness, add another ½ teaspoon of brown sugar. The sauce should be balanced between spicy, tangy, and slightly sweet—none of those flavors should overpower the others. Remove from heat and let cool for 1 minute. The sauce should still be hot enough to coat the wings beautifully but cooled enough that it won't re-crisp them into brittleness.
- Transfer your baked wings to a large bowl—I use a stainless steel mixing bowl because it's easy to handle and won't absorb sauce flavors. Pour your warm buffalo sauce over the wings. Using tongs or two forks, toss the wings gently but thoroughly until every piece is evenly coated in sauce. This should take about 1 to 2 minutes. Work quickly but carefully here. Your wings are hot and crispy, and you want to maintain that texture. Rough tossing can break delicate crispy skin. Aim for thorough coating without aggressive movement.
- While your wings were baking, you could have prepared this dip, but if you're timing everything fresh, do it now while the wings rest for 1 to 2 minutes after tossing with sauce. In a medium bowl, combine your crumbled blue cheese, sour cream, mayonnaise, minced garlic, fresh lemon juice, kosher salt, and black pepper. Using a fork or small whisk, mash the blue cheese into the creamy base until you reach your desired texture. I prefer a slightly chunky dip with visible pieces of cheese, but some people like it smoother. Stir in milk, 1 tablespoon at a time, until you reach a dipping consistency—thick enough to coat a celery stick but not so thick it clumps. Taste and adjust seasonings. The dip should taste rich and tangy with subtle garlic notes. If it tastes too pungent, add another tablespoon of sour cream. If it needs more tang, add a few drops of lemon juice.
- Transfer your sauce-coated wings to a serving platter, arranging them with space around each piece so they stay as crispy as possible. Pour any extra sauce from the bottom of the bowl over the wings. Arrange your blue cheese dip in a bowl in the center or off to the side, and surround everything with fresh celery sticks. Serve immediately while the wings are hot and crispy. This is not a recipe that improves with sitting. The magic happens in those first 10 to 15 minutes while the sauce is still warm and the coating hasn't softened.
Notes
FAQs
Can I cook these wings without a wire rack?
Technically yes, but the results won’t be identical. If you don’t have a wire rack, create one by crumpling heavy-duty foil into small balls and arranging them on your baking sheet, spacing them about 2 inches apart. Then place your wings on top of those foil supports so there’s air circulation underneath. It’s not perfect, but it’s functional. Alternatively, use two baking sheets—arrange wings on one, flip it over onto the second sheet midway through baking. It’s awkward but works in a pinch.
What if my wings aren’t crispy after baking?
This is usually caused by one of three issues: the wings were too wet when coated (pat them extra dry), your oven temperature wasn’t accurate (invest in an oven thermometer; many ovens run cool), or you skipped the wire rack and they steamed instead of roasted. For future batches, address whichever factor applies. For the current batch, try re-crisping them at 400°F for 5 to 8 minutes, but understand they may not recover completely. This is why prep is so important with this recipe.
Can I use chicken breasts or thighs instead of wings?
You can, though the result is different. Chicken breasts will be very lean and can dry out, though the baking powder coating does provide some protection. Thighs work beautifully and actually stay juicier, but they’ll take slightly longer to cook (add 5 to 10 minutes at the higher temperature) and will have more fat on top. Wings are ideal because of their perfect ratio of skin to meat and their natural size for dunking and sauce adherence.
Why does my blue cheese dip taste too strong?
Blue cheese is pungent by nature, but if it’s overwhelming, you’re either using too much cheese or your cheese is particularly intense. Solution: add more sour cream and mayo to dilute the flavor, then season more deliberately with salt and lemon juice. You can also try mixing your blue cheese with equal parts mild cheddar or white cheddar to soften the intensity. Taste as you go and adjust incrementally.
Can I make these wings in an air fryer?
Yes, absolutely. Air fryers work beautifully for wings. Use the same coating (baking powder, salt, pepper), and cook at 380°F for 18 to 22 minutes, shaking the basket halfway through. You may need to do wings in batches depending on your air fryer size. The results are actually very crispy because air fryers circulate heat intensely. Toss with sauce immediately after cooking, just like with the oven method.
More Recipes You’ll Love
- Apricot Chicken – A sweet and savory chicken recipe that balances spice beautifully if you want something different from buffalo sauce.
- my weeknight pasta – An elegant side or next-day option that uses fresh, bright flavors to complement leftover buffalo wing traditions.
