Shrimp Quesadilla Recipe
This post contains affiliate links. As an Amazon Associate I earn from qualifying purchases.
This shrimp quesadilla doesn’t just taste incredible—it stops people in their tracks. Golden-brown tortillas crackling with melted cheese, plump pink shrimp peeking through, and that moment when someone takes their first bite? That’s when the magic happens. I’ve watched countless family dinners transform around this dish, and I’m thrilled to share exactly how you can recreate that same magic in your kitchen. If you love quick seafood meals, you’ll also appreciate my Grilled Fish Tacos—another way to get restaurant-quality seafood on the table fast.
The Most Beautiful Shrimp Quesadilla Recipe You’ll Ever Make (And It’s Easier Than It Looks)
I remember the exact moment I realized this recipe had staying power. It was a Tuesday evening in my Fairfield kitchen—nothing fancy planned, just dinner for my family. I had medium shrimp, some tortillas, and basic pantry staples. But when I plated those first quesadillas, the golden-brown exterior glistening under the kitchen light, the way the cheese was just barely visible at the edges, something shifted. My kids stopped scrolling. My partner looked up from his phone. The visual appeal created an anticipation that made those first bites taste even better.
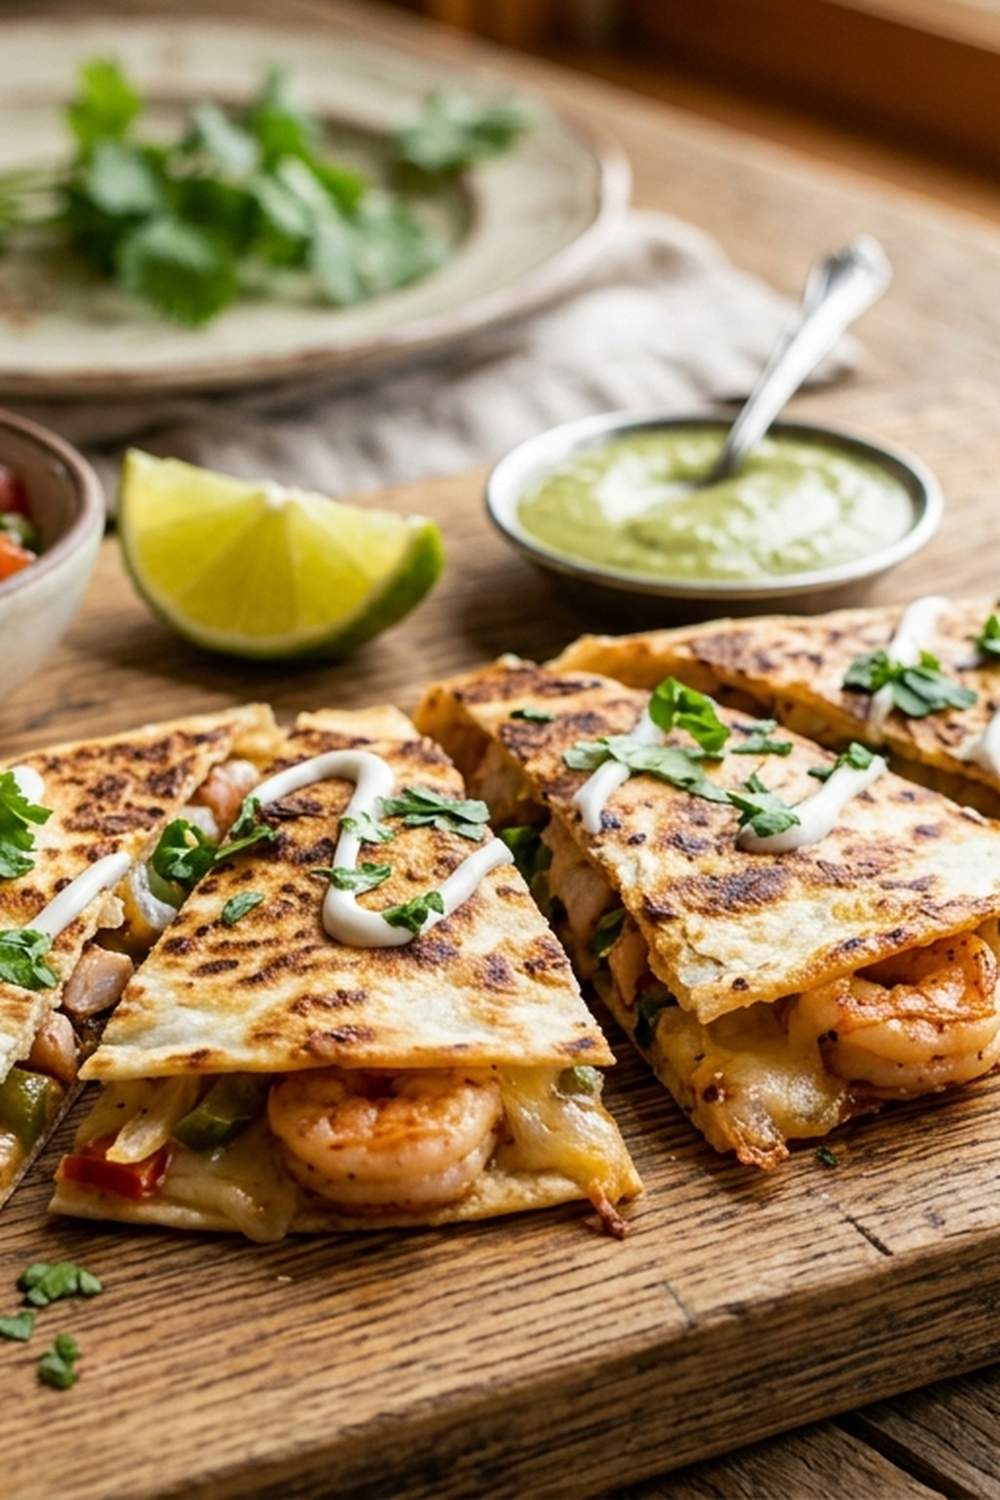
That’s when I understood: the best meals feed both the eyes and the soul. This recipe proves that healthy, efficient cooking never requires sacrificing presentation. In just 30 minutes, you can create something that looks like you spent hours in the kitchen.
The Visual Elements That Make This Dish Stunning
What makes a shrimp quesadilla visually captivating? It’s the thoughtful combination of colors, textures, and composition. Let me break down exactly what’s happening on the plate that makes people reach for their cameras before their forks.
- Golden-Caramel Crust – The tortilla exterior develops a beautiful deep golden-brown color through proper heat management. This color signals crispness and care, making the dish look professionally executed. The Maillard reaction creates both visual appeal and that irresistible toasted flavor.
- Contrasting Textures – You’re creating a play between the crispy exterior and the creamy, melted interior. When you fold the quesadilla and cook it until that cheese oozes slightly at the edges, you’re building visual interest that makes people want to taste it immediately.
- Color Layering – The pink shrimp against white and orange cheese, with vibrant bell pepper pieces visible at the edges, creates natural color harmony. These aren’t arbitrary choices—they’re the foundation of visual composition.
Choosing Ingredients for Maximum Visual Impact
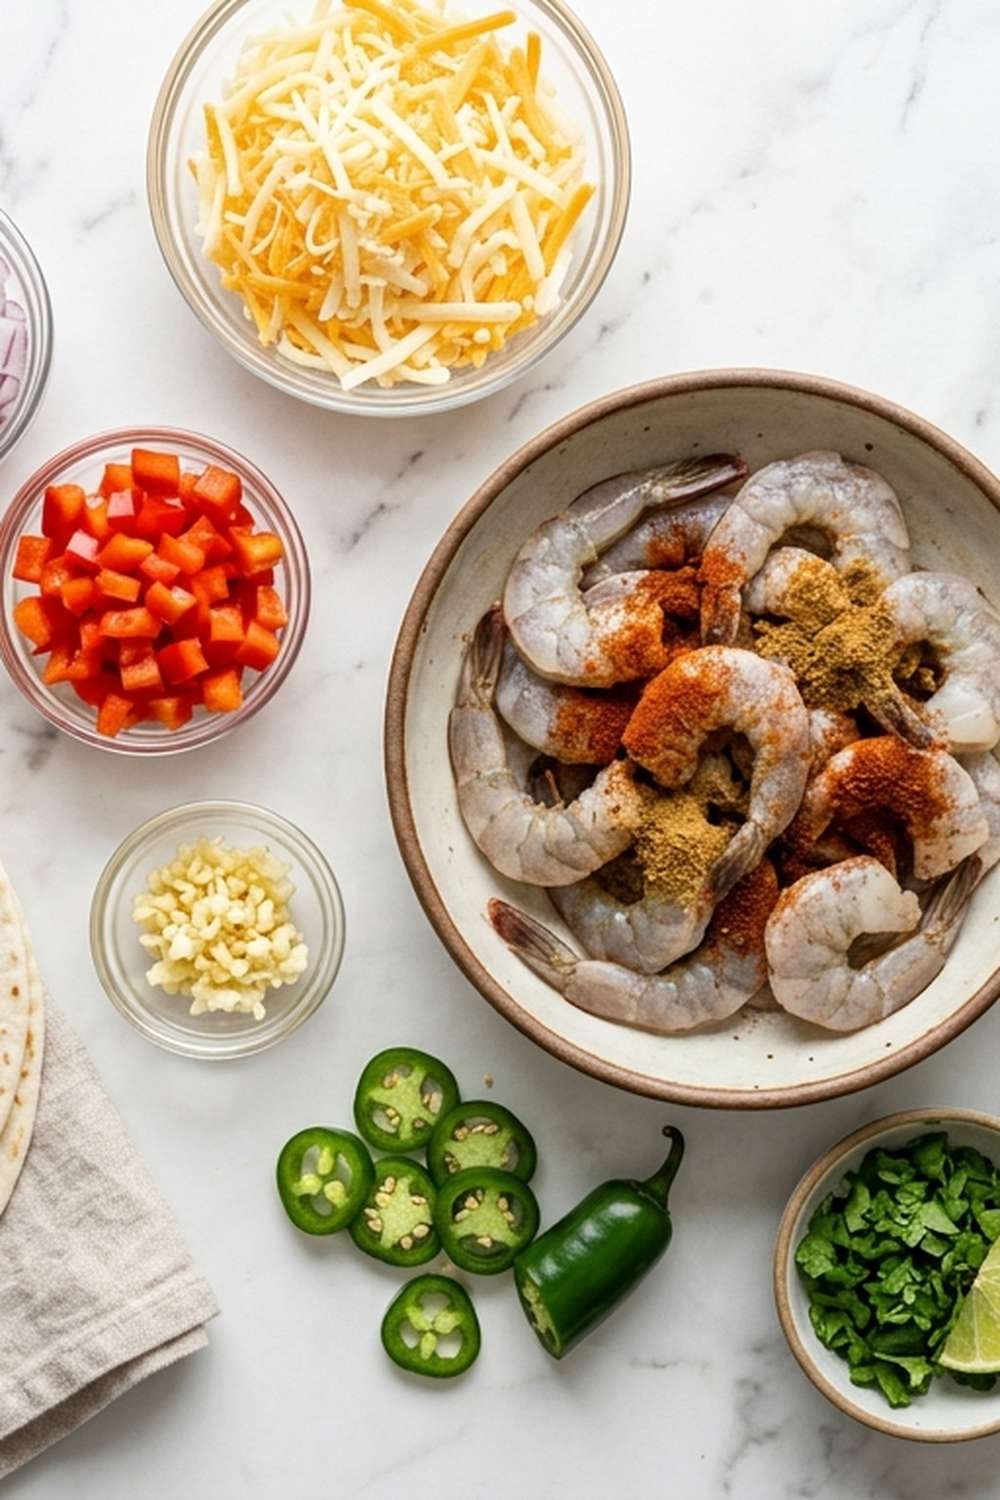
As a registered dietitian, I choose every ingredient on this list for three reasons: nutrition, flavor, and how it looks on the plate. When your ingredients are colorful, they’re typically nutrient-dense. When they’re visually interesting, people become more excited to eat them. It’s a beautiful cycle where presentation and health align perfectly.
- ½ cup yellow onion (diced into small, even pieces—the caramelization adds depth of color and sweetness)
- ½ cup red bell pepper (finely chopped—this is your color pop that signals freshness and vitamin C content)
- 1 tablespoon fresh cilantro (chopped, for garnish—adds brightness and a professional finishing touch)
- 2 cloves fresh garlic (minced—the aromatics that make people know something delicious is cooking)
- 2 tablespoons taco seasoning (cumin, chili powder, and paprika blend—provides warm color and unmistakable flavor)
- 1 pound medium shrimp (peeled and deveined—look for those with a slight translucent quality that turns vibrant pink when cooked)
- 6 medium flour tortillas (choose ones that are pliable and fresh; stale tortillas won’t achieve that golden-brown exterior)
- 1 tablespoon extra-virgin olive oil (the foundation for developing that beautiful caramelization on your tortilla exterior)
- 1½ cups shredded cheese blend (a combination of Monterey Jack, sharp cheddar, and mozzarella creates the creamiest melt and richest golden color)
- Lime wedges (for serving—the acidic pop that completes the dish visually and flavor-wise)
How to Make Picture-Perfect Shrimp Quesadilla Recipe
I’m going to walk you through this as if we’re creating edible art together. Each step builds on the last, and I’ll show you exactly where presentation matters—because it matters at every single stage.
Step 1: Sauté Your Aromatic Base
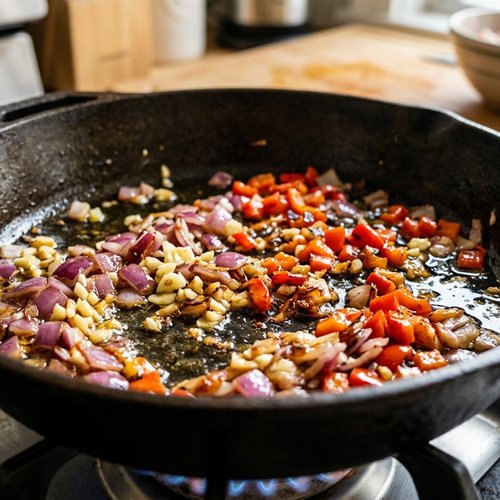
Pour your extra-virgin olive oil into a large skillet over medium-high heat. Once it’s shimmering—that’s when you see it moving but not smoking—add your diced yellow onion and minced red bell pepper. Let these cook undisturbed for about one minute. This matters for presentation because you’re developing those caramelized edges that add visual depth. Add your minced garlic and cook for another 15-20 seconds until fragrant. Your kitchen should smell incredible right now.
Step 2: Cook the Shrimp Until Perfectly Pink
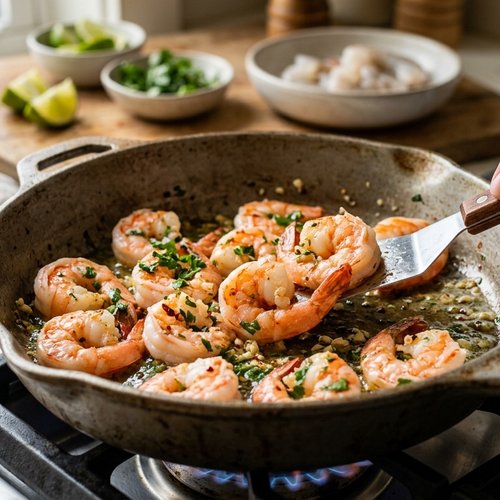
Add your pound of medium shrimp directly to the vegetables. This is the moment where color transformation happens—and it’s your visual cue for doneness. Sprinkle the taco seasoning evenly over the shrimp and fold everything together gently. Cook for exactly 1-2 minutes per side, until each shrimp has turned from translucent gray to that beautiful bright pink. Don’t overcook here—overcooked shrimp becomes rubbery and loses its visual appeal. The moment they’re pink, they’re ready.
Transfer this mixture to a small bowl and set aside. You’ve just created your filling—it should look vibrant with pink shrimp nestled among caramelized vegetables.
Step 3: Prepare Your Skillet for the Quesadilla Assembly
Quickly wipe down your skillet with a paper towel—this removes excess oil and vegetable bits, giving you a clean cooking surface for perfect quesadilla browning. Return the skillet to medium heat and allow it to warm for about 30 seconds. Light oil coating is all you need here (about ½ teaspoon brushed lightly across the surface).
Step 4: Build and Cook Each Quesadilla
Place one flour tortilla in your warm skillet. Immediately sprinkle about ¼ cup of your cheese blend onto one half of the tortilla—this is your “glue” that holds everything together. Spoon 5-6 cooked shrimp (with a bit of the vegetable mixture) onto that cheese. Top with another ¼ cup of cheese. This layering technique ensures the cheese melts into every crevice.
Fold the tortilla in half carefully. This is crucial for presentation: fold gently so the edges are even and the shape is symmetrical. Cook for 2-3 minutes on the first side until you see the edges beginning to turn golden-brown. Flip carefully using a wide spatula, and cook the other side for another 2-3 minutes until both sides are equally golden and crispy.
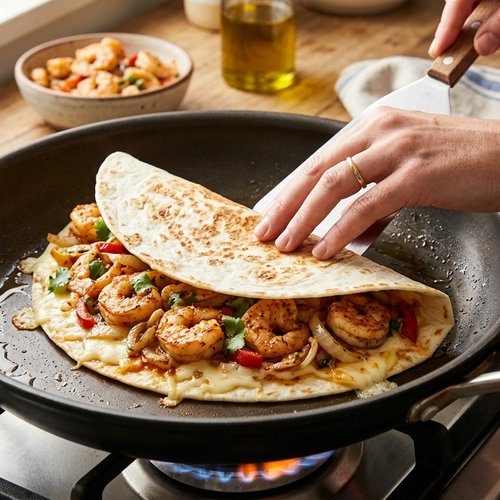
Transfer the finished quesadilla to a cutting board and cover loosely with foil to keep it warm while you repeat with remaining tortillas. You’re making 6 quesadillas total—this batch approach ensures each one gets proper attention and perfect browning.
Step 5: The Final Presentation Moment
As each quesadilla finishes cooking, let it rest on your cutting board for exactly one minute. This allows the cheese to set slightly, making them easier to slice. Cut each quesadilla in half diagonally—this angle creates visual height and makes the interior visible, showing off those pink shrimp and melted cheese.
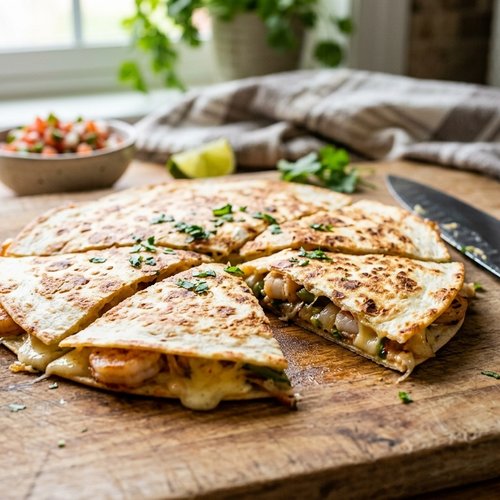
The Plating Masterclass
This is where the magic that started in your skillet becomes the magic on the plate. Professional plating isn’t about fussy complexity—it’s about intentional arrangement that makes people excited before they ever take a bite.
- The Angle Matters – Arrange your quesadilla halves slightly overlapping, standing them up at a 45-degree angle rather than laying them flat. This creates height and visual interest. The cut edges showing the pink shrimp and melted cheese become your focal point.
- Negative Space is Your Friend – Don’t crowd the plate. Leave space around your quesadilla so the eye can appreciate the whole composition. This isn’t laziness—it’s intentional design that makes the dish look restaurant-quality.
- The Garnish Placement – Place a small handful of fresh cilantro off to one side, and position a lime wedge nearby. These aren’t afterthoughts; they’re color accents and flavor signals. The bright green cilantro against the golden quesadilla, with yellow-green lime, creates a color story.
- Sauce Placement Strategy – If serving with sour cream or guacamole, place these in small portions off to the side rather than on top. This preserves the beautiful quesadilla exterior and lets people control their own sauce ratio.
Photography Tips for This Dish
If you’re sharing this at the dinner table or on social media, let me give you the insider perspective on capturing this dish at its absolute best.
- Timing is Everything – Photograph immediately after plating, while the quesadilla is still steaming slightly. That gentle steam adds texture and signals “fresh from the skillet.” It also keeps the tortilla at its crispest visually.
- Lighting Direction – Use natural window light from the side rather than directly overhead. This sidelight highlights the golden-brown crust and creates shadows that emphasize texture. The steam becomes visible and beautiful in this lighting.
- Angle Selection – Shoot from a 45-degree angle that captures both the height of your standing quesadilla halves and the interior cross-section. This angle tells the complete story of what’s inside.
Expert’s Nutritional Tip
As a registered dietitian, I want you to understand why this recipe works nutritionally beyond just tasting great. That vibrant pink shrimp is pure lean protein—about 20 grams per 3-ounce serving—with virtually no carbohydrates or unhealthy fats. The red bell pepper isn’t just beautiful; it contains more vitamin C than an orange, ounce for ounce. The combination of protein from shrimp and the carbohydrates in the tortilla creates a balanced meal that stabilizes blood sugar and keeps you satisfied for hours. This is why it’s perfect for weeknight dinners and meal prep alike.
Seasonal Color Variations
The beauty of this recipe is its adaptability throughout the year. While the core shrimp-cheese-tortilla combination stays consistent, you can adjust your vegetable medley and garnishes based on what’s in season and what’s visually stunning at your market.
Spring Version: Replace half the red bell pepper with fresh asparagus (diced small) and add a handful of fresh pea shoots as your garnish instead of cilantro. The tender greens and lighter colors create a fresh, delicate aesthetic.
Summer Version: Keep it as written with that vibrant red bell pepper, but add fresh corn kernels to your vegetable mixture. The pale yellow corn against pink shrimp is a classic summer combination. Garnish with fresh cilantro and lime as intended.
Fall Version: Swap the red bell pepper for a roasted poblano pepper (charred and diced), and add a touch of smoked paprika to your taco seasoning. Use orange or yellow bell pepper instead for warm autumn tones. Garnish with cilantro and a squeeze of lime, finished with a tiny drizzle of crema.
Winter Version: Add sautéed mushrooms and caramelized onions to deepen the color palette and flavor profile. Use sharp white cheddar as your primary cheese for brighter appearance. Finish with cilantro and lime as always.
Make-Ahead Guide for Busy Weeknights
One of my favorite aspects of this recipe is how beautifully it accommodates meal prep. As someone who understands the realities of busy families, I’ve built flexibility into every step.
Prepare the Shrimp Filling (Up to 2 Days Ahead): Cook the onion, bell pepper, garlic, and seasoned shrimp exactly as directed through Step 2. Cool completely and transfer to an airtight container. Store in the refrigerator for up to 48 hours. This removes the longest part of cooking on busy weeknights.
Assembly and Cooking (Day Of): On the day you’re serving, simply reheat your shrimp filling gently in a skillet over medium heat for 2-3 minutes, then proceed with Steps 3-5. The quesadillas cook in less than 15 minutes total, making your total active cooking time roughly 15 minutes.
Storage of Cooked Quesadillas (Up to 3 Days): If you’re making a full batch and want to store extras, let them cool completely on a wire rack (this prevents them from becoming soggy). Wrap individually in foil and store in an airtight container in the refrigerator for up to 3 days. Reheat in a 350°F oven for 5-7 minutes until crispy again.
Freezing Option (Up to 1 Month): Cooked quesadillas freeze beautifully. Wrap completely cooled quesadillas individually in plastic wrap, then place in a freezer bag. Label with the date. To reheat from frozen, unwrap and place directly on an oven rack at 375°F for 10-12 minutes until heated through and crispy.
Common Mistakes to Avoid
In my years of cooking and teaching, I’ve seen certain patterns emerge. Let me help you sidestep these before they happen.
Mistake 1: Using Pre-Cooked Frozen Shrimp Directly from the Freezer – If you use frozen shrimp without thawing them completely first, they’ll release excess water into your filling, making everything watery and preventing proper browning. Always thaw shrimp overnight in the refrigerator or in a bowl of cool water for 15-20 minutes before cooking.
Mistake 2: Cooking the Shrimp Too Long – Shrimp are incredibly forgiving if you hit that 1-2 minute window perfectly, but adding just one extra minute transforms them from tender to rubbery. The visual cue is your best friend here: the moment they turn that bright pink color throughout, they’re done. Remove from heat immediately.
Mistake 3: Skipping the Pan-Drying Step Between Cooking Batches – If you don’t wipe your skillet between quesadillas, vegetable bits and excess oil create spots of uneven browning. A quick wipe takes 5 seconds and guarantees that perfect golden exterior on every single quesadilla.
Mistake 4: Overfilling Your Quesadillas – It’s tempting to cram in as much filling as possible, but this creates two problems: the cheese won’t melt evenly, and when you fold the tortilla, filling spills out during cooking. Stick with 5-6 shrimp and about ¼ cup total filling per quesadilla. Your beautiful presentation depends on this restraint.
Can I Store Shrimp Quesadilla Recipe?
Yes, and I have a specific method that preserves both flavor and that beautiful crispy texture you worked so hard to achieve.
Refrigerator Storage (3 Days): Cool cooked quesadillas completely on a wire rack for at least 10 minutes. This cooling prevents steam from making them soggy. Transfer to an airtight container with parchment paper between layers. Store for up to 3 days. To reheat, place on an oven rack at 350°F for 5-7 minutes until the exterior crisps back up.
Freezer Storage (1 Month): Wrap completely cooled quesadillas individually in plastic wrap, then place in a labeled freezer bag with the date. Freeze for up to 1 month. To reheat from frozen, place unwrapped on an oven rack at 375°F for 10-12 minutes until heated through and crispy.
Storage for the Filling Only (2 Days): If you’re only storing the cooked shrimp-vegetable mixture (not assembled into quesadillas), keep it in an airtight container in the refrigerator for up to 48 hours. This is actually my preferred method for meal prep since you can assemble fresh quesadillas on the day you want to eat them, ensuring maximum crispiness.
Never Store Uncooked Assembled Quesadillas: Assembling and then storing leads to soggy tortillas as the cheese moisture seeps into the bread over time.
Nutrition Information
I’m providing this information based on USDA nutritional databases, calculated per quesadilla (yields 6 quesadillas total). These numbers reflect the core recipe without optional toppings.
Per Serving (One Quesadilla): Calories: 385 | Protein: 24g | Carbohydrates: 32g | Dietary Fiber: 1g | Total Fat: 16g | Saturated Fat: 8g | Cholesterol: 142mg | Sodium: 680mg | Potassium: 285mg
What I find fascinating from a nutritional perspective is how the colorful ingredients signal nutritional density. That pink shrimp provides complete protein with all nine essential amino acids. The red bell pepper delivers capsaicin (which supports metabolism) and vitamin C. The cheese contributes calcium and vitamin D for bone health. The whole grain tortilla provides B vitamins and fiber. When your food looks vibrant, it typically means you’re getting diverse nutrients. This is the intersection of beautiful food and healthy eating.
What to Serve Alongside for a Complete Visual Spread
When I’m planning a dinner around these shrimp quesadillas, I think about what complements them visually and nutritionally. You want your table to look like an intentional spread, not random dishes scattered about.
- A Bright, Acidic Salad – Something like my my favorite salad provides cool color contrast and a fresh element that balances the warm, cheesy quesadillas. The blue-purple berries against green lettuce creates visual variety on your table.
- Cilantro-Lime Rice – A simple white or cilantro-lime rice in a separate bowl adds textural contrast and completes the meal. The bright green cilantro echoes your garnish, creating visual cohesion.
- Black Bean Dip – Served in a small bowl with tortilla chips, this deep-colored dip (made vibrant with lime juice and cilantro) provides another element people can customize and adds depth to your spread.
- Fresh Lime and Cilantro Sour Cream – Mix regular sour cream with fresh cilantro and a squeeze of lime juice. The subtle green speckles make it more visually interesting than plain sour cream, and it’s the perfect cool contrast to the warm quesadilla.
- Grilled Pineapple or Mango Slices – If you want to add something unexpected, grilled fruit brings brightness and sweetness. The caramelized fruit against the savory quesadillas creates an interesting flavor and color interplay.
For beverages, think about the visual story you’re creating. A bright Pomegranate Smash brings deep pink-red color to your table and provides a refreshing counterpoint to the rich quesadilla. Ice-cold agua fresca with fresh fruit would also work beautifully.

Shrimp Quesadilla Recipe
Ingredients
Method
- Pour your extra-virgin olive oil into a large skillet over medium-high heat. Once it's shimmering—that's when you see it moving but not smoking—add your diced yellow onion and minced red bell pepper. Let these cook undisturbed for about one minute. This matters for presentation because you're developing those caramelized edges that add visual depth. Add your minced garlic and cook for another 15-20 seconds until fragrant. Your kitchen should smell incredible right now.
- Add your pound of medium shrimp directly to the vegetables. This is the moment where color transformation happens—and it's your visual cue for doneness. Sprinkle the taco seasoning evenly over the shrimp and fold everything together gently. Cook for exactly 1-2 minutes per side, until each shrimp has turned from translucent gray to that beautiful bright pink. Don't overcook here—overcooked shrimp becomes rubbery and loses its visual appeal. The moment they're pink, they're ready. Transfer this mixture to a small bowl and set aside. You've just created your filling—it should look vibrant with pink shrimp nestled among caramelized vegetables.
- Quickly wipe down your skillet with a paper towel—this removes excess oil and vegetable bits, giving you a clean cooking surface for perfect quesadilla browning. Return the skillet to medium heat and allow it to warm for about 30 seconds. Light oil coating is all you need here (about ½ teaspoon brushed lightly across the surface).
- Place one flour tortilla in your warm skillet. Immediately sprinkle about ¼ cup of your cheese blend onto one half of the tortilla—this is your "glue" that holds everything together. Spoon 5-6 cooked shrimp (with a bit of the vegetable mixture) onto that cheese. Top with another ¼ cup of cheese. This layering technique ensures the cheese melts into every crevice. Fold the tortilla in half carefully. This is crucial for presentation: fold gently so the edges are even and the shape is symmetrical. Cook for 2-3 minutes on the first side until you see the edges beginning to turn golden-brown. Flip carefully using a wide spatula, and cook the other side for another 2-3 minutes until both sides are equally golden and crispy. Transfer the finished quesadilla to a cutting board and cover loosely with foil to keep it warm while you repeat with remaining tortillas. You're making 6 quesadillas total—this batch approach ensures each one gets proper attention and perfect browning.
- As each quesadilla finishes cooking, let it rest on your cutting board for exactly one minute. This allows the cheese to set slightly, making them easier to slice. Cut each quesadilla in half diagonally—this angle creates visual height and makes the interior visible, showing off those pink shrimp and melted cheese.
Notes
FAQs
Can I Make These Quesadillas Without Cheese?
Technically yes, but I wouldn’t recommend it. The cheese isn’t just a flavor component—it’s your binding agent that holds the tortilla together and creates that beautiful melted interior. Without it, you’re essentially folding a tortilla with filling inside, which will likely fall apart during cooking. If you’re dairy-free, use a high-quality dairy-free cheese alternative that melts well (not all of them do). The presentation depends partly on that melted cheese being visible at the edges, so select an alternative that provides that visual element.
Should the Shrimp Be Cooked Before Going Into the Quesadilla, or Can I Use Raw Shrimp?
Always pre-cook your shrimp. Raw shrimp in the quesadilla won’t cook through in the 4-6 minutes that the tortilla is in the skillet, leaving you with translucent, undercooked shrimp. Plus, pre-cooking allows you to develop those beautiful pink-cooked colors and flavor-build with the taco seasoning before assembly. It’s a technique that guarantees both safety and visual appeal.
What’s the Best Cheese Combination for This Recipe?
I recommend a blend of three cheeses: Monterey Jack (the base—it melts creamily), sharp cheddar (adds flavor depth and a slightly deeper golden color), and mozzarella (adds stretch and visual appeal when the quesadilla opens). This combination melts smoothly, develops that gorgeous golden exterior, and provides the best flavor complexity. If you can’t find all three, use any two of these three—they’re the most reliable melters. Avoid soft cheeses like brie or goat cheese, which don’t provide the right texture, and avoid pre-shredded varieties with anti-caking agents, which won’t melt as smoothly.
Can I Make These on the Grill Instead of the Stovetop?
Yes, and this actually creates an interesting visual element! Preheat your grill to medium-high heat and lightly oil the grates. Assemble your quesadillas and cook them directly on the grill grates for 2-3 minutes per side. You’ll develop grill marks that add visual texture and that classic grilled appearance. The downside: controlling temperature on a grill is trickier, and you have less control over preventing burning. If you try this method, keep your heat at medium or use a grilling pan on the grill grates for easier management.
How Do I Scale This Recipe for a Crowd?
This recipe is already designed for 6 servings, but let me help you expand. For 12 people, simply double every ingredient: 2 pounds shrimp, 12 tortillas, 3 cups cheese blend, etc. The technique remains identical; you’re simply making two batches. Pro tip: Keep finished quesadillas warm by stacking them on a warm plate and tenting loosely with foil rather than stacking them directly on each other (which makes them soggy). For 20+ people, I’d recommend preparing the shrimp filling completely ahead of time (up to 2 days prior), then assembling and cooking quesadillas fresh as people are arriving. This prevents a huge time crunch and ensures every quesadilla is perfectly hot and crispy.
More Visually Stunning Recipes
If you loved the visual impact and efficient cooking method of these shrimp quesadillas, you’ll appreciate these other recipes that prove healthy eating can look absolutely restaurant-worthy.
- Grilled Fish Tacos – Another beautiful seafood dish that comes together quickly with vibrant colors and impressive presentation
- Basic Chicken Burrito Recipe – A different format for the same flavor profile, with equally beautiful presentation potential
- Air Fryer Stuffed Chicken Recipe – Shows how you can create restaurant-quality presentation with simple ingredients in minimal time
Making Family Dinners That People Actually Look Forward To
When I started my journey as a registered dietitian, I realized something crucial: the best nutrition advice in the world doesn’t stick if the food doesn’t taste good and feel special to eat. These shrimp quesadillas represent everything I believe about feeding a family well. They’re efficient enough for a Tuesday night. They’re nutritious in ways that actually matter—real protein, fresh vegetables, balanced carbohydrates. They’re beautiful enough to make people excited before the first bite. And they’re flexible enough to adapt to whatever ingredients you have and whatever season you’re cooking in.
The real magic happens around the table, though. When people stop scrolling and start paying attention because the food in front of them looks worth their time and energy. When parents feel confident serving something both kids and adults will genuinely enjoy. When you realize you can create meals that are efficient, healthy, and delicious all at the same time.
That’s what this recipe is really about. It’s not just about shrimp and tortillas and cheese—though those are delicious. It’s about reclaiming the family dinner as a moment where food connects people, where beautiful things happen on ordinary Tuesday nights, where healthy choices feel like a gift rather than a sacrifice.
I hope you make these quesadillas soon. I hope your kitchen fills with the aroma of caramelized onions and taco spices. I hope someone in your life stops what they’re doing because the food looks too good to ignore. And I hope you realize, if you haven’t already, that you absolutely have the skills and knowledge to create meals that nourish both body and soul.
Join me on this cooking journey!
