Sausage Sheet Pan Recipe
This post contains affiliate links. As an Amazon Associate I earn from qualifying purchases.
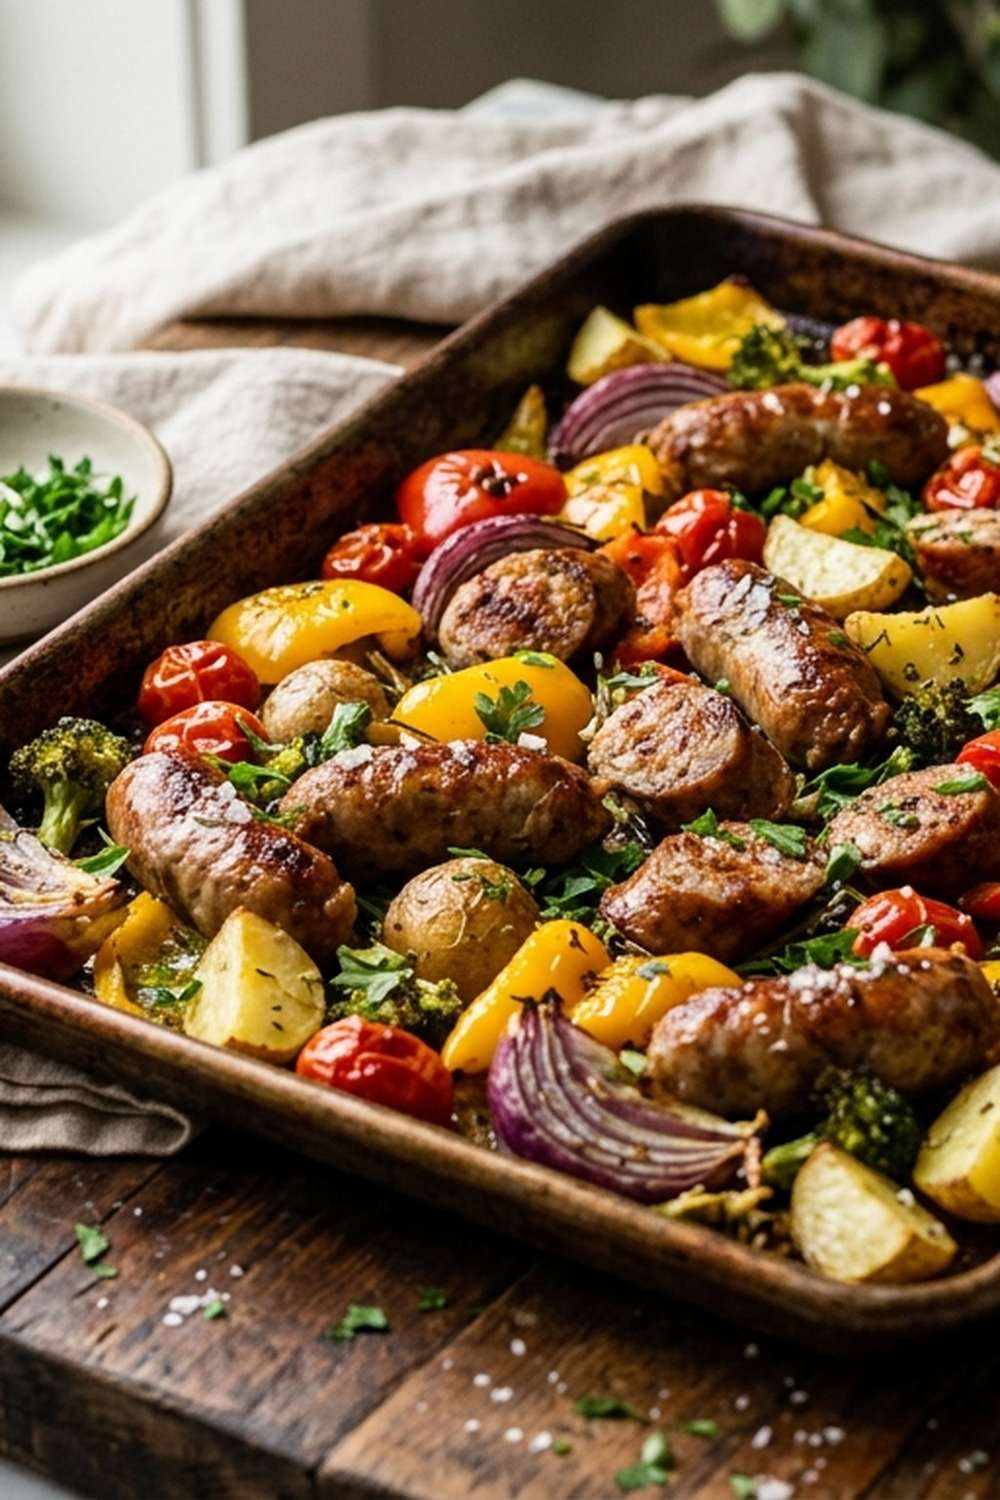
I still remember the Tuesday evening my neighbor stopped by with a tired smile and a bag of groceries she wasn’t sure how to use. We were both juggling work deadlines, and she’d grabbed whatever looked appealing at the market without a real plan. That’s when I pulled out a sheet pan, scattered those ingredients across it, and showed her how something so simple could taste absolutely delicious in under thirty minutes. She texted me the next day saying her family actually sat down together for dinner without rushing. That’s the magic I want to share with you today.
This sausage sheet pan recipe represents everything I believe in as a registered dietitian—meals that nourish your body, honor your time constraints, and bring flavor to the table without complicated techniques. Whether you’re feeding a family of four or meal prepping for the week, this one-pan wonder delivers protein, vegetables, and satisfaction all at once.
Why Sheet Pan Dinners Changed My Kitchen Forever
When I started my practice in Fairfield, I noticed a consistent theme in my client conversations: everyone wanted to eat better, but almost everyone felt trapped by meal preparation time. Sheet pan cooking became my answer to that challenge. There’s something profoundly efficient about roasting proteins and vegetables together, letting the oven do the heavy lifting while you handle other responsibilities.
What I love most about this approach is how it respects both your health goals and your reality. The high-heat roasting method caramelizes the vegetables naturally, intensifying their flavors without added sodium or refined ingredients. The smoked sausage contributes protein and umami depth, while the variety of vegetables ensures you’re getting a spectrum of nutrients—fiber, vitamins, minerals—all on one pan.
I’ve served versions of this dish to families managing diabetes, heart health goals, and simply busy schedules. The beauty is that it adapts beautifully to all of them.
The Ingredients: Building Blocks of Flavor and Nutrition
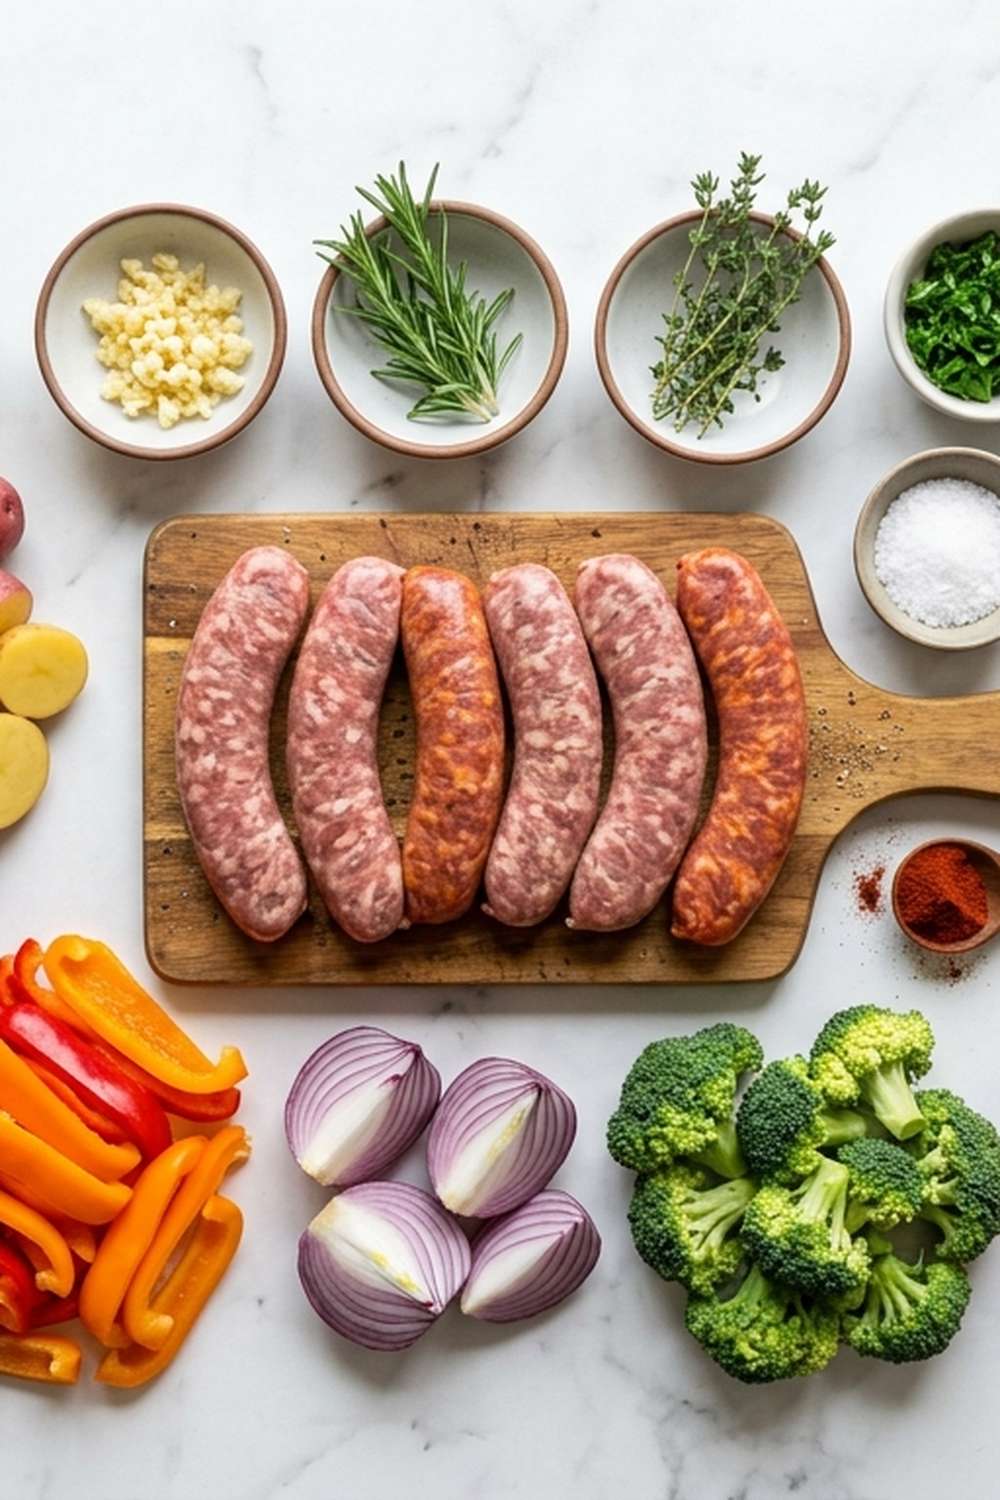
- Fresh parsley for garnish (optional but transforms presentation)
- ½ teaspoon garlic powder (never substitute with garlic salt; you control sodium here)
- ¼ teaspoon red pepper flakes (optional; omit if you have acid reflux or prefer mild heat)
- Freshly grated Parmesan cheese (optional garnish; about ¼ cup if using)
- Sea salt and freshly ground black pepper (to taste; I typically start with ½ teaspoon salt and ¼ teaspoon pepper)
- 1 teaspoon paprika (both sweet and smoked varieties work beautifully)
- Cooked quinoa or brown rice (optional serving base; ½ cup per person if including)
- 6 tablespoons extra-virgin olive oil (divided evenly; this is your cooking fat and emulsifier)
- 1 tablespoon dried oregano (Mediterranean herb that bridges flavors)
- 1 large head fresh broccoli (cut into 1½-inch florets for perfect tenderness)
- 1½ cups bell peppers (1-inch pieces; use a mix of red, yellow, and orange for visual appeal and varied phytonutrients)
- 13 ounces smoked sausage (nitrate-free option preferred; check label for sodium content as this is your protein anchor)
- 3 cups fresh green beans (trimmed and halved; frozen acceptable if fresh unavailable)
- 1 tablespoon dried parsley (adds color and fresh herb notes without fresh prep)
- 2 cups baby red potatoes (diced into ½-inch pieces to ensure even roasting)
Serves 4 with generous portions; scales beautifully to 6-8 servings by doubling vegetables and using two sheet pans.
Expert’s Nutritional Tip
Here’s something I always emphasize to my clients: the order in which you coat your vegetables matters more than you’d think. When you toss everything in olive oil first before adding dry seasonings, you create an even distribution of flavor compounds. But more importantly, that fat layer helps your body absorb the fat-soluble vitamins—A, D, E, and K—found in abundance in these vegetables. The carotenoids in red peppers and broccoli need fat for absorption, which is why cooking methods like this sheet pan approach are nutritionally superior to steaming alone.
How to Make This One-Pan Sausage Sheet Pan Recipe
I’m going to walk you through this as though we’re cooking together in my Fairfield kitchen. This method is forgiving, encouraging your confidence with each step.
Step 1: Prepare Your Workspace and Oven
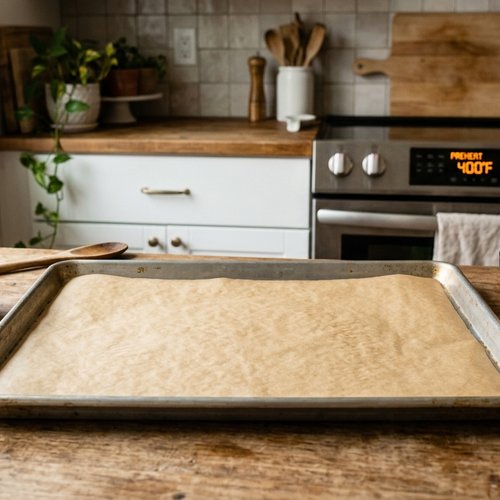
Preheat your oven to 400°F. While it’s heating, line a large sheet pan (I prefer 15×21 inches for proper spacing) with parchment paper. If you’re cooking for a crowd, have two pans ready. This single step prevents sticking, ensures even browning, and makes cleanup feel almost painless—a win for busy schedules.
Step 2: Prepare Your Vegetables with Intention
Wash your baby red potatoes under running water and pat dry. You want them unpeeled—that’s where the nutrients and texture live. Halve each potato, then dice the halves into smaller pieces. You’re aiming for roughly ½-inch cubes; this size matters because it ensures they’ll be perfectly tender but not mushy in our 25-minute cooking window.
Trim the stem ends from your green beans and cut them in half crosswise. This creates more surface area for caramelization. Cut your broccoli into florets—aim for 1½-inch pieces so they roast through without becoming bitter.
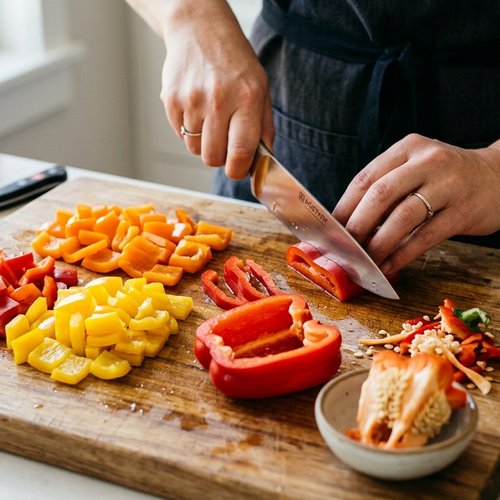
For your bell peppers, remove seeds and membrane, then cut into 1-inch pieces. The uniformity matters: inconsistent sizes mean some pieces overcook while others undercook. Slice your smoked sausage into thick coins—about ½ inch thick. These substantial pieces will develop a slight crust while staying juicy inside.
Step 3: Combine and Coat Everything Evenly
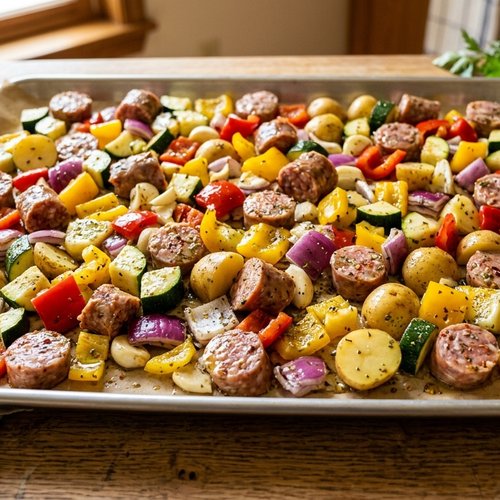
Place all your prepared vegetables and sausage on your prepared sheet pan. Drizzle the olive oil over everything. This is the moment where I become very particular: use your hands to toss and coat each vegetable piece and sausage slice. Make sure the oil reaches into crevices and coats surfaces evenly. This isn’t about being gentle—it’s about coverage.
Sprinkle your oregano, parsley, paprika, garlic powder, and red pepper flakes (if using) across the pan. Add your starting seasoning of salt and pepper. Toss everything together again, ensuring no white spice powder remains visible on the pan’s surface. The oil should carry every seasoning onto every ingredient.
The critical step many home cooks miss: spread everything in a single layer with nothing overlapping. If vegetables stack on top of each other, they steam instead of roast, taking longer to cook and missing out on that beautiful caramelization.
Step 4: First Roast—Let the Oven Work
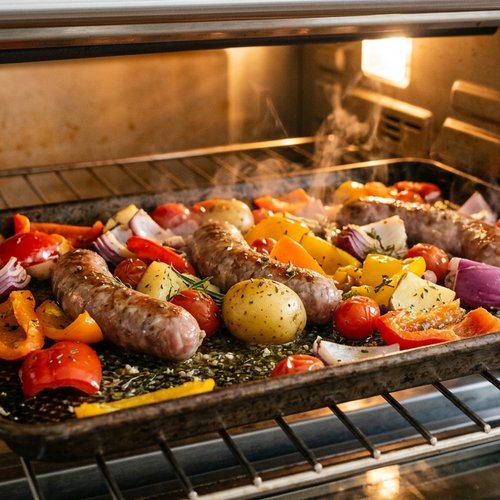
Place your sheet pan in the 400°F oven for exactly 15 minutes. Don’t peek constantly—each time you open the oven, you release heat and extend cooking time. Set a timer on your phone and use those 15 minutes to set your table, pour a beverage, or simply breathe.
Step 5: Stir and Return to Finish
After 15 minutes, remove the pan from the oven. Using a sturdy spatula or wooden spoon, flip and stir all the vegetables and sausage. This ensures even cooking on all sides. If any potatoes are still quite firm, give them a slight nudge to ensure they’re in contact with the hot pan surface.
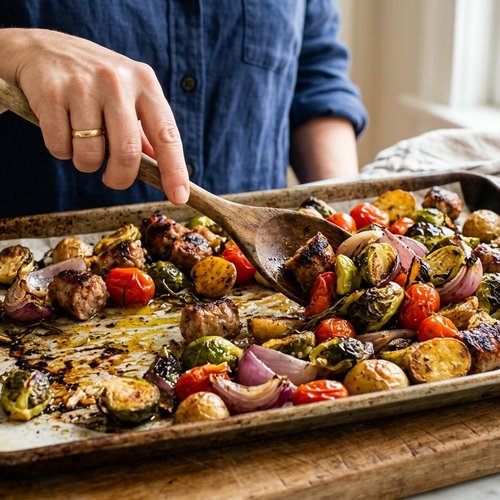
Return the sheet pan to the oven for another 10-15 minutes. The total cooking time depends on your oven’s accuracy and how much you love crispy edges on your vegetables. I’m always team crispy, so I lean toward 15 minutes. The vegetables are done when they’re tender when pierced with a fork but still maintain some textural integrity—what I call crisp-tender.
Step 6: Finish with Intention
The moment your sheet pan emerges from the oven, if you’re using Parmesan cheese, sprinkle it over the hot vegetables. The residual heat will soften it slightly, melting the cheese into the nooks and crannies. If you’re not adding cheese, taste one piece of potato and one piece of sausage, then adjust salt and pepper as needed. Everything needs proper seasoning to taste its best.
Add fresh parsley if desired—it adds brightness and visual appeal. Serve immediately while everything is still steaming and at peak flavor.
Make-Ahead and Meal Prep Guide
As a dietitian who believes in realistic nutrition, I know some weeks are more chaotic than others. Here’s how to work this recipe into your meal prep strategy:
Prep vegetables the night before: Wash, peel (if desired), and cut all vegetables. Store them in separate airtight containers in your refrigerator. They’ll stay fresh for up to 48 hours. Slice your sausage as well. When you’re ready to cook, you’ll simply assemble and roast—it becomes a 30-minute meal with virtually no prep time in the moment.
Cook the full batch and portion for the week: This recipe makes four generous servings, but I often double it. After the first roasting, I let it cool slightly, then divide into glass containers. Refrigerate for up to 4 days. Reheat gently in a 325°F oven for about 12 minutes until warmed through, or microwave individual portions for 2-3 minutes. The vegetables won’t have the same crispy exterior, but the flavor holds beautifully.
Freeze for later: Cool completely, then portion into freezer-safe containers. These keep well for up to 3 months. Thaw overnight in the refrigerator, then reheat as above. I find this method works especially well if you’re batch cooking on a Sunday but won’t need the meals until mid-week or later.
Common Mistakes to Avoid
Crowding the pan: This is the number one mistake I see. When vegetables overlap, steam traps beneath them, and you end up with steamed vegetables that taste flat. Even if it feels wasteful, use two pans if needed. The results are worth it.
Inconsistent vegetable sizes: I cannot overemphasize this. A potato chunk twice the size of another will still be firm while the smaller piece turns soft. Take 5 extra minutes to cut everything uniformly. Your palate will thank you.
Skipping the midway stir: That 15-minute mark and stir is essential. It redistributes vegetables that might be cooking faster, ensures the bottom pieces don’t burn, and makes the final roast much more even. Don’t skip this step.
Under-seasoning: Many people are afraid of salt, but this dish genuinely needs proper seasoning to shine. Taste as you go. Remember that smoked sausage already contains sodium, so account for that, but don’t leave your vegetables underseasoned.
Seasonal Variations That Keep This Recipe Fresh
Spring version: Replace the broccoli with fresh asparagus (cut into 2-inch pieces), use baby carrots, and add fresh peas in the last 5 minutes of cooking. The herbaceous quality of asparagus shifts the entire flavor profile.
Summer version: Incorporate yellow squash and zucchini (cut into half-moons), use cherry tomatoes, and add fresh basil instead of parsley at the end. This lighter approach celebrates the season’s abundance.
Fall version: Add diced sweet potato (more time needed), Brussels sprouts (halved), and finish with a drizzle of balsamic vinegar before serving. The natural sweetness of these vegetables pairs beautifully with smoked sausage.
Winter version: Use root vegetables like parsnips and regular carrots (cut thinner than potatoes for faster cooking), add hardy kale in the last few minutes, and finish with fresh thyme. The deeper flavors suit the season’s heavier feel.
Customizing for Dietary Needs
One of the reasons I love this recipe is its flexibility. Here’s how I adapt it for different clients and preferences:
Lower carbohydrate version: Reduce potatoes to 1 cup and increase green beans and broccoli. This shifts the carb-to-fiber ratio while maintaining portion size and satisfaction.
Paleo-friendly version: Skip the potatoes entirely, increase all other vegetables, and ensure your sausage is compliant (no added sugar or problematic additives). The dish remains equally delicious.
Vegetarian version: Replace the sausage with extra-firm tofu cut into thick pieces or with chickpeas for protein. Add a nutritional yeast sprinkle at the end for umami depth. The roasting method works beautifully with plant-based proteins.
Higher protein version: Keep the sausage amount but add 2 tablespoons of grated Parmesan mixed into the oil before tossing. This increases both protein and flavor intensity.
Can I Store This Sausage Sheet Pan Recipe?
Absolutely, and I do this constantly in my own kitchen.
Refrigerator storage: Allow the sheet pan to cool to room temperature, then transfer to airtight glass containers. This keeps perfectly for up to 4 days. The vegetables soften slightly but maintain good flavor. Reheat gently at 325°F until warmed through, about 10-12 minutes.
Freezer storage: Cool completely, portion into freezer-safe containers, and freeze for up to 3 months. Thaw overnight in the refrigerator before reheating. I don’t recommend freezing if you’re after that crispy exterior, but the flavor and nutrition remain intact.
Pro tip: Store any Parmesan garnish separately if you’re saving leftovers. Add it fresh when you reheat, and it’ll have a better texture than it would have after refrigeration.
Nutrition Information
Per serving (¼ of the recipe, without optional rice or quinoa): approximately 385 calories, 22 grams protein, 18 grams fat, 28 grams carbohydrates, 6 grams fiber, and 580 milligrams sodium. This data is calculated using USDA nutrition database standards for the primary ingredients listed.
From a dietitian’s perspective, I want you to notice several things here. The fiber content (6 grams per serving) comes primarily from the vegetables and their skins—this is why I never peel those baby potatoes. This fiber supports digestive health and helps stabilize blood sugar, which is especially important if you’re managing energy levels throughout your day.
The protein (22 grams) comes from the smoked sausage, but it’s balanced beautifully by the vegetables. Unlike a meal that’s all protein and no fiber, this balance means better satiety and more stable energy. The sodium level reflects the sausage—if you’re sodium-sensitive, choose a lower-sodium sausage option or skip the additional salt at the seasoning stage.
The carbohydrates are complex, coming from potatoes and vegetables rather than refined sources. This means your blood sugar will respond differently than it would to processed food, keeping you satisfied longer.
What to Serve With This Sausage Sheet Pan Recipe
While this dish is entirely complete on its own, I do love pairing it with complementary sides depending on the occasion and season.
Grain-based options: Cooked quinoa or brown rice serves as a hearty base if you want to stretch the meal further or increase total carbohydrate intake. About ½ cup cooked grain per person pairs perfectly. This is especially helpful when feeding teenagers or very active individuals.
Crusty bread: A thick slice of whole-grain bread is lovely for soaking up any pan juices. I often warm it lightly before serving.
Fresh salad: A simple arugula salad with lemon vinaigrette provides fresh acidity that balances the richness of the roasted vegetables and sausage. This is my go-to when I want to keep the meal light but satisfying.
Greek yogurt sauce: Mix plain Greek yogurt with fresh dill, lemon juice, and garlic for a cooling element that complements the roasted flavors beautifully. A dollop alongside each serving adds protein and creaminess.
If you’re looking for more complete meal ideas, my Broccoli and Cream Recipe shares a similar comfort-food approach that pairs wonderfully with this sheet pan dinner when served on the same week.
Scaling This Recipe for Crowds
The beauty of sheet pan cooking is how elegantly it scales. I’ve made this for book clubs, family gatherings, and community events in Fairfield.
For 6 people: Use 1.5 times the ingredients. You’ll need two 15×21-inch pans. Roast on separate racks, swapping their positions halfway through to ensure even cooking.
For 8 people: Double the entire recipe and use two full-sized sheet pans. This is my standard approach for dinner parties. The prep feels substantial, but the actual cooking requires minimal attention.
For 12+ people: Triple the recipe and use three pans, or better yet, recruit a helper. This becomes an assembly-line situation: one person preps vegetables, another portions on pans, another handles seasoning. I’ve found that delegating tasks makes large-scale cooking enjoyable rather than stressful.
Critical scaling note: Do not over-crowd a single pan in the name of convenience. The roasting quality suffers significantly. It’s always better to use additional pans and roast them simultaneously than to compromise on technique.

Sausage Sheet Pan Recipe
Ingredients
Method
- Preheat your oven to 400°F. While it's heating, line a large sheet pan (I prefer 15x21 inches for proper spacing) with parchment paper. If you're cooking for a crowd, have two pans ready. This single step prevents sticking, ensures even browning, and makes cleanup feel almost painless—a win for busy schedules.
- Wash your baby red potatoes under running water and pat dry. You want them unpeeled—that's where the nutrients and texture live. Halve each potato, then dice the halves into smaller pieces. You're aiming for roughly ½-inch cubes; this size matters because it ensures they'll be perfectly tender but not mushy in our 25-minute cooking window. Trim the stem ends from your green beans and cut them in half crosswise. This creates more surface area for caramelization. Cut your broccoli into florets—aim for 1½-inch pieces so they roast through without becoming bitter. For your bell peppers, remove seeds and membrane, then cut into 1-inch pieces. The uniformity matters: inconsistent sizes mean some pieces overcook while others undercook. Slice your smoked sausage into thick coins—about ½ inch thick. These substantial pieces will develop a slight crust while staying juicy inside.
- Place all your prepared vegetables and sausage on your prepared sheet pan. Drizzle the olive oil over everything. This is the moment where I become very particular: use your hands to toss and coat each vegetable piece and sausage slice. Make sure the oil reaches into crevices and coats surfaces evenly. This isn't about being gentle—it's about coverage. Sprinkle your oregano, parsley, paprika, garlic powder, and red pepper flakes (if using) across the pan. Add your starting seasoning of salt and pepper. Toss everything together again, ensuring no white spice powder remains visible on the pan's surface. The oil should carry every seasoning onto every ingredient. The critical step many home cooks miss: spread everything in a single layer with nothing overlapping. If vegetables stack on top of each other, they steam instead of roast, taking longer to cook and missing out on that beautiful caramelization.
- Place your sheet pan in the 400°F oven for exactly 15 minutes. Don't peek constantly—each time you open the oven, you release heat and extend cooking time. Set a timer on your phone and use those 15 minutes to set your table, pour a beverage, or simply breathe.
- After 15 minutes, remove the pan from the oven. Using a sturdy spatula or wooden spoon, flip and stir all the vegetables and sausage. This ensures even cooking on all sides. If any potatoes are still quite firm, give them a slight nudge to ensure they're in contact with the hot pan surface. Return the sheet pan to the oven for another 10-15 minutes. The total cooking time depends on your oven's accuracy and how much you love crispy edges on your vegetables. I'm always team crispy, so I lean toward 15 minutes. The vegetables are done when they're tender when pierced with a fork but still maintain some textural integrity—what I call crisp-tender.
- The moment your sheet pan emerges from the oven, if you're using Parmesan cheese, sprinkle it over the hot vegetables. The residual heat will soften it slightly, melting the cheese into the nooks and crannies. If you're not adding cheese, taste one piece of potato and one piece of sausage, then adjust salt and pepper as needed. Everything needs proper seasoning to taste its best. Add fresh parsley if desired—it adds brightness and visual appeal. Serve immediately while everything is still steaming and at peak flavor.
FAQs About This Sausage Sheet Pan Recipe
Can I use a different type of sausage?
Absolutely. I’ve made this successfully with Italian sausage (both mild and spicy), chicken sausage, andouille, and even plant-based options. Each brings different flavor notes. Italian sausage will give you more herb-forward taste, while chicken sausage will be leaner. Andouille adds Cajun spice. Choose based on what sounds appealing to your palate. Just note that different sausages have different fat and sodium content, so adjust seasonings accordingly. A good rule: taste before you fully season, then adjust.
What if my vegetables cook unevenly?
This almost always comes down to size inconsistency. Next time, invest 5 extra minutes in cutting everything uniformly. But if you’re facing uneven cooking right now, here’s your fix: at the 15-minute stir mark, move the firmest-looking vegetables to the center of the pan (where it’s hottest) and the softer ones toward the edges. This technique absolutely saves an otherwise unevenly cooked sheet pan.
Can I make this without the red pepper flakes?
Yes, and I often do for clients managing acid reflux or simply preferring milder food. Omit them entirely without needing to add anything else. The dish has plenty of flavor from the other seasonings. If you want to add heat differently, try a pinch of cayenne pepper instead, though this is equally optional.
Why does the cheese go on after cooking and not before?
This is actually important for both flavor and nutrition. Adding cheese after cooking means it softens gently from the residual heat without burning. More importantly, the direct heat of roasting can cause the milk proteins in cheese to separate, creating a grainy texture. By adding it at the end, you get creamy, melted cheese that coats your vegetables beautifully. If you add it before, it can become tough and separated.
How do I know when vegetables are truly done?
This took me years to develop a reliable sense for, so don’t feel frustrated if you’re uncertain. The answer is texture testing. At the 25-minute mark (15 + 10), pierce a piece of potato and a broccoli floret with a fork. The potato should be tender throughout but not falling apart. The broccoli should be tender but still have slight resistance when you bite it. If everything still feels quite firm, return for another 5 minutes. If it’s starting to soften but not quite there, 3-5 minutes more. You’re aiming for that “crisp-tender” sweet spot.
More Recipes You’ll Love
- Caramelized Onion Smash Burgers – Another sheet pan approach to dinner that celebrates technique and flavor
- Breakfast Wraps With Eggs Recipe – A different way to think about one-pan efficiency for your morning routine
- Avocado Bread Recipe With Cottage Cheese – Another whole-food approach to satisfying meals
Final Thoughts on This Sausage Sheet Pan Recipe
This recipe represents everything I value as a registered dietitian and a person who believes that health shouldn’t feel complicated. It’s efficient—truly 30 minutes from start to table. It’s nutritious—whole vegetables, quality protein, and healthy fat in appropriate proportions. It’s forgiving—it adapts to what’s in your refrigerator and your personal preferences. And perhaps most importantly, it brings people together around a table, which is where my passion for food began and where it continues to live.
When my neighbor called me months after that Tuesday evening, she was laughing. She’d made this sheet pan dinner a weekly staple. Her family was sitting down together regularly. She felt more confident in the kitchen. That’s the transformation I hope this recipe creates in your home as well—not just a meal, but a moment where nutrition and connection become one and the same.
The next time you’re standing in your kitchen feeling uncertain about dinner, remember that this single sheet pan holds everything you need. Gather your ingredients, set your oven, and trust the process. You’ve got this. Join me on this cooking journey!
