Baked quesadillas are delightful on their own, but they truly shine when paired with complementary sides and dips. Guacamole is an excellent choice, adding a creamy, rich element that contrasts nicely with the cheesy goodness of quesadillas.
A quick batch made with ripe avocados, lime juice, salt, and a pinch of garlic powder elevates the dish.
Sour cream is another classic pairing, offering a cool, creamy texture that balances out the spices in the quesadillas. It’s simple yet effective, providing the perfect contrast to the warmth and richness of the main dish.
Salsa also plays a key role, with fresh pico de gallo or zesty tomatillo salsa adding brightness and freshness to every bite.
For a more hearty side, refried beans are a great choice. They bring an excellent source of protein to the table and can be seasoned to suit your tastes.
Alongside, fluffy Mexican rice is the perfect mild counterpart to soak up any drippings and provide a comforting balance to the spices in the quesadillas. With these side dishes in mind, your baked quesadilla meal is sure to be unforgettable.
What are Baked Quesadillas?
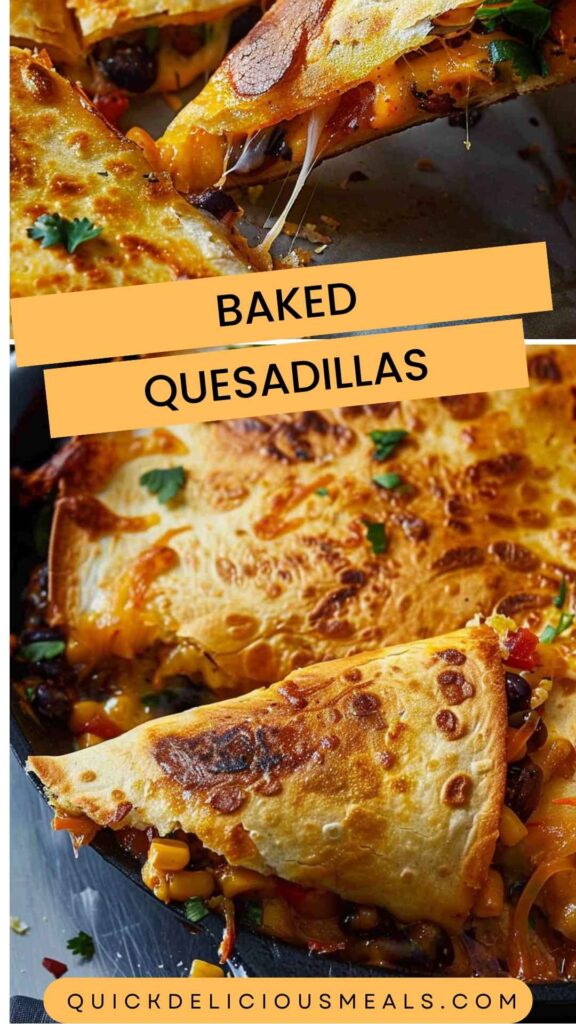
Baked quesadillas are tortillas, typically filled with cheese and other ingredients, then baked until crispy and golden.
The magic happens in the oven, where the cheese melts beautifully, creating a gooey center while the outsides become crispy. Unlike traditional quesadillas, which are often fried on a skillet, baking offers a healthier alternative. You can achieve a satisfying crunch without the excess oil.
Think of baked quesadillas as envelopes of deliciousness. They hold everything from spiced meats to vibrant veggies, making each bite an exploration of flavor. The best part? They’re easy to make in large batches, perfect for feeding a crowd or meal prep for the week.
Why You'll Love Baked Quesadillas
The allure of baked quesadillas lies in their versatility. They are a canvas for creativity. Here are some compelling reasons to fall head over heels for this dish:
- Simplicity: With just a few ingredients, you can create a hearty meal. I’m all about recipes that don’t require hours in the kitchen, and baked quesadillas come through.
- Quick to Prep: Once you’ve gathered your ingredients, assembling quesadillas takes only minutes. You can easily prep them ahead of time and bake when you’re ready to eat.
- Family-Friendly: Kids love quesadillas. If you've got picky eaters at home, you can sneak in veggies without them noticing.
- Make Ahead: You can prepare a batch of quesadillas and freeze them before baking. When cravings strike, just pop them in the oven straight from the freezer.
- Endless Options: From meats to veggies, the fillings are endless. You can transition from chicken and cheese to a vegetarian delight brimming with peppers and beans.
Now that you’re convinced, let’s get down to business and look at the ingredients you need.
The Ingredients You Will Need to Make Baked Quesadillas
Creating scrumptious baked quesadillas requires just a few key ingredients. Here’s what you’ll need:
- 4 soft flour tortillas
- 3 tsp olive oil
- 1 1/4 cups shredded cheese (cheddar, colby, Monterey Jack, or a mix)
- 8 oz ground beef (or chicken, turkey, pork, lamb – your choice)
- 2 tsp extra virgin olive oil
- 1 tbsp tomato paste
- 1/3 cup sweet corn kernels (canned, drained, or frozen)
- 1/3 cup black beans (canned, drained)
- 2 tbsp water
- 1/4 cup diced red bell pepper
- 1/2 tsp chili powder
Homemade Taco Seasoning:
- 1/2 tsp each of ground garlic powder, onion powder, dried oregano
- 1 tsp each of cumin, smoked paprika
- 1/8 tsp cayenne pepper
- 1/4 tsp sea salt or kosher salt
Serving:
- Guacamole or avocado salsa
- Fresh Pico de Gallo
- Sour cream for garnish
This blend enhances the flavor of the meat and ties the whole dish together.
Directions
Feeling ready? Let’s get cooking. Follow these step-by-step instructions to whip up your baked quesadillas.
Step 1: Preheat Your Oven
Start by preheating your oven to 400°F (200°C). A hot oven creates that delightful crispiness we’re after.
Step 2: Cook the Ground Meat
In a skillet, heat the 2 teaspoons of extra virgin olive oil over medium heat. Add the ground meat of your choice and cook until browned, usually about 5-7 minutes. Break up any lumps with a spatula.
Step 3: Add Flavor
Add the tomato paste to the skillet and stir to combine it with the meat. Next, mix in the taco seasoning and 2 tablespoons of water.
Add the sweet corn, black beans, and diced bell pepper. Cook for an additional 2-3 minutes, allowing everything to come together.
Step 4: Assemble the Quesadillas
On a clean surface, lay one tortilla flat. Spoon a portion of the meat mixture onto one half, then sprinkle generously with shredded cheese. Fold the other half of the tortilla over the filling. Repeat with the remaining tortillas.
Step 5: Bake to Perfection
Brush each quesadilla with olive oil on both sides and place them on a baking sheet lined with parchment paper. Pop them into the oven and bake for about 15 minutes, flipping halfway through. You want them golden and crispy.
Step 6: Serve and Enjoy
Once they’re baked, remove them from the oven and let them cool for a few minutes. Slice into wedges and serve with your favorite dips.
Notes
Here are some pro tips to ensure your baked quesadillas are perfect every time:
- Cheese Matters: Don’t skimp on cheese. A mix of cheeses can add depth of flavor and creaminess.
- Use Fresh Ingredients: Whenever possible, use fresh veggies and high-quality meats. They make a noticeable difference.
- Don’t Overfill: Keep fillings to a reasonable amount. Overstuffed quesadillas can burst while baking.
- Experiment with Tortillas: Try different styles of tortillas, including whole wheat or flavored varieties.
- Watch the Time: Ovens vary, so keep an eye on your quesadillas. Take them out once golden and crispy.
Storage Tips
Baked quesadillas are great for leftovers. Here’s how to store them properly:
- Refrigeration: Allow cooked quesadillas to cool before placing them in an airtight container. They can last for about 3-4 days in the refrigerator.
- Freezing: For longer storage, freeze uncooked assembled quesadillas. Wrap them tightly in plastic wrap and place them in a freezer-safe bag. They can be frozen for up to 2 months. When you’re ready to bake, cook them directly from the freezer, adding a few extra minutes to the baking time.
Serving Suggestions
Here are some excellent suggestions for serving your delectable baked quesadillas:
- Guacamole or avocado salsa: Guacamole adds richness, perfectly complementing the crispy quesadillas.
- Fresh Pico de Gallo: A zesty, tangy salsa that brightens up the dish.
- Sour Cream: Creamy and refreshing, it balances out the spices and richness.
- Mexican Rice: A side of seasoned rice makes for a hearty meal.
- Refried Beans: A comforting addition that offers a satisfying, protein-packed side dish.
What Other Substitutes Can I Use in Baked Quesadillas?
Baked quesadillas are incredibly flexible. Here are a few substitutes to consider:
- Protein Substitutes: Try tofu or tempeh if you're looking for a vegetarian or vegan option. Season them similarly for a delightful flavor.
- Cheese Substitutes: Dairy-free cheeses work well for a vegan version. Look for brands that melt nicely.
- Veggies: Feel free to swap in any veggies you like, such as spinach, mushrooms, or zucchini. Just ensure they’re cooked or wilted to avoid added moisture.
- Tortilla Varieties: Use corn tortillas for gluten-free options or try spinach or herb tortillas for added flavor.
- Beans: If black beans aren’t your jam, pinto beans or chickpeas can easily be used for added protein.
Conclusion
Baked quesadillas are not only a breeze to make but also a joy to customize. Whether you’re preparing them for a casual family dinner or a lively gathering with friends, they never disappoint.
Embrace the versatility of the fillings, enjoy the crispiness from the oven, and savor each bite.
Next time you find yourself at a crossroads about what to cook, think of those tortillas waiting in your pantry. Grab some cheese, load them up with your favorite fillings, and let the baking magic happen. Your taste buds will thank you. Happy cooking!
You’ll also like the following recipes!