Mediterranean Chicken Breast Recipe
This post contains affiliate links. As an Amazon Associate I earn from qualifying purchases.
Getting kids to eat Mediterranean Chicken Breast feels impossible—until you try this approach. I’ve watched countless families in Fairfield transform their dinner tables by bringing the warmth of Mediterranean flavors into their homes, and I want to share my secrets with you. When I first started serving this dish at family dinners, my niece who claims to hate “anything fancy” went back for seconds. The magic isn’t complicated: it’s about creating textures and flavors that even the pickiest eaters find irresistible. Whether you’re looking for something quick on a Tuesday night or trying to expand your weeknight rotation, this recipe delivers real nutrition without the fuss. Check out my Air Fryer Stuffed Chicken Recipe for another family favorite, and let me show you how this one can become your go-to.
Mediterranean Chicken Breast Recipe the Whole Family Will Actually Eat (Picky Eaters Included)
I remember the exact moment I realized this recipe had staying power. My neighbor Maria brought her three kids over for dinner—the oldest refuses “anything with visible vegetables,” the middle one only eats foods that are the same color, and the youngest will only eat circular shapes. I was nervous, honestly. But when that first bite of tender chicken with its bright lemon sauce hit their plates, something shifted. The olives became little treasure hunts. The tomatoes weren’t “mushy vegetables” anymore—they were part of the sauce. The feta cheese turned it into something special. By the end of dinner, all three kids were asking for the recipe to take home.
That’s when I understood: this isn’t just a Mediterranean chicken recipe. It’s a gateway to helping kids discover that flavorful, wholesome food doesn’t have to feel like a compromise. As a registered dietitian, I know that one meal won’t change a child’s nutrition story, but consistent exposure to real, interesting flavors absolutely will. This dish does exactly that while fitting into your 30-minute timeline.
Why Kids Love This Version
The secret lies in understanding why picky eaters reject foods in the first place. It’s rarely about the ingredient itself—it’s about control, texture, temperature, and whether they feel brave enough to try something new. This recipe addresses each of those concerns.
- Interactive cooking process – Kids get to add toppings at the end, which means they feel ownership over the final dish. When children help build their meal, they’re far more likely to actually eat it.
- Tender, juicy protein – The braising technique keeps the chicken impossibly moist, not dry and chalky like chicken often becomes. Kids notice this immediately.
- Bright, fresh flavors – The combination of lemon, garlic, and herbs creates complexity without heat or intensity. It’s sophisticated enough for adults but approachable for developing palates.
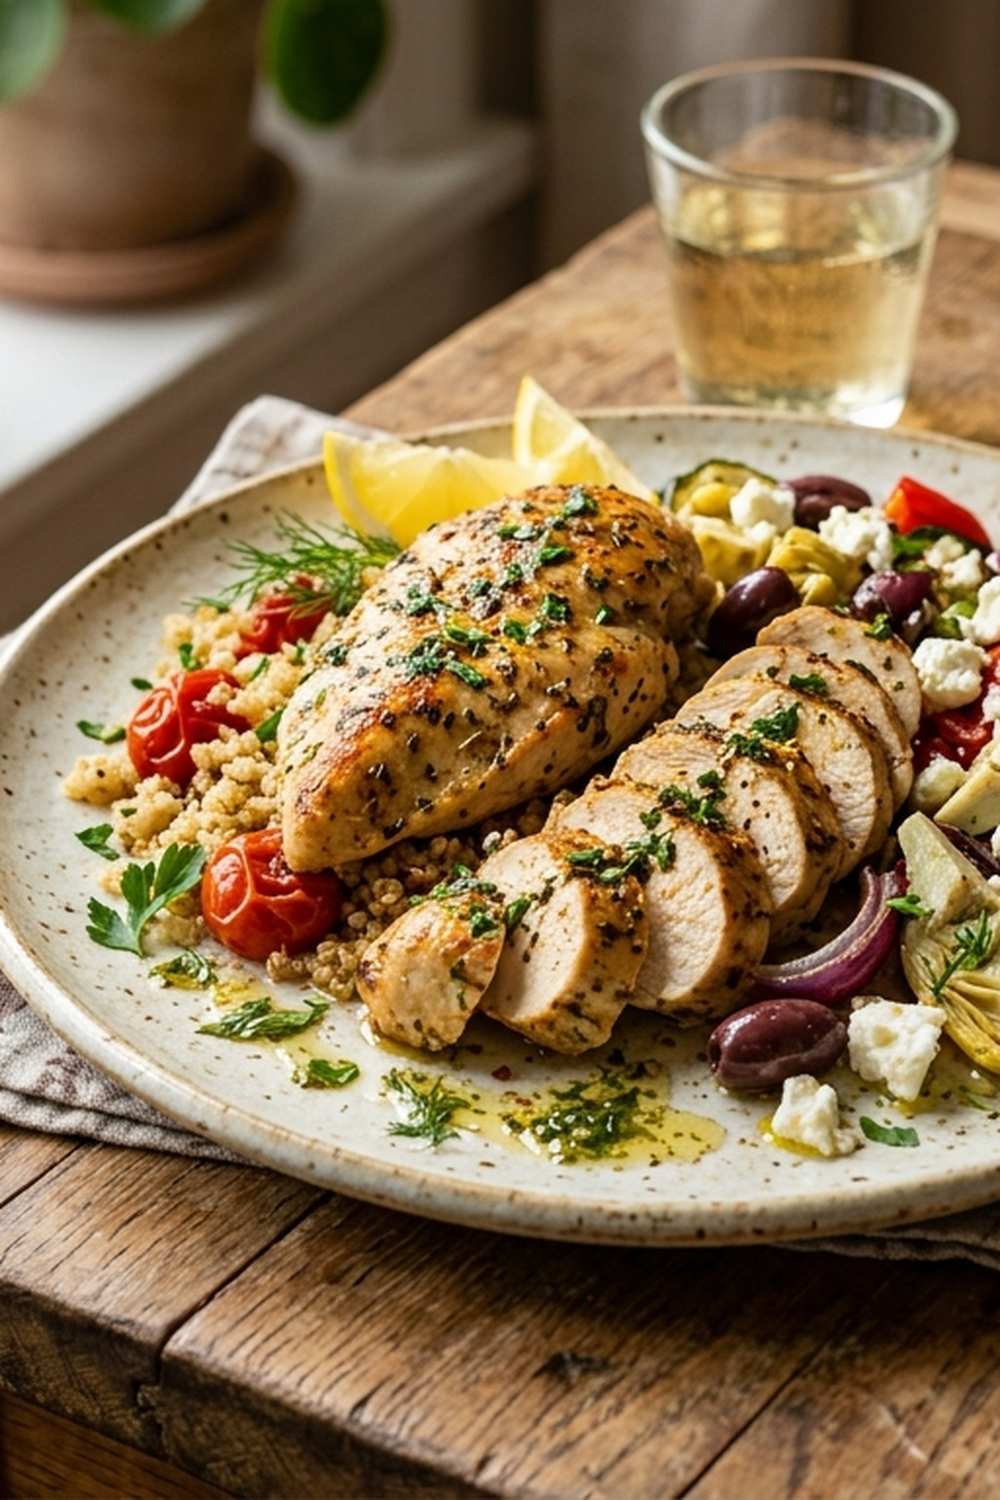
- Visual appeal – The golden chicken, green olives, red tomatoes, and white feta create a naturally colorful plate. Even kids who eat with their eyes first will be drawn in.
- Customizable components – Unlike casseroles where everything is mixed together, kids can see exactly what’s on their plate and adjust accordingly.
How to Get Kids Involved in Making This
Cooking with children isn’t about efficiency—it’s about building food memories and confidence. I always tell parents that a 30-minute recipe might take 45 minutes with kids involved, and that extra time is worth every second.
- Ages 3-5: Juice the lemon – Use a handheld citrus juicer (the kind that doesn’t require squeezing strength) and let them watch the juice fall into a bowl. They’ll feel like real contributors, and honestly, their enthusiasm makes everyone’s kitchen better.
- Ages 6-9: Chop the tomatoes and onion – Teach them how to use a child-safe knife with proper hand positioning (the “claw grip”). Supervise closely, but let them lead. This teaches knife skills while giving them real responsibility.
- Ages 10+: Manage the entire braising process – Let older kids do the searing (with you close by for safety), monitor the cooking time, check the internal temperature with a meat thermometer, and orchestrate the final assembly. They’re learning real cooking technique.
The Ingredients – Hidden Nutrition, Visible Deliciousness

Every ingredient in this recipe pulls double duty: it’s either adding flavor, nutrition, or both. As a dietitian, I’m particularly focused on the antioxidants from the olives and tomatoes, the heart-healthy monounsaturated fats from olive oil, and the lean protein from the chicken. For kids who are skeptical about “healthy,” these ingredients hide their nutrition behind absolute deliciousness.
- 4 boneless, skinless chicken breasts (about 6-8 ounces each, patted dry before cooking)
- 2 tablespoons extra virgin olive oil (cold-pressed for maximum flavor and antioxidants)
- Freshly cracked black pepper to taste (pre-ground loses potency)
- 1/2 cup dry white wine (use something you’d actually drink—cheap wine affects the taste)
- 3 tablespoons minced fresh garlic or garlic paste (not pre-jarred, which has a slightly metallic taste)
- 1/2 cup low-sodium chicken broth (homemade is better, but store-bought works)
- 1/4 cup fresh flat-leaf parsley, stems removed and finely chopped (cilantro-haters often accept parsley)
- 1/3 cup green Castelvetrano olives, sliced (avoid canned black olives—they taste like tin and will scare off kids)
- Kosher salt to taste (sea salt works too, adjust quantity slightly)
- 1 large lemon (fresh-squeezed juice only, about 3-4 tablespoons)
- 4 medium tomatoes, diced (about 1 1/2 cups, or use high-quality canned San Marzano if fresh aren’t available)
- 1/3 cup crumbled feta cheese (optional, but it’s the finishing touch that makes this feel restaurant-quality)
- 2 teaspoons honey (optional, to balance acidity if needed)
- 1 tablespoon dried oregano, divided (or 3 tablespoons fresh oregano if you can find it)
- 1 medium red onion, finely chopped (red onions are sweeter than yellow, which kids prefer)
Makes 4 servings (perfect for a family of four, or with sides, feeds 6)
How to Make Mediterranean Chicken Breast Recipe for the Whole Family
I’m framing this as a cooking adventure rather than a task. When you approach it this way—even in your head—the whole energy of the kitchen shifts. Kids pick up on that.
Step 1: Prepare Your Chicken Like a Pro
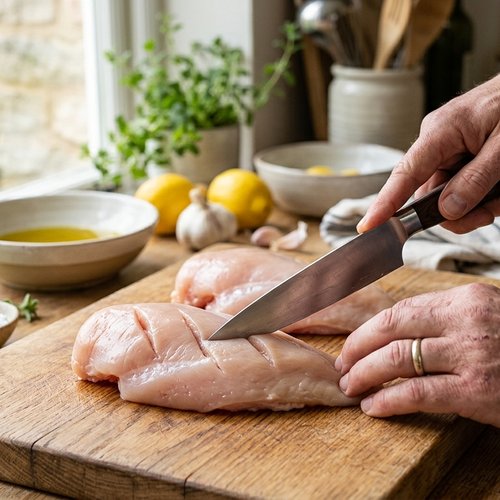
Pat your chicken breasts completely dry using paper towels. Moisture is the enemy of golden searing, so don’t skip this step even though it feels unnecessary. Using a sharp knife, make three shallow slits (about 1/4 inch deep) on each side of each breast. Keep children at least two feet away from knife work and remind them that sharp knives are serious tools. These slits create little pockets where your garlic will nestle in, infusing flavor throughout the protein as it cooks.
Step 2: Build Flavor Into Every Layer
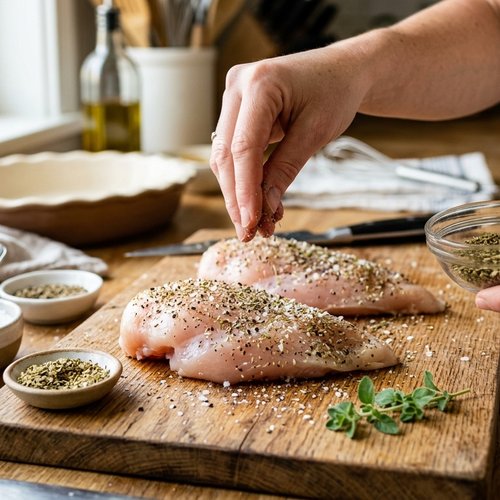
Take your minced garlic and gently rub it all over both sides of each chicken breast, working some into those slits you just created. Then season generously with kosher salt and freshly cracked black pepper. Sprinkle half your dried oregano evenly across both sides. This is where kids aged 6+ can take over—let them season and rub. They’re learning that seasoning isn’t something that happens at the end; it’s foundational.
Step 3: Sear for That Golden Crust
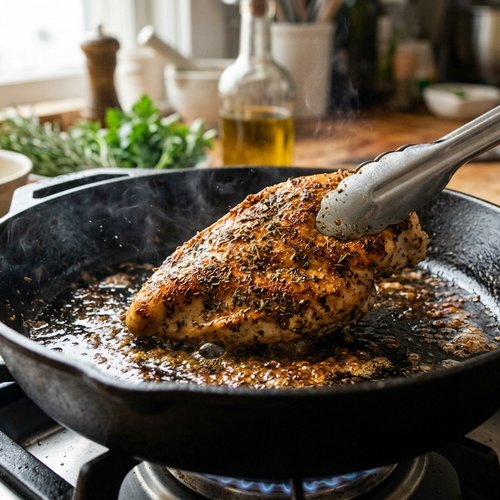
Heat your extra virgin olive oil in a large cast iron skillet (I prefer cast iron for heat retention and the gorgeous color it creates) over medium-high heat. When the oil shimmers—this usually takes 2-3 minutes—you’re ready. Carefully place the seasoned chicken in the hot pan. Keep children clear of the skillet, as oil can splatter. Sear for 3-4 minutes per side until golden brown. You’re not cooking the chicken through yet; you’re just building that flavorful crust that makes everyone’s mouth water.
Step 4: Deglaze and Reduce
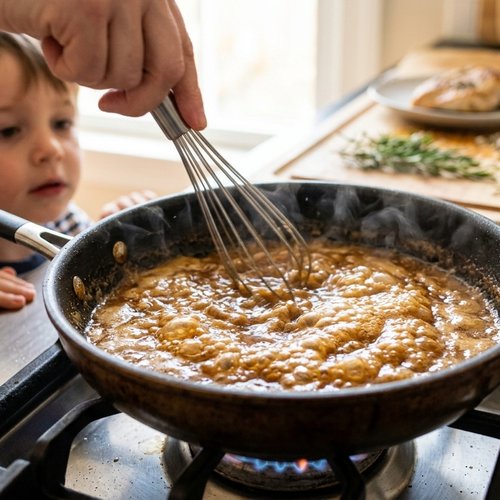
Once both sides are golden, immediately pour in your dry white wine. Let it bubble and reduce by half—this usually takes 2-3 minutes. This step removes the raw wine taste and concentrates the flavor. Kids can watch this happen; it’s fascinating to see the liquid shrink down. Point out how the bubbles are doing the work, teaching them about what reduction actually means.
Step 5: Begin the Braise
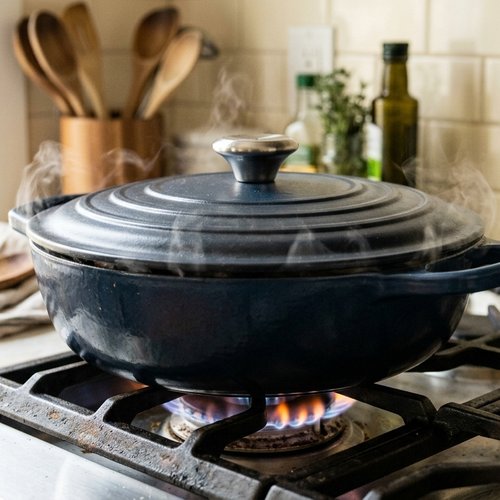
Pour in your lemon juice and chicken broth. Sprinkle the remaining oregano across the top. Turn your heat down to medium and cover the skillet with either a metal lid or tight-fitting foil. If using foil, warn children not to touch it as steam underneath will be extremely hot. Let the chicken braise undisturbed for 5-6 minutes, then carefully flip each breast and cook for another 5-6 minutes. The internal temperature should reach 165°F on a meat thermometer.
Step 6: The Grand Finale
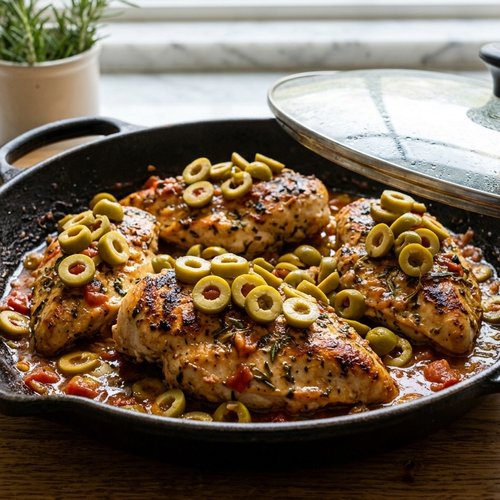
Uncover your skillet and scatter the chopped red onion, diced tomatoes, and sliced green olives across the top of the chicken. Cover again and cook for exactly 3 minutes—this is just enough time to warm everything through without cooking down the tomatoes into mushiness. Kids aged 10+ can actually manage this step with supervision, learning about timing and layering flavors.
Step 7: Finish and Serve
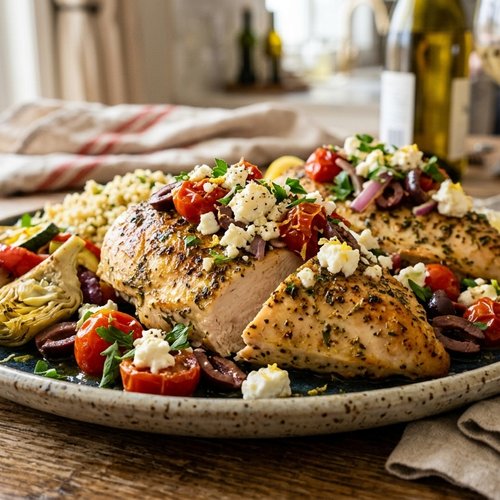
Uncover one final time. Garnish with fresh parsley and crumbled feta cheese. The heat from the chicken will slightly soften the feta without melting it completely, creating this amazing creamy-crumbly texture. Serve immediately family-style, or plate individually in the kitchen. I often plate it on family dinners and let kids carry their own plates to the table—another small way to build ownership.
Customization Station: Let Everyone Build Their Own
Here’s the secret weapon for picky eaters: control. When kids feel like they’re building their own meal rather than being served something unfamiliar, resistance drops dramatically. Set up your “customization station” family-style.
- The protein base – Slice the chicken into smaller pieces so kids can take their portion size. Some kids need small bites to feel brave enough to try something new.
- The toppings buffet – Serve the tomatoes, olives, onion, parsley, and feta in separate small bowls. Let everyone build according to their comfort level. The kid who usually refuses vegetables might try a single tomato piece if they chose it themselves.
- The sauce options – Some kids prefer less sauce (especially if they’re sensitive to “wet” foods). Let them control how much of the braising liquid goes on their plate.
- Sides available – Offer bread for dipping, rice, pasta, or a simple salad so kids can balance their plate exactly how they prefer.
Scaling for Different Family Sizes
One of my favorite things about this recipe is how beautifully it scales. I’ve made it for myself, for dinner parties of twelve, and everything in between.
For 2 people: Use 2 chicken breasts and cut every ingredient in half. The braising time stays the same. This makes an elegant weeknight dinner for partners or roommates.
For a family of 4: Follow the recipe exactly as written. It serves four as a main course with sides, or three if you’re serving hearty portions without additional sides.
For a family of 6 or more: I recommend making this in two batches rather than doubling everything. Two skillets cooking simultaneously means you can have dinner ready in the same 30-minute timeframe. If you must double it, use a wider shallow baking dish instead of a skillet—lay the chicken out in a single layer, pour the braising liquid over everything, cover with foil, and braise in a 375°F oven for 12-14 minutes instead of stovetop cooking. The result is nearly identical, and it frees up your stovetop.
For meal prep or entertaining: You can braise the chicken completely through Step 5, then refrigerate it in the braising liquid for up to 3 days. When ready to serve, gently reheat on the stovetop over medium heat until warmed through, then add your fresh toppings (onion, tomatoes, olives, parsley, feta) for that just-made brightness.
Can I Store Mediterranean Chicken Breast Recipe?
Yes, and I’ve perfected the method through years of packing lunches for my own family and professional clients.
Refrigeration: Store the complete dish in an airtight container for up to 3 days. The chicken stays tender, though the sauce thickens slightly as it sits. Before serving, reheat gently in a skillet over medium heat with a splash of water or broth if needed.
Freezing: This recipe freezes beautifully for up to 2 months, but freeze the chicken separately from the fresh toppings for best results. Freeze the cooked chicken in its braising liquid, then thaw in the refrigerator overnight. Add fresh parsley, tomatoes, and feta after reheating.
Lunchbox strategy: Chop the reheated chicken into smaller pieces and pack it in a compartmentalized container with the sauce in one section, olives and tomatoes in another, and feta and parsley in a third. Keep them separate until lunchtime so textures stay intact. Serve at room temperature or pack with an ice pack to keep cold.
Quick make-ahead hack: Prep all your ingredients the night before—pat chicken dry, mince garlic, chop onion, dice tomatoes, slice olives. Store each in its own container. In the morning, you’re 20 minutes from dinner.
Expert’s Nutritional Tip: Why This Recipe Works for Growing Bodies
As a registered dietitian, I’m particularly passionate about what this dish delivers nutritionally. Chicken breast provides high-quality protein (about 35 grams per breast) without excess saturated fat, which growing children need for muscle development and neurotransmitter production. But here’s what makes this version special: the combination of ingredients creates what we call “nutrient density.”
The green olives provide polyphenols, powerful antioxidants that research increasingly links to brain health and reduced inflammation. Lycopene from the tomatoes supports heart health. The lemon juice contains vitamin C while also enhancing iron absorption from the chicken—a synergy that many recipes miss. The fresh parsley adds lutein, which supports eye development in children. The feta cheese brings probiotics and calcium without the lactose load of larger dairy portions. This isn’t a salad masquerading as chicken. It’s a complete nutritional strategy hiding inside something delicious.
According to USDA nutritional data, one serving of this recipe provides approximately 280 calories, 38g protein, 12g carbohydrates, and 8g fat, with about 5g coming from heart-healthy monounsaturated sources. The sodium content depends on your broth choice—using low-sodium broth keeps it around 650mg per serving, which is appropriate for children.
Make-Ahead Guide: The Registered Dietitian’s Approach to Meal Prep
I structure my meal prep differently than most. Rather than cooking complete meals in advance, I build flexibility into the system so meals taste freshly made even when built from prepared components.
The day before: Make your braising liquid and cook the chicken through Step 5. Store the chicken in its braising liquid in an airtight container. The flavors actually deepen overnight.
Morning of serving: Prep your fresh toppings—chop tomatoes, slice olives, chop onion and parsley. Store in separate containers.
30 minutes before dinner: Reheat the chicken gently in its braising liquid over medium heat. About 3 minutes before serving, add your fresh toppings so they stay bright and crisp.
This approach means you get restaurant-quality brightness and texture while actually reducing your cooking stress on busy nights. The fresh toppings are what transform this from “food I made earlier” into “I just made this for you.”
Common Mistakes to Avoid
After years of cooking and teaching others, I’ve seen the same pitfalls derail otherwise perfect recipes. Let me save you from these.
Mistake 1: Skipping the chicken-drying step. I know it seems unnecessary, but wet chicken steams rather than sears. You’ll miss that gorgeous golden crust that makes this dish feel special. Pat dry every single time.
Mistake 2: Using cheap wine in the braising liquid. If you wouldn’t drink it, your chicken will taste off. Wine concentrates as it reduces, so poor quality becomes more obvious, not less. Spend the extra three dollars for a drinkable white.
Mistake 3: Cooking the chicken all the way through in Step 3. So many home cooks skip the braising step entirely and just sear the chicken. That’s fine, but you’re missing the magic—the braising liquid infuses the meat with flavor while keeping it impossibly tender. Don’t rush this step.
Mistake 4: Mixing the toppings in too early. Wait until the last moment to add tomatoes, olives, and parsley. Their texture and brightness are what make this feel fresh and exciting. If they sit in the hot pan too long, they become soft and the parsley loses its vibrant color.
Seasonal Variations: Keep It Fresh All Year
This recipe is wonderfully adaptable to what’s actually available and good to eat. As a dietitian, I’m passionate about seasonal eating because it naturally varies our nutrient intake and supports local agriculture.
Spring: Replace the red onion with sliced scallions added at the very end. Use fresh peas stirred in during the last minute of cooking. If you can find fresh herbs like dill or tarragon, swap half the parsley for those.
Summer: This is the formula as written—tomatoes and onions are at their absolute best. Add fresh basil in place of some parsley. Consider adding diced zucchini or yellow squash in the last 3 minutes of cooking for extra vegetables.
Fall: Use roasted red peppers from a jar (drained well) in place of some tomatoes. Add caramelized fennel for a subtle licorice note. Swap some of the chicken broth for apple cider to play with slightly different flavor notes.
Winter: Stick with canned San Marzano tomatoes—they’re often better than fresh winter tomatoes. Add sun-dried tomatoes for concentrated flavor. Consider substituting some of the fresh parsley with fresh rosemary, adding it to the braising liquid rather than at the end.
What to Serve Alongside for a Complete Family Meal
The braising liquid is too delicious to waste, so always serve this with something to soak it up. Here’s what I’ve found works beautifully with families.
- Crusty bread or focaccia – Kids love having something to dip into the sauce. This makes the meal feel less formal and more like a family activity. Tear off pieces rather than cutting slices; it feels more interactive.
- Simple rice pilaf – Orzo pasta with a touch of butter and parmesan absorbs the sauce beautifully. It’s also extremely kid-friendly because kids understand pasta in a way they sometimes don’t with other starches.
- Roasted potatoes – Baby potatoes or fingerlings roasted with olive oil and rosemary provide heartiness and another vegetable serving without feeling “healthy” to skeptical eaters.
- Fresh green salad – A simple salad with a lemon vinaigrette actually complements this dish rather than competing with it. Use a my favorite salad if you want to sneak in extra vegetables in a format kids might actually eat.
- Sautéed green beans – Tossed with garlic and a squeeze of fresh lemon, they’re almost a natural extension of this dish without being redundant.
My recommendation: start with bread and let the braising liquid do its job. Add a starch if your family prefers heartier meals. Keep the vegetable component light since the chicken dish is already providing vegetables.

Mediterranean Chicken Breast Recipe
Ingredients
Method
- Pat your chicken breasts completely dry using paper towels. Moisture is the enemy of golden searing, so don't skip this step even though it feels unnecessary. Using a sharp knife, make three shallow slits (about 1/4 inch deep) on each side of each breast. Keep children at least two feet away from knife work and remind them that sharp knives are serious tools. These slits create little pockets where your garlic will nestle in, infusing flavor throughout the protein as it cooks.
- Take your minced garlic and gently rub it all over both sides of each chicken breast, working some into those slits you just created. Then season generously with kosher salt and freshly cracked black pepper. Sprinkle half your dried oregano evenly across both sides. This is where kids aged 6+ can take over—let them season and rub. They're learning that seasoning isn't something that happens at the end; it's foundational.
- Heat your extra virgin olive oil in a large cast iron skillet (I prefer cast iron for heat retention and the gorgeous color it creates) over medium-high heat. When the oil shimmers—this usually takes 2-3 minutes—you're ready. Carefully place the seasoned chicken in the hot pan. Keep children clear of the skillet, as oil can splatter. Sear for 3-4 minutes per side until golden brown. You're not cooking the chicken through yet; you're just building that flavorful crust that makes everyone's mouth water.
- Once both sides are golden, immediately pour in your dry white wine. Let it bubble and reduce by half—this usually takes 2-3 minutes. This step removes the raw wine taste and concentrates the flavor. Kids can watch this happen; it's fascinating to see the liquid shrink down. Point out how the bubbles are doing the work, teaching them about what reduction actually means.
- Pour in your lemon juice and chicken broth. Sprinkle the remaining oregano across the top. Turn your heat down to medium and cover the skillet with either a metal lid or tight-fitting foil. If using foil, warn children not to touch it as steam underneath will be extremely hot. Let the chicken braise undisturbed for 5-6 minutes, then carefully flip each breast and cook for another 5-6 minutes. The internal temperature should reach 165°F on a meat thermometer.
- Uncover your skillet and scatter the chopped red onion, diced tomatoes, and sliced green olives across the top of the chicken. Cover again and cook for exactly 3 minutes—this is just enough time to warm everything through without cooking down the tomatoes into mushiness. Kids aged 10+ can actually manage this step with supervision, learning about timing and layering flavors.
- Uncover one final time. Garnish with fresh parsley and crumbled feta cheese. The heat from the chicken will slightly soften the feta without melting it completely, creating this amazing creamy-crumbly texture. Serve immediately family-style, or plate individually in the kitchen. I often plate it on family dinners and let kids carry their own plates to the table—another small way to build ownership.
FAQs
Can I make this with chicken thighs instead of breasts?
Absolutely, and honestly, thighs are more forgiving if you’re worried about dryness. Use bone-in, skin-on thighs and increase the braising time to 8-10 minutes per side. They’ll be incredibly flavorful, though your plating will look slightly different. Some kids actually prefer the visual of thighs because they look less “plain” than breasts. This is a completely valid substitution, and many culinary professionals would argue thighs are actually superior for this preparation.
What if my family hates olives?
Skip them entirely or replace with diced roasted red peppers, artichoke hearts, or capers for a similar briny element without the texture some kids find off-putting. The sauce and chicken are the stars; the olives are just a supporting cast. You won’t lose the integrity of the dish without them. Many Mediterranean dishes are flexible about these components—that’s part of their genius.
Can I do this in the oven instead of on the stovetop?
Yes! After searing in Step 3, transfer everything to a baking dish, cover with foil, and braise at 375°F for 12-14 minutes instead of the stovetop braising. This actually frees up your stovetop if you’re cooking sides. The result is nearly identical, though you miss the tiny bit of additional browning from flipping. This method is often easier when cooking for crowds.
How do I prevent the chicken from being dry?
Three strategies: First, don’t skip the braising step—that’s where moisture comes from. Second, use a meat thermometer and pull the chicken at exactly 165°F rather than guessing (cooking to 170°F or higher is where dryness really starts). Third, let the cooked chicken rest in its braising liquid for at least 5 minutes before serving. The liquid redistributes throughout the meat as it cools slightly.
Is this recipe actually Mediterranean, or is it just chicken with olives?
It’s legitimately Mediterranean—this preparation style is common across Greece, Italy, Spain, and southern France. The combination of lemon, garlic, tomatoes, olives, herbs, and seafood or protein is the backbone of Mediterranean cooking. However, Mediterranean cuisine is regional and diverse. This particular version draws from Greek and Italian influences. If you explore the broader Mediterranean cuisine, you’ll find infinite variations on this theme, which is part of why it’s so satisfying—it feels authentic without being rigidly traditional.
More Family-Friendly Recipes
- this cozy soup – When you have leftover braised chicken, transform it into this warming, kid-approved soup that’s perfect for lunch boxes.
- How To Make Amazing Whipped Feta – Learn how to make a creamy feta spread that pairs beautifully with bread alongside this chicken.
- Air Fryer Stuffed Chicken Recipe – When you want Mediterranean flavors with even less hands-on time using air-frying technique.
You know what I’ve learned through years of family dinners and working with clients across Fairfield? The magic of a great recipe isn’t about complexity. It’s about creating moments where people feel cared for through food. This Mediterranean Chicken Breast recipe does exactly that. It looks impressive enough to serve guests, tastes restaurant-quality, comes together in 30 minutes, and somehow gets even picky eaters genuinely excited about dinner.
The real victory isn’t just the meal on the table—it’s the conversation that happens around it. It’s watching your kid venture into a green olive for the first time and discover they actually like it. It’s the memory of cooking together, the confidence they build helping in the kitchen, the food memories you’re building as a family unit. These are the moments that matter.
I hope this recipe becomes a regular rotation in your kitchen. I hope you make it on nights when you’re exhausted and need something that feels effortless. I hope you make it when you want to impress someone. Most of all, I hope it becomes one of those meals your family requests, one they remember years later as part of your family’s food story.
Join me on this cooking journey!
